Preparing to deploy
- Connect to a deployed instance. For more information, see Red Hat Satellite Service.
- Review patterns that require licenses. For more information, see Licenses for patterns.
- Store test data and performance results. For more information, see Project results database.
- Separate storage of test artifacts from the pattern workload. For more information, see Adding block storage to a pattern.
Licenses for patterns
Licenses for Rational Integration Tester
You can either buy floating licenses or token licenses. For more information, see License descriptions.
Licenses for Rational Test Virtualization Server or Rational Performance Test Server
You can either buy Processor Value Unit (PVU) printed licenses or token licenses. For information about Processor value unit (PVU) licensing and token licensing, see License descriptions.
- Processor value unit (PVU) licensing
- In PVU licensing mode, you receive printed versions of the licenses. When you deploy IBM Rational Test Virtualization Server Pattern, or IBM Rational Performance Test Server, you select RTVS (PVU Mode) or RPTS (PVU Mode) for the Agent Mode field.
- You can track license usage with the workload console. For more information, see Tracking license usage.
- Agent mode licensing
- In Agent mode licensing, you can use token licenses or floating licenses. Agent mode licensing requires that a Rational License Key Server is deployed in the cloud with valid licenses in order for the Rational Integration Tester Agent to operate. Additionally, the Agent must be configured with the details of the license server so that the Agent is able to communicate with the license server at runtime. You complete this setup when you deploy IBM Rational License Key Server Pattern and its shared service. For more information, see Deploying IBM Rational License Key Server Pattern.
- When you deploy IBM Rational Test Virtualization Server Pattern, or IBM Rational Performance Test Server, you select RTVS (Agent Mode) or RPTS (Agent Mode) for the Agent Mode field. For more information, see Deploying IBM Rational Test Virtualization Server Pattern or Deploying IBM Rational Performance Test Server Pattern.
- Important: If you select agent mode licensing, you must disable PVU license tracking. For more information, see Disabling PVU license tracking.
Project results database
Several supported databases can be configured and used as a project results database that is external to the appliance. For more information about setting up an external project results database, see Configuring the project results database for Rational Integration Tester.
The Default DB2® OLTP Pattern for Linux is available on the appliance and is the only database pattern that can be cloned and used as a project results database that is internal to the appliance. For more information about setting up an internal project results database, see Creating a project results database from a DB2 default pattern.
Database connection
- If you are using a database that is internal to the appliance, see Finding information about the database connection.
- If you are using a database that is external to the appliance, ask the database administrator for those connection details.
When you deploy IBM Rational Integration Tester Pattern, you provide the connection details for the projects results database. If you decide not to provide the connection details when you deploy the pattern, you can do so later by using the project settings in Rational Integration Tester. For more information about connecting to the deployed Rational Integration Tester instance see, Connecting from a VNC client.
When you deploy IBM Rational Test Control Panel Pattern, you cannot provide the connection details for the projects results database. You can do so later by adding connection details and entering that information in Rational Test Control Panel. For more information about adding database connections details, see Adding database connection details.
Creating a project results database from a DB2 default pattern
Before you begin
To clone a pattern on the appliance, you must be assigned the Create new catalog content role or the Workload resources administration role with full permissions. For more information about user roles, see Managing system users.
About this task
Procedure
- Configure the cloned pattern by adding the Configure
DB2 Results Database for RIT script package.
- Click the cloned pattern. The pattern details are displayed.
- Open the Pattern Builder. Click the Open icon on the toolbar.
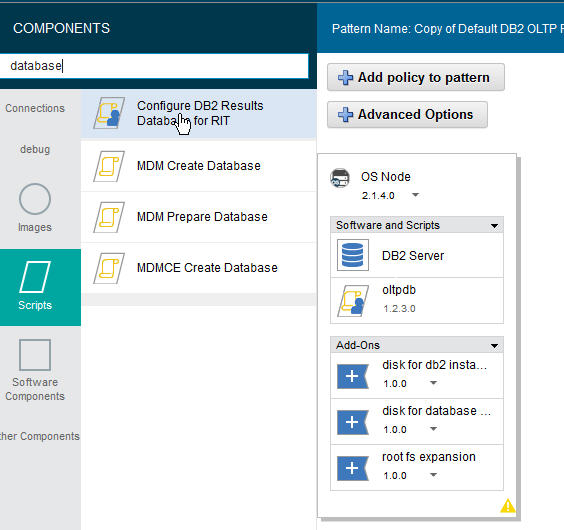
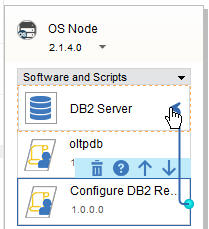
- Expand Scripts and drag the Configure
DB2 Results Database for RIT script into the OS Node box
on the canvas.
- Edit the connections between the script package and
the other components.
- Add a link between the script package and oltpdb.
Move the cursor over Configure DB2 Results Database for
RIT until the blue circle turns orange.
Helper text describes the asset that is associated with the link. Select the circle, drag a connection to the oltpdb asset until the asset is highlighted, and then release.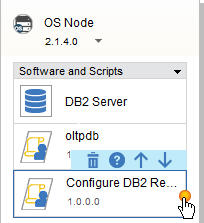
- When you create a link between two assets, you can see that each
property of one asset is mapped to each property of the asset to which
it is linked.
Click OK to confirm the connection and the data dependencies.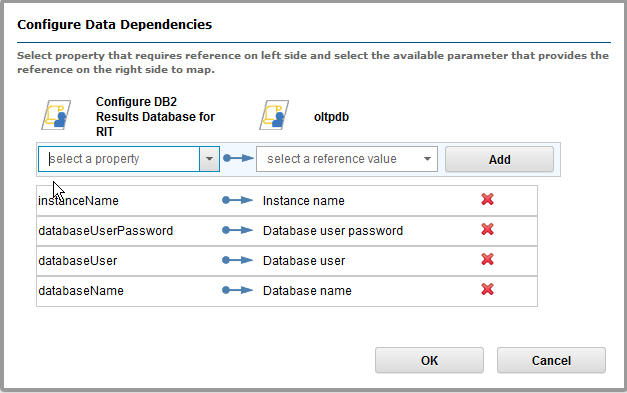
- Add another link between the script package and DB2
Server. Move the cursor over Configure DB2
Results Database for RIT until the blue circle turns orange.
Select the circle, drag a connection to the DB2 Server asset
until the asset is highlighted, and then release.
- When you create a link between two assets, you can see that each
property of one asset is mapped to each property of the asset to which
it is linked.
Click OK to confirm the connection and the data dependencies.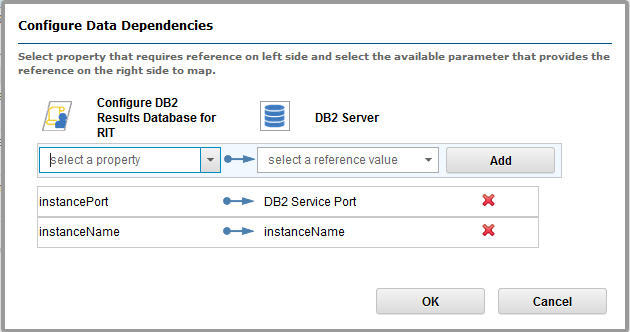
- Add a link between the script package and oltpdb.
Move the cursor over Configure DB2 Results Database for
RIT until the blue circle turns orange.
- To save the changes to the pattern, click Save.
- Close the Pattern Builder.
Results
What to do next
Finding information about the database connection
About this task
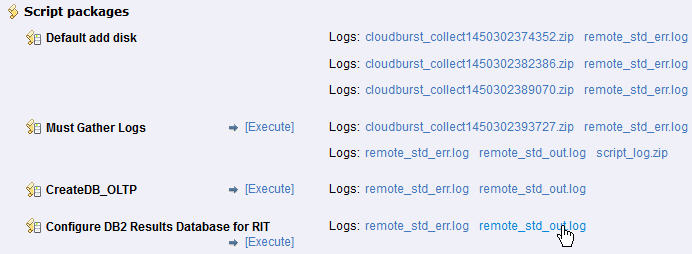
Find the remote_std_out.log file for the script package Configure DB2 Results Database for RIT.
Procedure
- Go to the Script Packages section
and find Configure DB2 Results Database for RIT.
What to do next
Adding block storage to a pattern
Before you begin
To add an add-on on the appliance, you must be assigned the Create new catalog content role or the Workload resources administration role with full permissions. For more information about user roles, see Managing system users.
About this task
Procedure
- Click Add a component add-on icon
on the top of the OS Node box on the canvas. Click the Default
attach block disk add-on from the list.
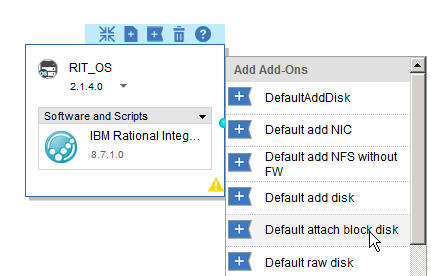
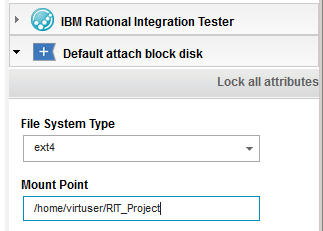
When the block storage add-on is added to the pattern in the Pattern Builder, you enter the value for mount point and file system type. The rest of the add-on values are entered during the distribution stage of deployment, because they depend on the placement location of the workload.
- Click the Default attach block disk box
on the canvas. In the right pane, set the FILESYSTEM_TYPE to ext4.
Set the MOUNT-POINT field to the workspace
path (for example, /var/IBM/RTCP or home/virtuser/RIT_Project).