Procedure: Selecting transactions for a profile
After creating a new profile, or when editing an existing profile, you can select predefined transactions to associate with the profile, by using the following procedure.
- Access the Profiles view.
- Click
 and select the desired profile.
 - In the configuration window, click the Transactions tab.
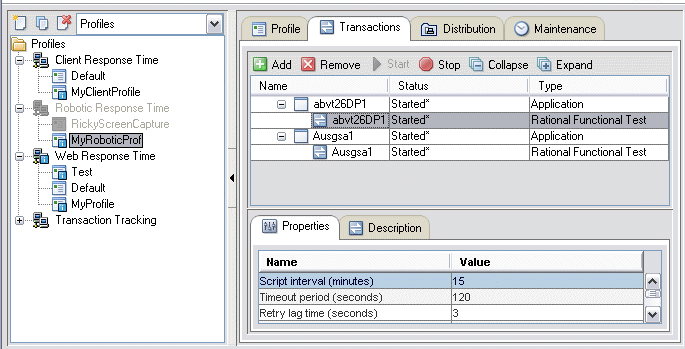
The top portion of the window displays the transactions or robotic scripts that are already associated with this profile, similar to the following example. For a new profile, this portion of the Transactions tab is initially empty.
- To include transactions in the profile, use the following procedure:
- Click Add. Note that if there are no additional transactions to be included in the profile, this option is not available. This option becomes available after you create more transactions or remove one or more transactions from the profile.
- The Transaction Selection window is displayed, similar to the
following example, showing all of the existing applications and transactions
that are available to include in the profile.
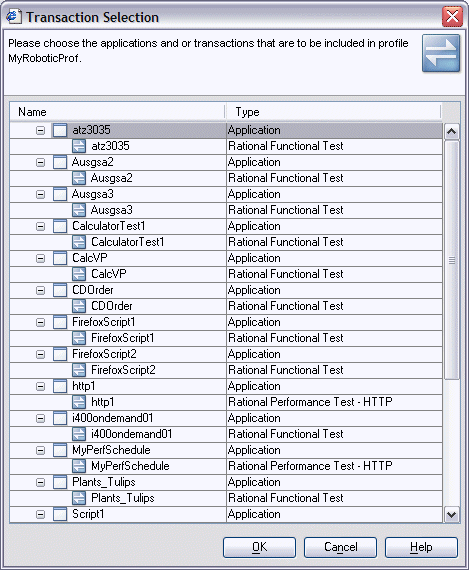
- The node tree is collapsed by default to show only applications. You can manually expand the application nodes to display the transactions. Select one or more applications and transactions to include in the profile. Use the Shift or Ctrl keys to highlight more than one selection if needed, or click and drag the mouse to highlight all the transactions you want to include.
- Click OK. The selected applications and transactions are added to the table in the Transactions tab.
- When you select a transaction in the upper portion of the Transactions
tab, the Properties tab displays the associated properties.
- For Robotic Response Time and Transaction Tracking profiles:
You can modify the values for each property by double-clicking a row in the Value column and typing in the new value.
To define a single set of properties for multiple (or all) transactions, click and drag the mouse to highlight the transactions for which you want to define properties. When you select more than one transaction, the values in the Properties tab are blank. Enter the values for the selected properties that you want to change. Any properties that you do not change retain their default values, or the values that were previously specified for those properties.
See Property value descriptions for a complete list and description of the properties for each agent type.
See Procedure: Configuring for robotic screen capture for additional information about configuring the Enable screen content capture property.
- For Web Response Time profiles:
The values in the Properties tab cannot be modified. You must edit the transaction itself to change those values. (See Using filters and Defining reporting rules.
- For Robotic Response Time and Transaction Tracking profiles:
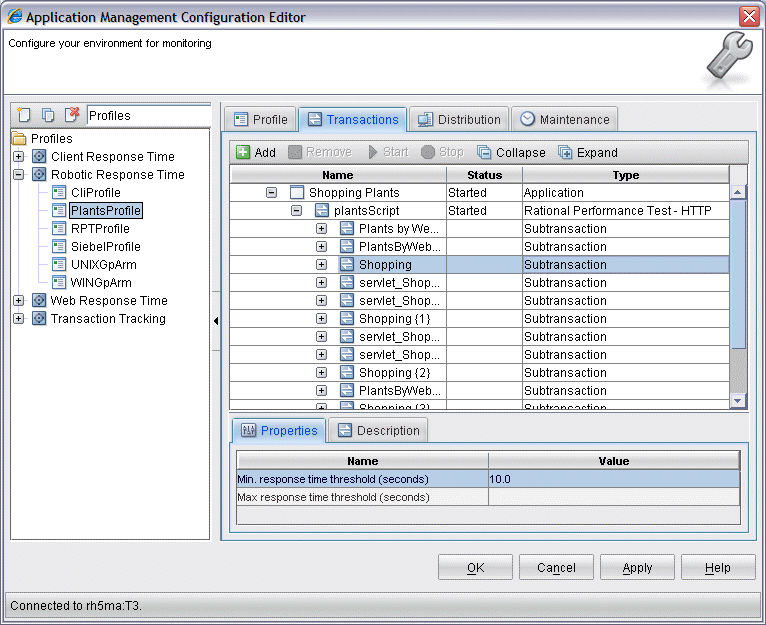
- After the transaction is added to the profile, you can expand
the node tree to display any subtransactions. You can then select
subtransactions and then click the Properties tab and configure minimum
and maximum response time thresholds for subtransactions.
- Click Apply to save your changes and continue using the Application Management Configuration Editor. Be sure to remember to select the agents or managed system lists that you want to associate with the profile, or there will be no data collection because the profile will not be run.
- When you are finished, click OK to close the Application Management Configuration Editor.
- You can remove transactions from the profile by highlighting one or more transactions in the table and clicking Remove.
- The Status column in the table indicates whether monitoring for the application is started or stopped. Use Start and Stop to control this status for each application in the profile.
- Use the Collapse and Expand functions to hide or display the transactions under each application in the table.