Creating clients
Define clients so that you can see reports about how groups of end users experience availability and performance.
Before you begin
Keep
the following points in mind:
- The Application Management Configuration Editor ships with one default client group named All Clients that uses the IP filter value *.
- Each client name must be unique.
- Names can consist of any string of alphanumeric characters.
- Client definitions are stored in a file called clients.xml in the CANDLE_HOME/kt1depot/T3/clients directory.
Important: If you define a client pattern that does
not match anything in your environment or does not match anything
for scripts running on a particular computer, data from that computer
is not reported because nothing matches the client pattern. This is
true even when there are valid transactions running on that computer.
Note: ARM Transaction Tracking transaction
types require a client definition to match for the transaction to
be reported. Client definitions are ignored for non-ARM Transaction Tracking transaction
types. These are:
- ITCAM for Application Diagnostics
- CICS®
- CICS Transaction Gateway
- Other
- DB2® through CICS or IMS
- Optim™ (DB2)
- IMS™
- IMS Connect
- .NET
- Tuxedo
- WebSphere Message Broker
- WebSphere MQ
Procedure
- Access the Applications view, if you have not already done so (see Procedure: Accessing the Applications view).
- Click
 and select Clients.
 - Do one of the following:
- To create a new client group, right-click Clients and select Create New Client Group.
- To create a new client group based on an existing group, right click an existing client group and select Create Another Client Group.
The Create Client Group window is displayed, similar to the following example:
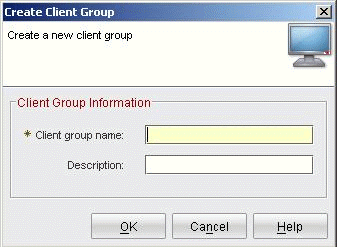
- Type a unique name for the client group in the Client Group Name field.
- (Optional) Type a description for the client group in the Description field.
- Click OK.
- Click the Filter tab to configure filters for this client.
The software includes a set of predefined filters (IP and Hostname) in a drop down list to specify clients in terms of multiple host names and IP addresses that you want the matching pattern to include or exclude. This field is completely editable so you can filter on properties other than host name and IP for the client. For example, if you have a specific transaction filter that you also want to use to configure clients, then you can manually enter any other valid filter. See Using filters for more information about using this tab.
- Click the Reporting tab to define how you want to name
the collected data that is displayed in workspaces. The software provides
a set of common variables for sorting the reports. The default reporting
value for a newly created client group is the name of the client group
that was entered by the user. See Defining reporting rules for more information
about using this tab.Tip: You can change these settings when you set up the profile.
- Click Apply to distribute this client list to all agents.
Follow-up or related tasks
Use
the following procedure to edit an existing client group:
- Access the list of client groups.
- Highlight the client group you want to edit.
- Edit the client parameters as needed.
- Click Apply to save your changes.
Use the following procedure to delete a client group that
is no longer useful:
- Access the list of client groups.
- Highlight the client group you want to delete.
- Right-click the client group and select Delete Client Group.
- Click Yes to confirm the operation.