To view the custom panels Taskmaster DotEdit, you need to create
two batches and start the Verify task.
- If necessary, start Taskmaster Server.
- Start the Taskmaster Web
client, select the Survey application, and
log in with the Admin account.
- Run the VScan task and generate
two batches.
- Open the Taskmaster Web
client Job Monitor window and confirm that there
are two batches ready for verification.
- Start Taskmaster DotEdit.
- In the Application field, enter Survey.
- Enter the Admin login credentials
and then click Login.
- In the Shortcut field, select Verify and
click Start.
- Click OK to run the next pending
batch and use the modified custom panel.
Tip: If Taskmaster DotEdit displays a table that
includes a batch with a Status of hold,
double-click the task row to start the Verify task.
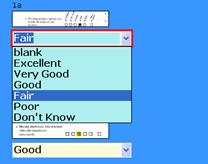
- Open the combination box drop-down menu for field 1a to
see the options that are defined in the dictionary that is associated
with this field. This field is explained in Overview of the combination box OMR field.
- Click Survey_Page2 in the Batch
View pane on the right.
- Scroll through the field 8 listbox to see the options that
are defined in the dictionary that is associated with this field.
This field is explained under Examining
the listbox OMR field.