The blabber sample application is a microblogging application, used to enable many
different people to share brief comments. This sample application shows how to write and package
bundles into an enterprise bundle archive (EBA) file. The sample includes example code for Blueprint
management, bean injection, using and publishing services from and to the OSGi service registry, and
the use of Java™ persistence.
Before you begin
The sample application requires that the supplied
com.ibm.samples.websphere.osgi.logging.api.jar and
com.ibm.samples.websphere.osgi.logging.impl.jar bundles are installed into the
internal bundle repository. The following procedure describes how to do this. These two JAR files,
and the blabber sample EBA file, are provided in the installableApps directory
of the OSGi_blabberSample.zip compressed archive file.
About this task
The blabber sample application consists of two bundles, divided into the following functional areas:
com.ibm.samples.websphere.osgi.blabber.persistence, which contains code
relating to the Java Persistence API (JPA) layer, and also
contains the interface that is used by the main application code.com.ibm.samples.websphere.osgi.blabber, which contains the main application
logic code, and interacts between the web front end and the back end persistence code layer.
You can use scripts to completely install the sample application, or you can use scripts to
complete the initial configuration of the application then use the administrative console to install
the application into the application server. You can also use, modify and remove the sample.
Procedure
Configure and install the blabber sample.
You can either configure and install the
sample using scripts (the first optional step in the instructions that follow), or you can configure
the sample using scripts then install the sample using the administrative console (the second
optional step in the instructions that follow).
The scripts that you use to do this are
provided in the scripts directory of the
OSGi_blabberSample.zip compressed archive file. The
createblabberDb.sql script contains the necessary configuration commands to create
the required Derby database and associated tables. The blabberSampleInstall.py
script contains the required jython to create data sources, and to install the blabber sample with
default configuration. You should fully qualify the path to the script if you do not run it from the
directory that contains the script.
Note: If you have data sources already defined in your
environment, and these data sources have the same name as the data sources that are specified in the
blabberSampleInstall.py script, then the sample might not install and run
successfully.
In the following steps you must substitute your own values for the variables
app_server_root, profileName, serverName,
nodeName, blabberSample.eba_Location,
com.ibm.samples.websphere.osgi.logging.api.jar_Location,
com.ibm.samples.websphere.osgi.logging.impl.jar_Location,
uncompressed_sample_directory, and path_to_ant.
- Optional:
Configure and install the sample using scripts.
-
Create and configure the
BLABBERDB
Derby database and associated tables by running the
following command.
On UNIX
platforms:
app_server_root/derby/bin/embedded/ij.sh scripts/createBlabberDb.sql
On Windows
platforms:
app_server_root\derby\bin\embedded\ij.bat scripts\createBlabberDb.sql
-
Create the data sources, create the business-level application and import the .eba file as an
asset by running the following command.
Note: The target application server must be running before you use this script.
On UNIX
platforms:
app_server_root/profiles/profileName/bin/wsadmin.sh
     -f scripts/blabberSampleInstall.py fullInstall serverName nodeName
     blabberSample.eba_Location
     com.ibm.samples.websphere.osgi.logging.api.jar_Location
     com.ibm.samples.websphere.osgi.logging.impl.jar_Location
On Windows
platforms:
app_server_root\profiles\profileName\bin\wsadmin.bat
     -f scripts\blabberSampleInstall.py fullInstall serverName nodeName
     blabberSample.eba_Location
     com.ibm.samples.websphere.osgi.logging.api.jar_Location
     com.ibm.samples.websphere.osgi.logging.impl.jar_Location
- Optional:
Configure the sample using scripts, then install the sample using the administrative
console.
-
Create and configure the
"BLABBERDB"
Derby database and associated tables by running
the following command.
On UNIX
platforms:
app_server_root/derby/bin/embedded/ij.sh scripts/createBlabberDb.sql
On Windows
platforms:
app_server_root\derby\bin\embedded\ij.bat scripts\createBlabberDb.sql
-
Create the data sources by running the following command.
On UNIX
platforms:
app_server_root/profiles/profileName/bin/wsadmin.sh
     -f scripts/blabberSampleInstall.py setupOnly serverName nodeName
On Windows
platforms:
app_server_root\profiles\profileName\bin\wsadmin.bat
     -f scripts\blabberSampleInstall.py setupOnly serverName nodeName
-
Use the administrative console to add the
com.ibm.samples.websphere.osgi.logging.api.jar file to the internal bundle
repository.
- Navigate to
- Click New.
- Select the file system that hosts the
com.ibm.samples.websphere.osgi.logging.api.jar file, then click
Browse.
- Browse to the uncompressed_sample_dir/installableApps
directory.
- Select the com.ibm.samples.websphere.osgi.logging.api.jar file, then click
OK.
- Click OK.
- Click Save.
-
Repeat the previous step to add the
com.ibm.samples.websphere.osgi.logging.impl.jar file to the internal bundle
repository.
-
Use the administrative console to import the application (EBA file) as an asset, and to
configure the business-level application.
- Import the asset.
- Navigate to .
- On the Upload asset panel, browse to the
uncompressed_sample_dir/installableApps directory.
- Select the com.ibm.samples.websphere.osgi.blabber.app.eba file, then click
Next.
- On the Select options for importing an asset panel, click Next.
- On the Summary panel, click Finish.
- Click Save.
- Create the business-level application and add the asset.
- Navigate to .
- On the New Application panel, enter a name for the business-level application. For example,
blabber
.
- Click Apply.
- In the Deployed assets pane, click .
- Select the com.ibm.samples.websphere.osgi.blabber.app.eba asset, then click
Continue.
- On the Set options panel, click Next.
- Select a target for the composition unit, then click Next.
- Modify the context root if required, then click Next.
- Modify the virtual host if required, then click Next.
- On the Summary panel, click Finish.
- Click Save.
-
Start the application.
- Select the newly-created business-level application.
- Click Start.
Use the blabber sample.
-
Use your browser to navigate to http://server:port/context_root/ (by
default http://localhost:9080/blabber/).
The main blabber screen is displayed.
-
Register yourself as a user.
You need to do this before you can create blabber entries.
-
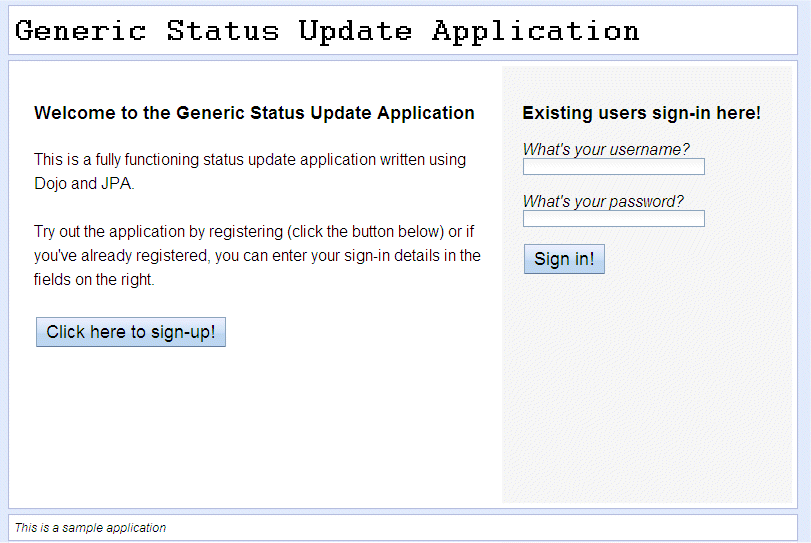
Click Click here to sign-up!.
-
Complete the form.
-
Click Create my account!.
The status update home page is displayed.
-
Explore the blabber application.
From the status update home page, you can select any of the following options:
- Set a status message.
- Search for and track other users.
- View your profile.
- Sign out.
Within each of the previous options, there is an option to return to the status update home
page.
Note:
- When you enter some status then click Update, your status message is
displayed on the current page.
- You can only view or use the tracking option if the application has more than one user.
Modify the blabber sample.
All the source code for this application is provided in
sub-directories the uncompressed_sample_dir directory. Each part of the project
has its own ant build.xml script. To build the whole application into a
newly-available EBA file, you use the ant build.xml file located in the
uncompressed_sample_dir directory. WebSphere® Application Server ships a version of ant in its bin directory
called ws_ant. To build the sample, you also need several JAR files on the ant
classpath. To simplify matters, you can edit the was.root property in the
supplied build.properties file to point to these JAR files.
-
Put the following jar files on the ant classpath:
- javax.j2ee.persistence.jar
- javax.j2ee.jsp.jar
- javax.j2ee.servlet.jar
- com.ibm.ws.prereq.jaxrs.jar
These JAR files are available in the
plugins directory of Websphere
Application Server. Edit the
was.root property in the supplied
uncompressed_sample_dir/scripts/build.properties file, and
point it to your
app_server_root
directory. If you have copied the jars to another location, modify the
was.root property to point to this location.
-
Run the following ant command from the
uncompressed_sample_dir directory:
path_to_ant -propertyfile scripts/build.properties -buildfile build.xml
The newly-built binary file (EBA file) is in the
uncompressed_sample_dir/output directory.
Note: This is the
only location to which this EBA file is written. The script does not overwrite the original binary
file located in the uncompressed_sample_dir/installableApps
directory.
Remove the blabber sample.
To remove the blabber sample, you complete the following 3 steps:
- Remove the application configuration and the data sources, either by using a script (the first
optional step in the instructions that follow), or by using the administrative console (the second
optional step in the instructions that follow).
- Remove the shared logging bundles from the internal bundle repository.
- Remove the database.
Note: Only remove the bundles if you have no other applications installed that use them. Both
the blabber and blog sample applications use the shared logging bundles, so if both applications are
installed these bundles should not be removed.
The uninstall script is provided in the
scripts directory of the OSGi_blabberSample.zip compressed
archive file. The blabberSampleUninstall.py script contains the required jython to
remove data sources and to remove the installation of the blabber sample with default configuration.
You should fully qualify the path to the script if you do not run it from the directory that
contains the script.
In the following steps you must substitute your own values for the
variables app_server_root, and profileName.
- Optional:
Remove the application configuration and the data sources by running the following
command.
Note: The target application server must be running before you use this script.
On UNIX
platforms:
app_server_root/profiles/profileName/bin/wsadmin.sh
          -f scripts/blabberSampleUninstall.py
On Windows
platforms:
app_server_root\profiles\profileName\bin\wsadmin.bat
          -f scripts\blabberSampleUninstall.py
- Optional:
Remove the application configuration and the data sources by using the administrative
console.
-
Remove the application configuration.
- Navigate to .
- Select the business-level application representing the blabber sample application, then click
Stop.
- Click the business-level application representing the blabber sample application to view the
configuration details.
- Select all the deployed assets, then click Delete.
- Click OK to confirm removal.
- Click Save.
- Select the business-level application representing the blabber sample application, then click
Delete.
- Navigate to .
- Select the com.ibm.samples.websphere.osgi.blabber.app.eba asset, then click
Delete.
- Click OK to confirm removal.
- Click Save.
-
Remove the data sources.
- Navigate to
.
- Select the two data sources configured for the blabber application.
- Click Delete.
- Click Save.
-
Remove the shared logging bundles from the internal bundle repository by using the
administrative console.
-
Navigate to .
-
Select the following bundles:
- com.ibm.samples.websphere.osgi.logging.api.jar
- com.ibm.samples.websphere.osgi.logging.impl.jar
-
Click Delete.
-
Click Save.
-
Remove the database.
On UNIX platforms, open a command prompt, then enter the
following
command:
cd app_server_root/derby
rm -fr BLABBERDB
On Windows platforms, delete the
app_server_root\derby\BLABBERDB directory.
Results
The following illustration shows the correctly running sample: