Installing the product
There are two main paths to install InfoSphere® MDM: custom or stand-alone with IBM® DB2®. The instructions for each deployment style are the same for all InfoSphere MDM editions.
Before you begin
- You have reviewed the known problems for InfoSphere MDM.
- Your environment meets the hardware and software requirements for components you plan to install.
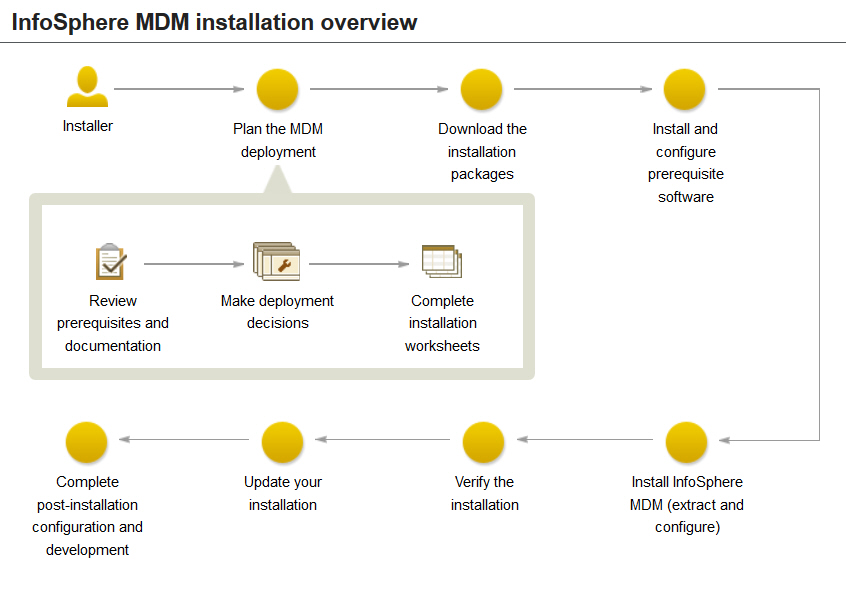
- You have completed the installation worksheets.
- You have access to the InfoSphere MDM offering.
- You have completed the preparation steps.
About this task
- Extracting InfoSphere MDM assets onto the file system and preparing the madconfig configuration tool. This step is performed by IBM Installation Manager.
- Configuring InfoSphere MDM by
running the installation configuration command line tool (
madconfig
Configure_MasterDataManagement
).
Procedure
If you plan to install using the custom deployment style:
- Add the necessary repositories to IBM Installation Manager.
- Extract your application and components using the Installation Manager wizard panels.
- Configure your installation using the installation configuration
command line tool (
madconfig Configure_MasterDataManagement).
If you plan to install using a stand-alone with DB2 deployment style:
- Determine whether you are installing a stand-alone server or stand-alone workstation.
- Follow the procedure specific to your deployment type.
What to do next
A success message on the final installer panel indicates that the verification tests were automatically run as part of the installation process. You can also view the log files to verify a successful installation. If the installation is not successful, view the log files and use the information in the troubleshooting topics to assist you.
After installation, if you want to add or remove a feature (for example, add an application or another language translation), or modify any of your configuration settings, you can run IBM Installation Manager again and select Modify.