Configuring WebSphere Application Server
Use the WebSphere Application Server Integrated Solutions
Console (the admin console
) to install and configure the CICS
ECI resource adapter (cicseci.rar ).
- Install the ECI resource adapter
- Create a connection factory
- Configure a connection factory
Step 1. Install the ECI resource adapter
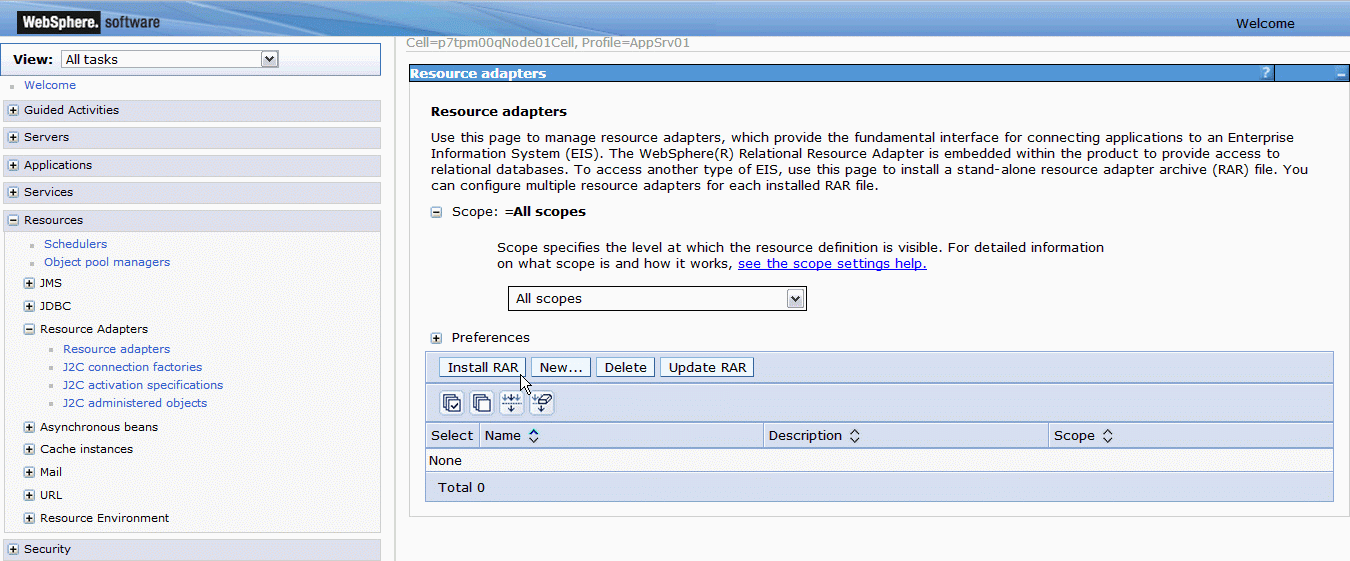
Start the admin console and select Resource Adapters from the Resources > Resource Adapters section of the navigation menu. Click Install RAR shown in Figure 1.
From the Install RAR file dialog shown in Figure 2, click Browse for the Local file system. Select the CICS ECI resource adapter cicseci.rar. Take note of the scope; this choice limits the scope of later connection factory definitions. In this scenario, the scope is Node.
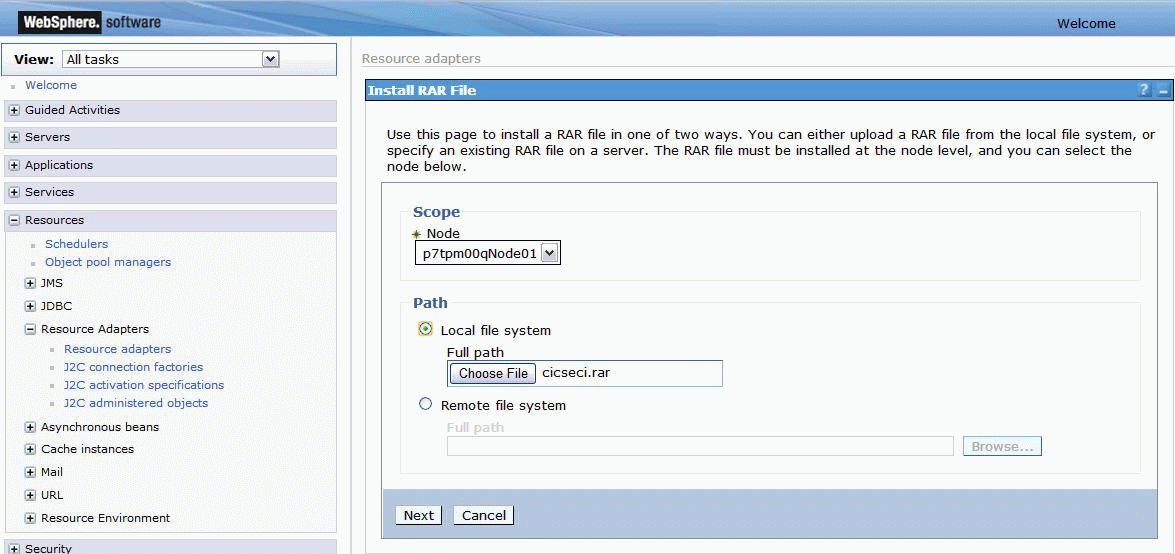
Click Next. The resource adapter General Properties dialog shown in Figure 3 contains a predefined name and description for the CICS ECI resource adapter.
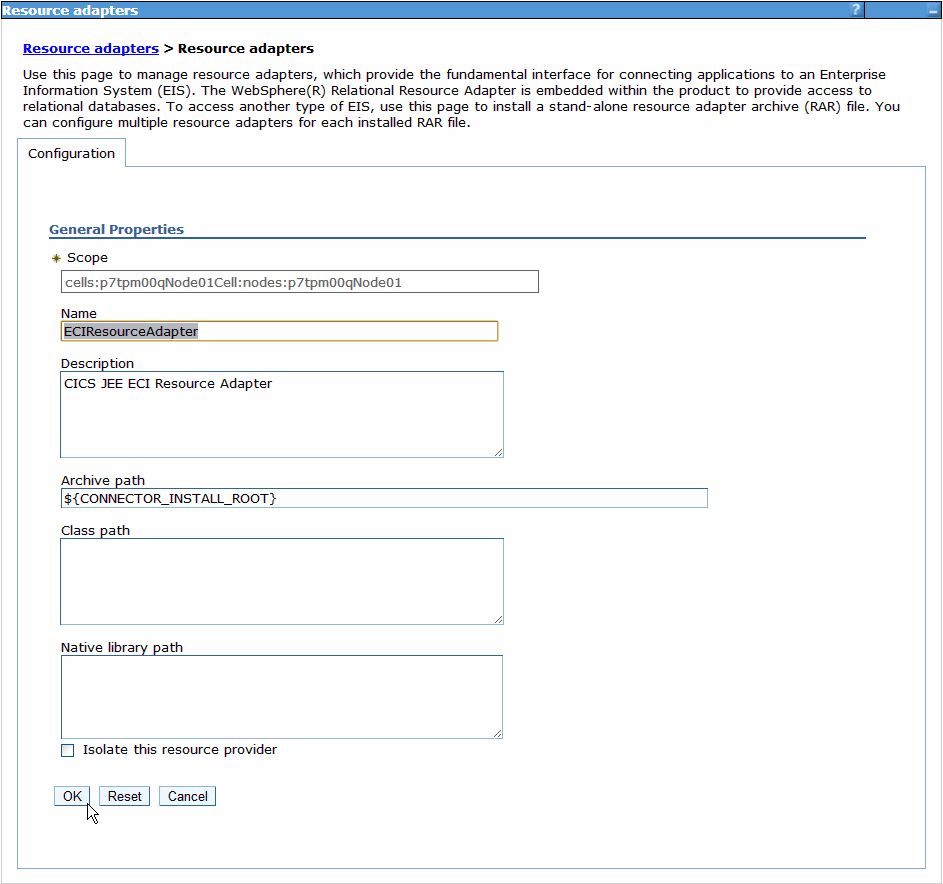
Because this scenario implements the remote mode topology, you do not have to configure the native library path. Accept the default settings and click OK.
The admin console returns you to the Resource adapters dialog shown in Figure 4, and prompts you to save the changes. Note that the new resource adapter ECIResourceAdapter is now visible in the table of available resource adapters, with the scope matching the node.
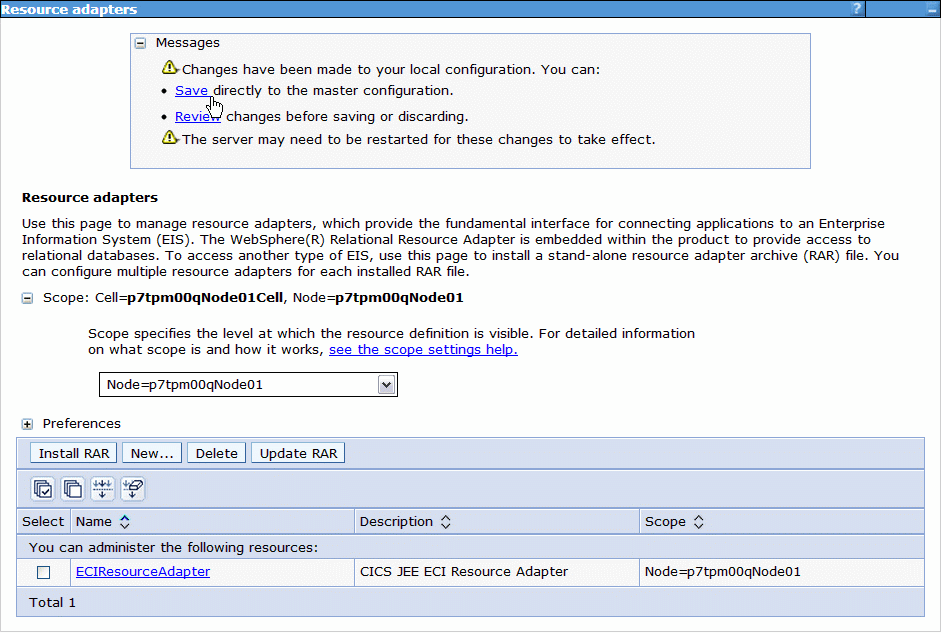
Save the changes to the main configuration.
Step 2. Create a connection factory
Select J2C connection factories from the Resources > Resource Adapters section of the navigation menu. Firstly, you must ensure that the scope is correctly selected as shown in Figure 5. For this particular scenario, the resource adapter is installed within the Node scope. If the scope is set incorrectly, attempts to create a new connection factory will fail.
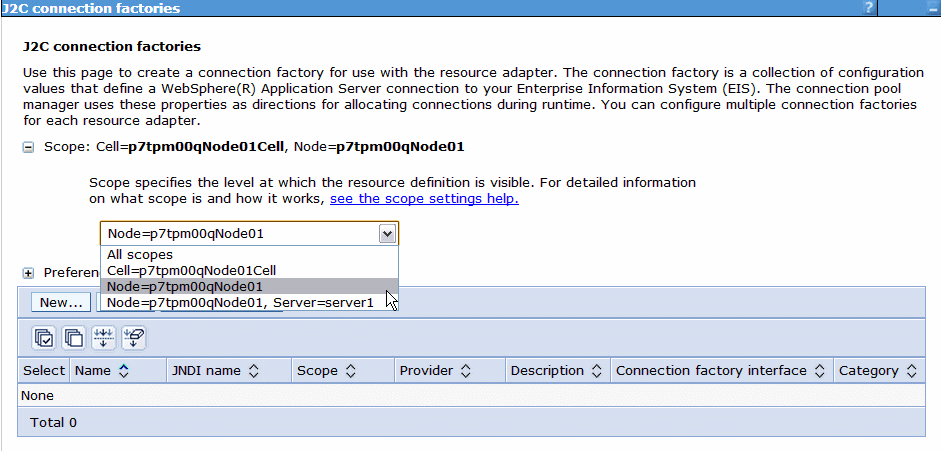
Click New to create a new connection factory using the CICS ECI resource adapter.
The J2C connection factory General Properties screen allows you to define the name, JNDI name and description for the new connection factory. The required values are provided in the table of values in Configuring workload management using a CICS request exit (SC09), and are shown in the following screen capture.
For the JEE applications, the important value here is the JNDI name. This allocates a single symbolic name to access CICS, and masks the detail of the underlying Gateway daemon and CICS topology.
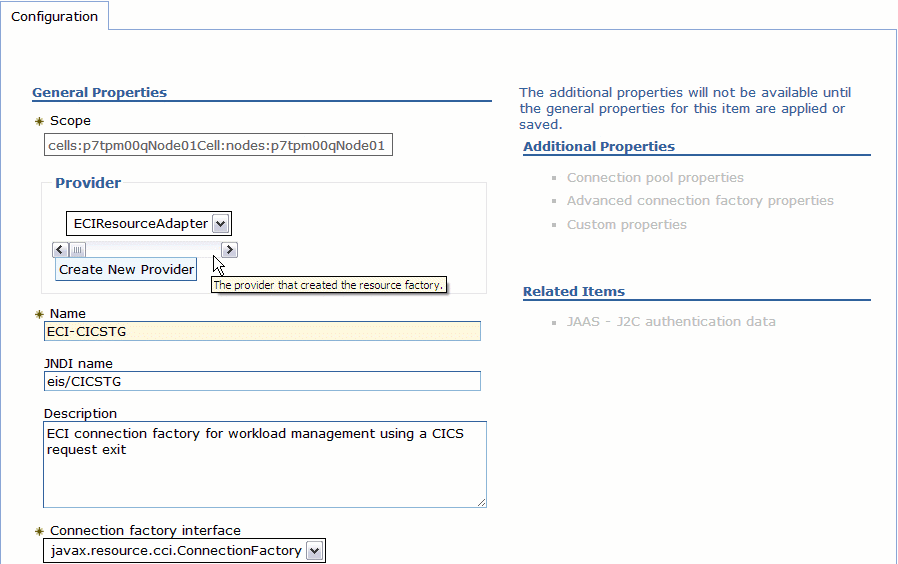
At the bottom of this dialog, click OK. The admin console returns you to the J2C connection factories dialog. The new connection factory is included in the table as shown in Figure 7.
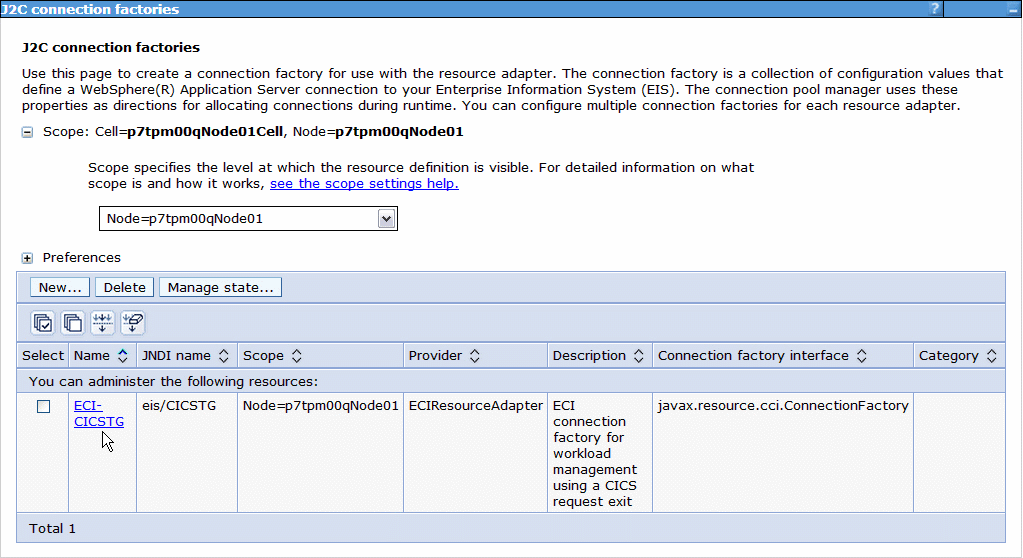
If the admin console prompts you to save the changes to the main configuration, you do not have to save at this point because the configuration task is not yet complete.
Step 3. Configure a connection factory
In the J2C connection factories dialog, select the new connection factory ECI-CICSTG from the table of connection factories shown in Figure 7.
The admin console returns you to the J2C connection factories - General Properties dialog for the connection factory ECI-CICSTG. From the Additional properties section, select Connection pool properties. The admin console displays the Connection pool properties configuration dialog shown in Figure 8.
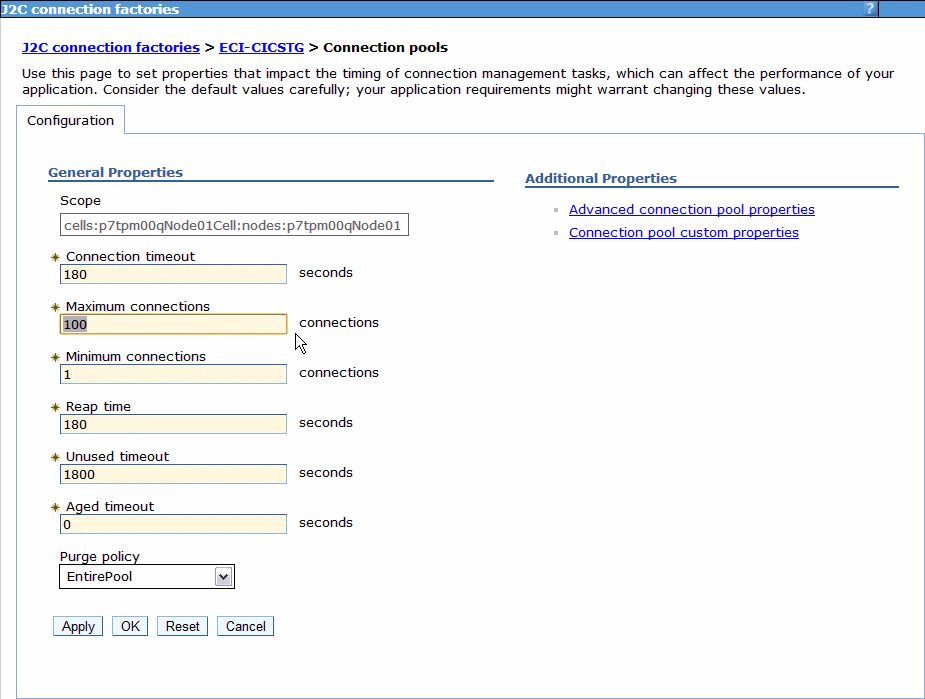
Change the value of Maximum connections to 100 to match the default MAXCONNECT value of 100 which the Gateway is configured to use.
For the remaining connection pool properties, use the default values. Click OK. The admin console returns you to the J2C connection factories - General properties dialog.
If the admin console prompts you to save the changes to the main configuration, you do not have to save at this point because the configuration task is not yet complete. The final part of the configuration task provides the connection factory with the details required to connect to a Gateway daemon and CICS.
From the J2C connection factories - General properties dialog, Additional properties section, select Custom properties. The admin console displays the Custom properties dialog shown in Figure 9.
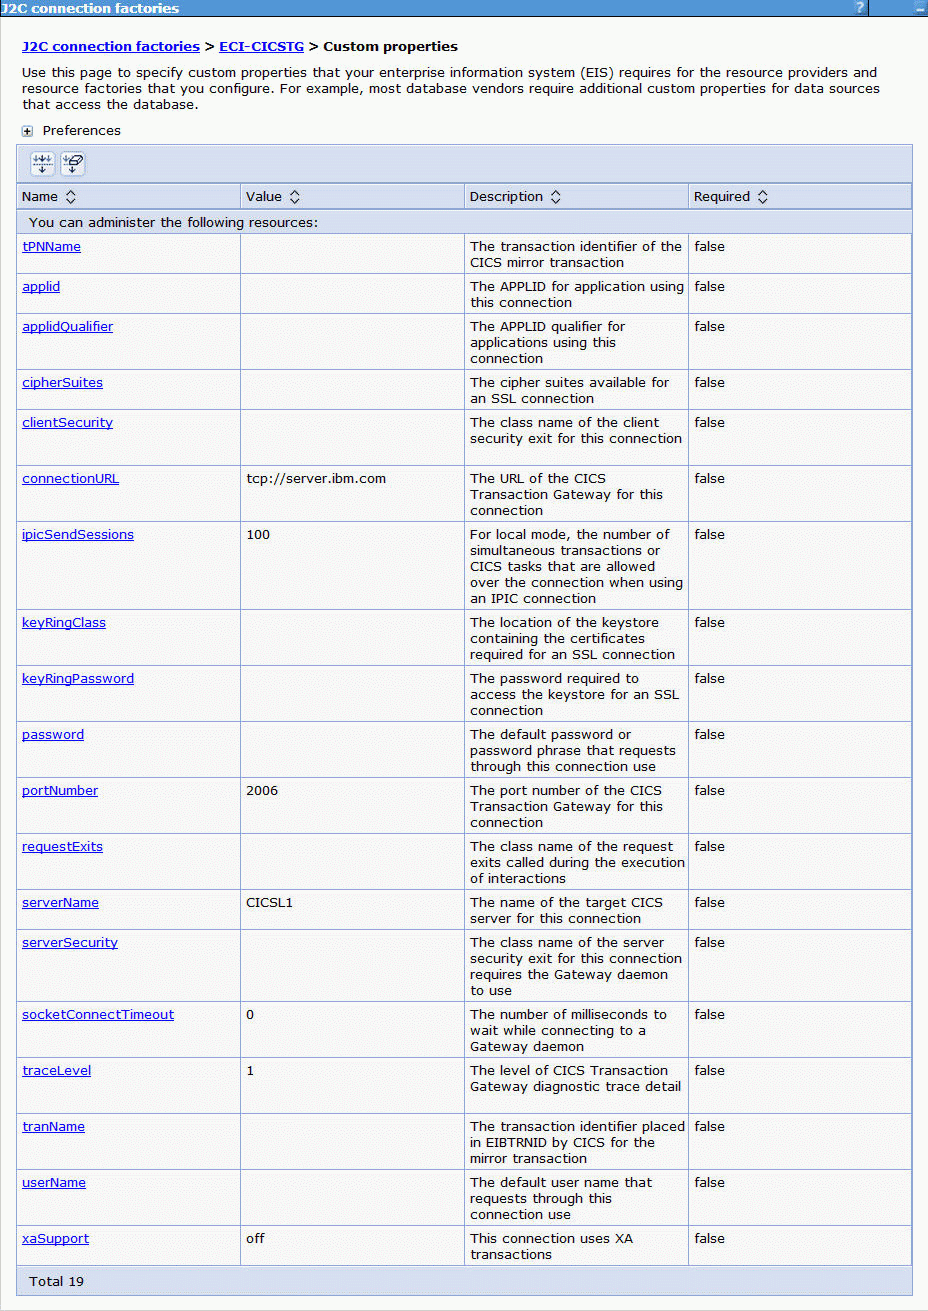
Set each of the following custom properties individually, by clicking on the name:
- ConnectionURL
- PortNumber
- ServerName
The required values for these properties are provided in the table in Configuring workload management using a CICS request exit (SC09); the default values for all other properties are acceptable. When you have set the required custom properties, save all changes to the main configuration.