Creating mobile applications
You can use the tools in the workbench to create mobile
applications on the Android platform
Before you begin
Installing the SDK and Tools
- Download the Android SDK from Download Android SDK, and select DOWNLOAD
FOR OTHER PLATFORMS, and download the archive file from
the SDK tools only. Restriction: The Android SDK does not support Java™ 8; use Java 7 or Java 6. For more information, see: Get the Android SDK
- Extract the Android SDK to a directory in your workstation.
- Once you have installed the Android virtual device, you can Setting Cordova preferences, and point to the directory where you installed Android.
Creating an Android virtual device
- On Windows: Open the Android SDK folder, and navigate to the SDK Manager.exe. Double click SDK Manager.exe.
- On Linux: open a Terminal, change into the directory of the Android SDK tools (commmand: cd <your SDK Path>/tools ) and run the command ./android sdk or ./android avd.
- The Android SDK manager opens.
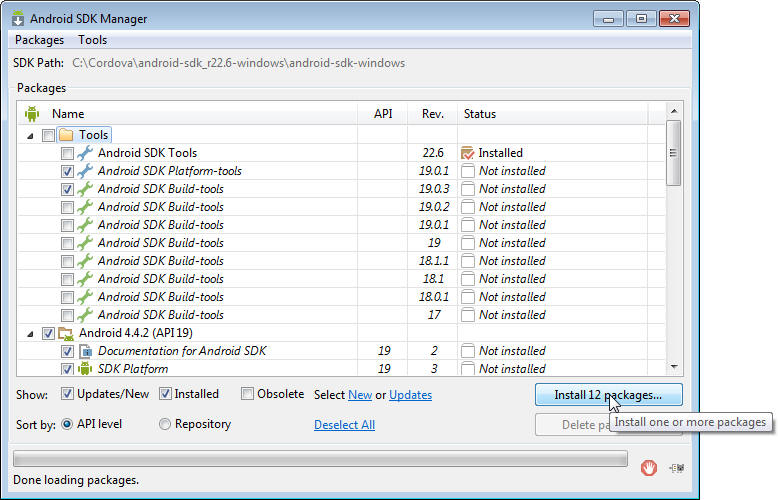
- Click Install <num> packages, and click Accept License, and then click Install.
- Once the installation is complete, select .
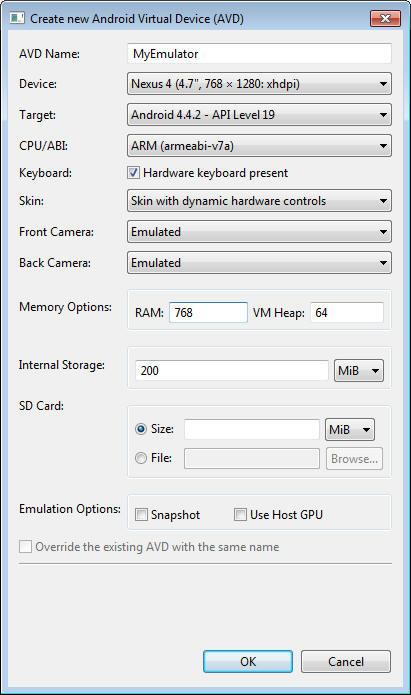
- Click New.
- In the AVD name field, type a name for your emulator.
- In the Device field, select the device you are using.
- In the Target field, select the target Android version.
- In the RAM memory field, type 768, and type OK.
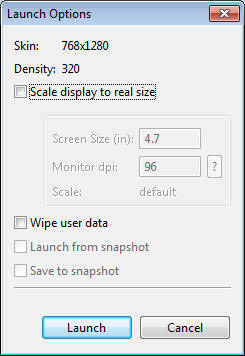
- Highlight the Android virtual device you just created and click Start. Whenever you want to create and run a project using the Android virtual device, you must start it first.
- On the Launch options page, click Launch.
About this task
When using Cordova for the first time (meaning creating a Cordova project for the first time) as you are adding platform and plugins support, additional Cordova artifacts need to be downloaded from Internet. If you are behind a proxy, you can use the networks connection link: Select and you see the Network Connections link at the top of the wizard. Click on it and you are redirected to Network Connections preferences page that is located under General category. In there, you can configure your proxy settings. See this Eclipse help page for details about how to configure your proxy settings: Network Connections

Procedure
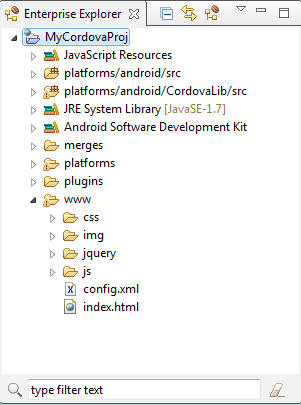
- If you do not see the Java EE
icon
 on the top right tab
of the workspace, you need to switch to
the web perspective.
on the top right tab
of the workspace, you need to switch to
the web perspective. - In the Configuration page:
- Click the jQuery tab, and click Add
jQuery mobile if you want to include jQuery functionality.
Click the folder icon or compressed file icon to browse for jQuery
files to add to your project. Restriction: The workbench supports jQuery version 1.9 and jQuery Mobile version 1.3. For more information, see Web tools support in this topic: Introduction to Rational® Application Developer
- Click the Platforms tab, click
the platform that you want to use. If you have not installed the prerequisites
beforehand (see Learn more about configuring your environment
for hybrid mobile: ), click Configure Platforms. Restriction: The iOS platform option is supported only on the MAC OS operating system.
- Click Add Plugin. Plugins provide a JavaScript interface for your Cordova application to access the native components of a device. On the Add Plugin, the list of available plugins appears. You can filter it out for easy access. Select the plugins that you want to add, and click Finish.
- Click the jQuery tab, and click Add
jQuery mobile if you want to include jQuery functionality.
Click the folder icon or compressed file icon to browse for jQuery
files to add to your project.