Creating a WebSphere Application Server

You can create a server to specify a WebSphere® Application Server runtime environment for testing or publishing your project resources. Example usages of a runtime environment are compiling an application, connecting to a server, and publishing applications on a server.

About this task

The following are examples of default installation directory for a WebSphere Application Server runtime environment:
  • A stand-alone server is available when you purchase the WebSphere Application Server and its installation is located at C:\Program Files\IBM\WebSphere\AppServer
  • An integrated test environment is available when installing WebSphere Application Server using the Installation Manager that comes with the installation of the IBM® Rational® Software Delivery Platform and its installation is located at C:\Program Files\IBM\SDP\runtimes\base_vX
  • A stub directory is available when selecting the Tools for WebSphere Application Server, version X.X feature from the Installation Manager that comes with the installation of the of IBM Rational Software Delivery Platform and its installation is located at C:\Program Files\IBM\SDP\runtimes\base_vX_stub
Where X is the version-level of the WebSphere Application Server, such as V8.5, V8.0, V7.0, or V6.1.

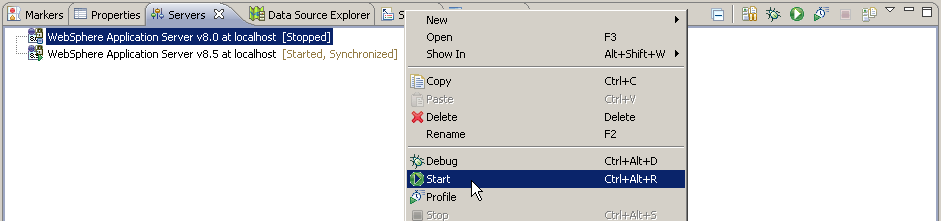
The task of creating a WebSphere Application Server involves creating a reference from the workbench to an existing installation of an application server and its profile. You can use this reference to handle your server requests from the workbench. An example of visualizing this reference, is the server entry that displays in the Servers view:

This is a graphic of a screen capture of the WebSphere Application Server in the Servers view.

Prerequisite
  • An installation of WebSphere Application Server installed either on the same or on a remote computer from the development workbench

If the WebSphere Application Server is installed using the Installation Manager that comes with the installation of the IBM Rational Software Delivery Platform, this task is already completed for you. A WebSphere Application Server entry is created in the Servers view. This server entry contains a reference to the integrated WebSphere Application Server test environment and its default server profile.

If you want to create another reference to a local installation of the WebSphere Application Server or you want to create a reference to a remote installation of the WebSphere Application Server, complete the following steps:

Procedure

  1. Select any of the following options:
    • In the Servers view (Window > Show View > Servers), right-click and select New > Server.
    • In the menu bar, click File > New > Other. Expand the Server folder, select Server and click Next.
  2. The New Server wizard opens. This wizard defines a new server, that contains information required to point to a specific runtime environment for local or remote testing, or for publishing to an application server.
  3. In the Select the server type list, under the IBM folder select one of the following servers you want to create:
    • WebSphere Application Server v8.5
    • WebSphere Application Server v8.0
    • WebSphere Application Server v7.0
    • WebSphere Application Server v6.1
  4. In the Server's host name field, you can provide the fully qualified DNS name or IP address of the host machine that where the server is running. By default, this field is pre-filled with the default address: localhost.
  5. (Optional) In the Server name field, type a label to identify this server entry in the Servers view. By default, this field is completed with the following naming conventions: server type @ host name, for example WebSphere Application Server v7.0 at localhost.
  6. If the workbench has a reference to a WebSphere Application Server runtime environment, a Server runtime environment list is available to select a runtime environment. When selecting a runtime environment follow these guidelines:
    • If you want to perform actions on a local installation of the WebSphere Application Server, you must select the runtime environment that defines an installation directory to a local server, such as a stand-alone or the integrated test environment. When publishing the application on the server, the runtime environment publishes the application in the directories of the local server.
    • If you want to perform actions on a remote installation of the WebSphere Application Server, you need to select a runtime environment that defines either a local installation or a stub directory of the server. When publishing the application on the server, the application is not going to publish in the local installation of the server nor the stub directory, instead these runtime environments contain the libraries to connect and publish to the remote server.
    In addition, you can add additional runtime environments by clicking the Add link or you can modify the runtime environments defined in the workbench by clicking the Configure runtime environments link.
  7. Click Next to configure additional settings.
  8. If the workbench does not have a reference to the server runtime environment, the New Server wizard is going to prompt you for this information in the WebSphere Application Server Runtime Environment page. Otherwise, this page does not display in the New Server wizard.
    1. (Optional) In the Name field, type a label to identify this server entry in the Server Runtime Environments preference page (Window > Preferences > Server > Runtime Environments ).
    2. In the Installation directory field, type or browse to the path where the WebSphere Application Server is installed. This path is the same as the WAS_ROOT path mappings as defined by the WebSphere Application Server configuration. For example, if you have installed WebSphere Application Server in C:\WebSphere\AppServer directory, then specify this path in the Installation directory field.
    3. Click Next to configure WebSphere Application Server settings.
  9. On the WebSphere Application Server Settings page, specify one or more of the following settings:
    Option Description
    Profile name In the drop-down list, select the name of the profile of WebSphere Application Server. A profile is the set of files that define the runtime environment. For information on creating a profile, see Creating a profile.

    This option is available only when running a local server and not available when running a remote server.

    Server connection type and administrative port The administrative ports are used to communicate requests between the workbench and the server. Use one of the following radio button to select how you want the workbench to connect to the server:
    • The Automatically determine connection settings option is available only for local servers and by default is selected when working with a local server. It retrieves the port values directly from the configuration files of the server defined in its profile and attempts to connect to one of these available ports.
    • The Manually provide connection settings option allows you to select which connection types you want to use. It is available for both local and remote servers. In the case of a remote server, you are restricted to using this option and you must provide the correct port numbers for each connection type you choose.
    The following ports are used for making Java™ Management Extensions (JMX) connections with the server:
    • The InterProcess Connector (IPC) port is available only for a local WebSphere Application Server v7.0 (or later), It is designed to be a more stable and robust connection between the workbench and the local server. The default setting of the IPC port is 9633
    • The remote method invocation (RMI), also known as the ORB bootstrap, port is designed to improve performance and communication with the server. The default setting of the RMI port is 2809
    • The Simple Object Access Protocol (SOAP) connector port is designed to be more firewall compatible. The default setting of the SOAP port is 8880
    For more details, see Setting the connection to the WebSphere Application Server.
    Run server with resources within the workspace This check box enables you to run your application from within the workbench without publishing to the server. As a result, your application will not get copied to the server under the installedApp folder (x:/profiles/profile_name/installedApps, where x is the installation directory where WebSphere Application Server is installed). This option is available only when running a local server and not available when running a remote server. For local servers, this check box is enabled by default.

    If this check box is clear, the workbench runs the server with resource on the server. This publishes your application on the targeted server. As a result, the enterprise application (EAR) file is automatically published to the server by expanding into the installedApps folder (x:/profiles/profile_name/installedApps, where x is the installation directory where WebSphere Application Server is installed).

    Enable remote server start Enables you to start the WebSphere Application Server from the workbench. For more details about enabling to start a remote WebSphere Application Server, see Starting a remote WebSphere Application Server
    Security is enabled on this server Enables the security feature that comes with WebSphere Application Server. When security is not enabled, all other security settings are ignored. For more details about this security option, see Specifying administrative settings to a secured WebSphere Application Server.
    Application server name Specifies a logical name for the application server. For WebSphere Application Server, the logical name is unique and assigned to a server that distinguishes it from all other server instances within the node. This server name must already be created in the application server and its default setting is server1.
  10. (Optional) Click the Test Connection link to verify if you have a successful connection between the workbench and the server. Before using the Test Connection link, the server must be started.
    Tip: To ensure a successful connection, verify the following:
    • The actual server is started.
    • A profile to the server runtime environment is correctly specified under the Profile name field.
    • If you are manually providing the connection settings, verify the correct port values are specified.
  11. If you are creating a reference to a remote server and have selected to enable remote server start, the Remote WebSphere Application Server Settings page opens.
    • Select whether your remote server is installed on Windows or Linux, and enter the location of the server profile.
    • If you want to access the remote server using the logon credentials, enter your user name and password.
    • If you want to access the remote server using SSH, copy the private key file to the machine where the workbench is installed, and specify the key file location and user ID.
    For more details about starting a remote WebSphere Application Server, see Starting a remote WebSphere Application Server topic.
  12. (Optional) Click Next to add the projects of your application to the server. On the Add and Remove Projects page, under the Available projects list, select the project that you want to test and click Add. The project appears in the configured projects list.
  13. (Optional) A Next button might be available to click depending on what type of projects you are adding to the server. If the Next button is available and you select it, the Select Task page opens. In the Select Task page, use the check boxes to select tasks to be performed on the server, such as create tables and data source.
  14. Click Finish.

Feedback