< Previous | Next >

Task 6: Deploying rules

In this task, you deploy your ruleset to Rule Execution Server. Rule Execution Server is the runtime environment that contains the rule engine to execute the rules.

Up to this point, you have written some rules by using vocabulary that a business user can understand, and associated these rules with a rule flow. Now, you integrate your work into the Miniloan application in two stages:
  1. Deploy a RuleApp to Rule Execution Server. The RuleApp is the format expected by Rule Execution Server. It contains the ruleset. In the same way that Java™ classes are packaged in a JAR file, a ruleset is packaged in a JAR file and contains all that is necessary for the execution (rules, ruleflow, and so on).
  2. Call the integration code in the miniloan web application so that the business logic you implemented and validated in previous tasks is now executed in Rule Execution Server.
    Graphic presentation of the deploying process

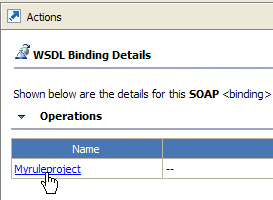
In this task, you can also test your deployed ruleset using a hosted transparent decision service (HTDS). After deploying the RuleApp in Rule Execution Server, you can generate a WSDL file from your ruleset, and then test it in Rule Designer.

Time This task should take you about 15 to 30 minutes to complete.

Step 1: Deploy from Rule Designer

To deploy the rules from Rule Designer, you must first create a RuleApp project. Then, you set some properties to enable the monitoring of the ruleset execution that you will do in the next task.

To create a RuleApp project and deploy the RuleApp:

  1. Make sure that the sample server is started.

    If you have stopped the sample server, click Start > All Programs > IBM > package_group > Sample Server > Start server. package_group refers to the package group specified in Installation Manager during installation. The default package group is Operational Decision Manager V8.5.

  2. In the Deploy and Integrate part of the Rule Project Map, click Create RuleApp project.
    Tip: You can also use the File menu, then click New > Project and select RuleApp Project.
  3. In the New RuleApp Project wizard, in the Project name field, type my ruleapp.
  4. Click Next.

    The my rule project is displayed on the Add Ruleset Archives page.

    Tip: If you cannot see your rule project, click Add, select my rule project, and click OK.
    Adding rule projects on the Add Ruleset Archives page
  5. Click Finish.

    You created a RuleApp project that contains a ruleset archive generated from the project my rule project.

    my ruleapp is displayed in the Rule Explorer and the RuleApp editor opens to let you deploy the RuleApp to Rule Execution Server.

  6. Click the Ruleset Archives tab in the editor.
    Ruleset Archives tab
  7. Under Ruleset Archives, select the myruleproject archive.
  8. Add the ruleset property to enable ruleset monitoring:
    1. In the Ruleset Properties section, make sure that ruleset.bom.enabled is absent or set to true.
    2. Click New to create a new property for the ruleset.
    3. In the Edit Property dialog, select the predefined property monitoring.enabled from the list, type true in the Value field, and then click OK.
    4. Save the changes.
  9. Click the Overview tab, and click Deploy in the Deployment section.
  10. In the Deploy RuleApp Archive wizard, keep Increment RuleApp major version selected, and click Next.
    Note: A warning is displayed if you are using the default Eclipse with JDK 7. If your application server runs with JDK 6, you must modify the settings in Eclipse to use JDK 6.
  11. On the next wizard page, make sure that Create a temporary Rule Execution Server configuration is selected, and type the following configuration details:

    URL: http://localhost:<PORT>/res

    Important: Enter the correct port number in the URL. For more information, see Checking the server port number.

    Login: resAdmin

    Password: resAdmin

  12. Click Finish.

    The Console displays a message indicating that the 1.0 version of the RuleApp has been deployed.

  13. Close the RuleApp editor.

Step 2: View the deployed RuleApp

You now view the deployed RuleApp in Rule Execution Server, which is an execution environment for rules (Java SE and Java EE) that interacts with the rule engine. Rule Execution Server handles the management, performance, security, and logging capabilities associated with the execution of your rules.

From your application, you access Rule Execution Server using either web services, EJBs, or, in this case, pure Java objects (POJO).

To view the deployed RuleApp:

  1. Click Start > All Programs > IBM > package_group > Sample Server > Rule Execution Server Console.

    package_group refers to the package group specified in IBM® Installation Manager during installation. The default package group is Operational Decision Manager V8.5.

    Tip: You can also enter http://localhost:<PORT>/res in a browser. Enter the correct port number for the URL.
  2. Sign in to the Rule Execution Server console using the following details:

    Username: resAdmin

    Password: resAdmin

  3. Click the Explorer tab.
  4. In the Navigator, expand RuleApps, and then /myruleapp/1.0.

    You see that Rule Execution Server contains your 1.0 version of myruleapp, which contains the 1.0 version of the ruleset as expected:

    Expanding RuleApps in the Explorer tab
  5. Click /myruleproject/1.0 to view the details.
    Details of /myruleproject/1.0

    Note that the status of the ruleset is enabled, indicating that it can be executed.

  6. Click the Show Properties link to view the ruleset properties.

    The property that you added in the previous step is set to true.

Step 3: Run the Miniloan web application with rules

The Miniloan web application is designed to let you choose whether the business logic is embedded in the application as pure Java code or is coded in a ruleset. When you first started the Miniloan application, you had not yet created the ruleset, so you ran the application using the Java code. Now that you have created the ruleset and deployed it to Rule Execution Server, you can select the Use Rules check box. The application now calls for the execution of the ruleset.

The validation is done using the validateWithJRules method of the Miniloan bean.

To call the integration code in the Miniloan application:

  1. Open a new browser window, and enter the following URL with the correct port number:

    http://localhost:<PORT>/miniloan-server

  2. Select the Use Rules check box.

    This check box activates the code that calls the execution of the ruleset. From this point, when you click Validate Loan, the miniloan web application executes the rules that you deployed to Rule Execution Server. The behavior of Miniloan is the same, except that the business logic is no longer part of the application code.

    Note that some fields have been temporarily added under Ruleset Information to let you see, as a developer, how the rules are being executed.

  3. Click Validate Loan. The results of the validation are as before:
    The loan is rejected 
    Messages: 
    Too big Debt-To-Income ratio 

    The Rules Execution Summary shows that the eligibility.minimum income rule was executed in the rule task miniloan#eligibility.

    A rule is executed when the conditions of the rule are met and the actions of the rule are triggered. This rule sets the approved status of the loan to false.

  4. Change the amount to 300000 and click Validate Loan again.

    This time you should see the following response:

    The loan is approved 
    The yearly repayment is 23758 

    The loan is approved, no rule has been fired.

  5. Close the Miniloan web application. You will open it again later to monitor the application.

(Optional) Step 4: Retrieve the HTDS WSDL file

A hosted transparent decision service (HTDS) is a web service that provides an interface to access a deployed ruleset. The Decision Service component passes input parameters to the rule engine and accesses the return values. The transparent decision service support includes traceability from decision services to rules, runtime monitoring and version management.

You can retrieve the WSDL file for the myruleproject ruleset, from the Rule Execution Server console.

To retrieve the WSDL file:

  1. In the Rule Execution Server console, make sure that you are still on the myruleproject ruleset page, and click Retrieve HTDS Description File in the toolbar at the top.
  2. Keep the SOAP option selected, and then select Latest ruleset version and Latest RuleApp version, and click Download.
  3. Save the WSDL file to <MyEclipseWorkspace>/my rule project and rename it to MyDecisionService.wsdl.

    <MyEclipseWorkspace> refers to your workspace directory on the file system.

    Tip: To import the WSDL file into Rule Designer, you can also use the Import wizard:
    1. On the File menu, click Import.
    2. Click General > File System, and then click Next.
    3. Browse to the folder where you saved the WSDL file, and select the WSDL file to import.
    4. In the Into folder field, select my rule project, and then click Finish.
  4. Sign out of the Rule Execution Server console.

(Optional) Step 5: Test the HTDS in Rule Designer

In Rule Designer, you use the WSDL file that you retrieved from Rule Execution Server and saved to your workspace, to test the web service. In the test environment, you enter some test data and call the WSDL operation.

To test the web service:

  1. In the Rule Explorer, right-click my rule project, and click Refresh.

    The MyDecisionService.wsdl file is displayed in the rule project.

  2. Double-click the MyDecisionService.wsdl to open it in the WSDL editor.

    There is one operation (MyRuleProject) of request-response type with an input message, an output message, and a SOAP fault.

  3. Close the MyDecisionService.wsdl file.
  4. Switch to the Java perspective:
    1. On the Window menu, click Open Perspective > Other > Java.
    2. Click OK.
  5. In the Package Explorer, expand my rule project.
  6. Right-click MyDecisionService.wsdl, and click Web Services > Test with Web Services Explorer.
  7. In the Web Services Explorer, under Operations, click Myruleproject.
    Click Myruleproject
  8. Enter the following values in the empty fields for the borrower:
    • creditScore: 100
    • yearlyIncome: 70000
  9. Enter the following values in the empty fields for the loan:
    • amount:8000
    • duration:12
    • yearlyInterestRate:2.5

    The credit score is below the minimum limit so the loan should be rejected.

  10. Click Go to call the web service on Rule Execution Server.
  11. In the Status section, take a look at the response.

    The loan was not approved.

    WSDL execution result
  12. Close the Web Services Explorer, and switch back to the Rule perspective.

You have now deployed your ruleset to Rule Execution Server and tested the result in the Miniloan web application, and as a web service. In the next task, you use Rule Execution Server to monitor and audit the execution of the rules.

< Previous | Next >