Before you run the sample, you must complete the sample setup instructions; for more information, see Setting up the Workload Management sample.
The Workload Management sample programs allow a pair of message flows (within an Integration Bus Application) to be driven as fast as they will go for a short time, using a large file. The back-end program gives an indication of the message rate being achieved by the flows. The main point of the sample is to allow you to observe how setting policies changes the rate at which the message flows invoke a back-end program. The instructions here describe how to use the sample flows in 3 ways:
Try one of the following to demonstrate the sample:
Before you run any work through the sample, you need to ensure the back-end program is running. When you import the sample, a project called Run_slow_tcpip_app is created in your Integration Toolkit workspace. This contains a batch file/shell script which will launch the back-end program from a command prompt.
To start the back-end application:
slow_tcpip_app.bat 1445 10or on Linux run
bash slow_tcpip_app.sh 1445 10to launch the back-end application. Make sure you add the parameters on the end, which are for the port (1445) and the maximum rate (10 messages per second).
The purpose of this step is to demonstrate that without a policy, the integration node will process data too fast for the back-end application. Remember that the back-end application will report warnings if it is driven at more than 10 messages per second.
A data file called WLMSample_QueryProductSalesByStores.xml is included in the same Run_slow_tcpip_app project that contains the back-end application. This contains 10000 records which should take around 1 minute to process on an average workstation. To drive the application, copy that file into the input directory you chose for your message flows in Setting up the sample. This is C:\WLMSample\fileinput on Windows, or /tmp/WLMSample/fileinput on Linux, if you have followed the suggested directory from the instructions.
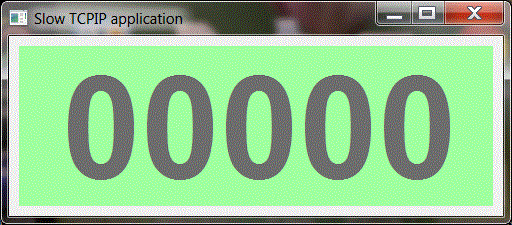
You should see the counter on the backend application increase to a large number. This number indicates the message rate. The background of the window will turn red and the console window will show messages like "Going too fast" to show that the backend application is being overloaded.
As the file is processed, you will see records added to the output file which is in C:\WLMSample\fileoutput\WLMSample_OutputProductSalesByStores.xml on Windows or /tmp/WLMSample/fileoutput/WLMSample_OutputProductSalesByStores.xml on Linux. There should be 10000 lines added to that file once the data has been fully processed.
This step shows how you can update your BAR before deployment to control workload. These instructions will show how a limit of 10 messages per second is imposed on the message flow which routes data from the file to the backend TCP/IP application.
When the sample is imported and deployed, the BAR file named WLMSample_ProductSales.bar is deployed. This BAR file does not include any overrides to the default settings, so there is no workload limit imposed.
You can override a property on the WLMSample_Producer message flow in the BAR editor to impose a Maximum Rate of 10 messages per second. To show this:
Once you have deployed your updated BAR file, run the same sample data file through the system as in the previous section:
An administrator can create policies within the Integration Registry to change flow behaviour, including controlling the maximum rate of processing. These policies are then attached to one or more message flows. These can be created via the web user interface, or via commands. On the command line, a policy is defined via an XML file and loaded into the Integration Registry with a command, then attached to the flow you want to control. See Configuring a policy for more details.
To apply a workload management policy to the Workload Management sample via commands, do the following:
mqsicreatepolicy IB9NODE -t WorkloadManagement -l SampleWLMPolicy -f WLMSamplePolicy.xml
mqsiattachpolicy IB9NODE -e WorkloadManagementExecutionGroup -k WLMSample_ProductSales -m WLMSample_ProductSales_Producer -t WorkloadManagement -l SampleWLMPolicy
You can experiment with viewing and using policies in the Web interface as well as commands. You can also attach different policies which specify a different rate, or change the policy which is already attached, and you should observe that the rate changes dynamically without the need to restart your broker. Note that values set in a policy override values which you specified in the BAR file.
If you encounter problems when you run the sample, see Resolving problems when running samples in the Integration Bus documentation.