Setting up security for Response Time
Set up Response Time security and logical views with IBM Tivoli Monitoring security controls so that unauthorized users cannot view or modify applications, transactions, or profiles.
Giving permissions to individual users
- Who can see and launch the Application Management Configuration Editor.
- What profiles and transactions a user can view and edit.
- Which agent types a user can access.
| Allowed Application | If allowed, a user can If NOT Allowed, a user cannot |
|---|---|
|
|
| Applications |
|
| Clients |
|
| Robotic Response Time plus Applications access |
|
| Web Response Time plus Applications access |
|
| Transaction Collector or Transaction Reporter plus Applications access |
|
| Robotic Response Time plus Dashboard / Application Management Console access |
|
| Web Response Time plus Dashboard / Application Management Console access |
|
| Transactions Collector OR Transactions Reporter plus Dashboard / Application Management Console access |
|
- Access the Tivoli Enterprise Portal.
- Access Administer Users by clicking on
 .
. - Select the Users tab.
- If you have not already done so, you must create the user to whom you want to set up permissions. For details on doing this, see IBM Tivoli Monitoring Administrator's Guide.
- Do the following to grant a user permission to see the Application Management Configuration Editor icon
in the Tivoli Enterprise Portal toolbar:
- Select the user.
- Click the Permissions tab.
- Select Situations under Authorities.
- Click the Modify check box.
- Click the Applications tab.
- Use the arrow buttons to move any of the following from the Available
Applications column to the Allowed Applications column.
- Applications
- Clients
- Response Time Dashboard
- Robotic Response Time
- Web Response Time
- Transaction Collector
- Transaction Reporter
- Click Apply to save the settings for this user.
- (Optional) Repeat the previous steps to set up permissions for another user.
- When you finish setting up users, click OK to close the window.
Setting up security with logical views
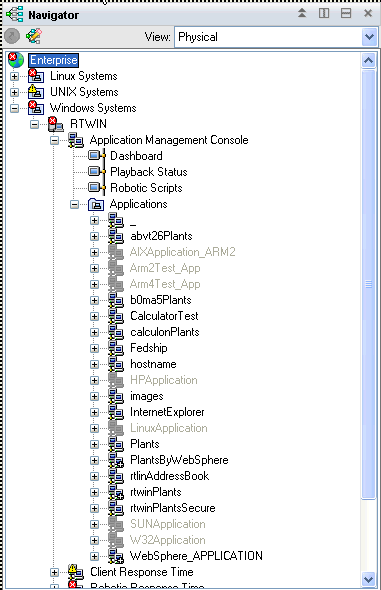
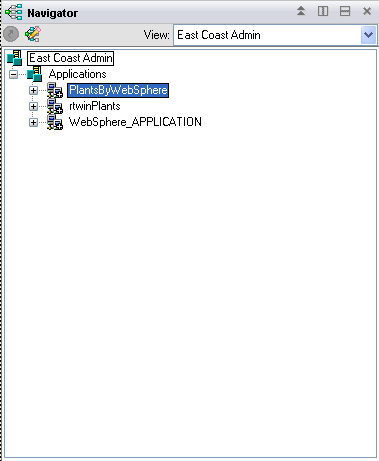
If you do not customize the Tivoli Enterprise Portal, the default view when a user accesses the portal is the Navigator Physical view. This default view shows the entire enterprise as a physical mapping of platforms, systems, monitoring agents, and monitored resources, which means that Tivoli Enterprise Portal detected the managed systems in the network and created items for them under the appropriate platform branch. If new managed systems come online, the software adds them to the default Navigator Physical view, unless you set up different logical views for different users. You can define Navigator Logical views for any obvious hierarchical grouping, such as business units, job responsibilities, or geographical sites. You can then use Logical views in conjunction with individual user permissions to create a limited view specific to a single user (or group of users) that restricts access to ITCAM for Transactions.
If you have access to Applications, then you can see a list of the applications underneath the Application Management Console, If you don't have this access, you cannot see those applications.
| Default Navigator Physical View | East Coast Administrators Logical View |
|---|---|
 |
 |
See the User Administration section in IBM Tivoli Monitoring Administrator's Guide and the Customizing the Navigator section in the IBM Tivoli Monitoring User's Guide for the specific steps for creating a Logical view, and use the following the process as a guideline.
- Create users for the various users or groups of users for whom you want to set up access to specific applications, systems, and monitoring agents.
- Create a custom logical view.
- Give that view access only to the items that you want them to see and grant access to only that view, not the physical view.
- (Optional) Give the user the ability to view more details by granting access to a specific monitoring agent.
- Set up access so that the user only has access to the logical view that you create for them.