Configuring Robotic Response Time (Windows)
Administrators can configure Robotic Response Time for Windows.
Configuring Robotic Response Time provides the parameter definitions for playing back robotic scripts. You can override the default parameter values within each configuration tab, but if you do not change the values, the installation uses the default parameter values.
- Before you begin configuration, review Information to collect before you begin installation and configuration. In addition, review the Robotic Response Time parameters in: Windows Configuration Parameters. You will need these parameters during the configuration.
- In the Setup Type window of the Installation Wizard, select Launch
Manage Tivoli Monitoring Services for additional configuration options
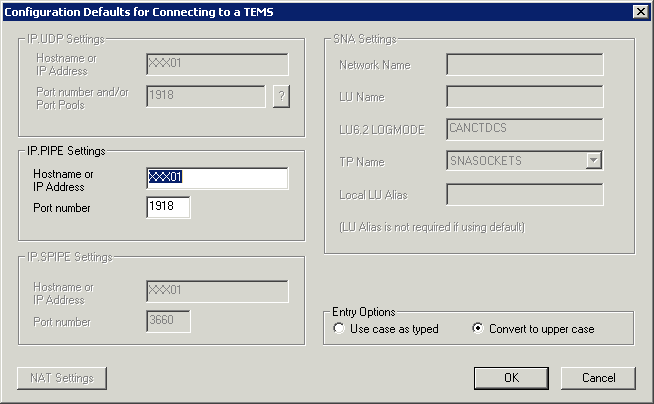
and to start Tivoli Monitoring services and click Next. The Configuration Defaults for Connecting to a TEMS window is displayed.

- In the Configuration Defaults for Connecting
to a TEMS window,
check the information and click OK. The information
on this window is automatically detected and depends on the protocol
selected earlier.
- In the Configuration window,
do one of the following:
- Accept all the default parameter values by clicking OK.
- Customize the parameter values in the Configuration tabs:
- Select the Robotic Monitoring Configuration tab.

- Select the Mercury LoadRunner Configuration tab and use
the information from Windows Configuration Parameters.

- Select the Rational® Functional
Tester Configuration tab.

- Select the Data Analysis Configuration tab.

- Select the Rational Performance
Tester Configuration tab.

- Select the Robotic Monitoring Configuration tab.
- (Optional): When installation is complete, the InstallShield Wizard Complete window opens.
- Click Finish.
- Restart Robotic Response Time.
- Verify the installation.
- When the installation is complete, proceed to Verify installation of Response Time monitoring agents.