IBM Support

Update(s) for HMC V9R1

Troubleshooting


Problem

This document provides instructions to update the HMC Version 9 Release 1 with the latest fixes.

Resolving The Problem

This document provides instructions for updating HMC Version 9.1.0 with the latest fixes for 9.1.0.


HMC V9R1M910 Fix Support ended September 30, 2021
For upgrade options see IBM support document Recommended Fixes - HMC Code Upgrades at https://www.ibm.com/support/pages/recommended-fixes-hmc-code-upgrades
This is the last release that supports the model CR7, CR8, OE1 and OE2.


This release is out of service support, and the document will not be updated.
Before you begin this Update, please note,
 
The HMC can no longer be updated directly from public.dhe.ibm.com.  HMC update is supported directly from Fix Central by using SFTP option or by staging the updates on a local server. 

1. Verify the HMC is at Version 9 Release 1.0
If the HMC is not at 9.1.0, you must first upgrade to 9.1.0. To upgrade the HMC to Version 9.1.0, refer to document N1022499, Model 7042 x86: Upgrading the HMC from Version 8.8.6 or Later to Version 9 or N1022504, Model 7063 ppc: Upgrading the HMC from Version 8.8.7.0 to V9R1

2. Determine the type of HMC (x86 versus ppc)
Starting with V8R8.7 all HMC Recovery images, network images, iFixes, and Service Packs are published in two formats, x86 and ppc. There is a unique PTF number/download for each. Determine which PTF/download is need based on the HMC model or vHMC component.

x86 This term is used to reference HMCs running on 7042 type or vHMC hosted by x86/Intel/AMD hardware and hypervisors (KVM, VMWare, Xen).

ppc Term is used to reference HMCs running on 7063 type or vHMC hosted by Power servers.

* 7063 Firmware updates can be found in fix central at https://www-945.ibm.com/support/fixcentral/swg/selectFixes?parent=ibm~powerHWmgmtConsole&product=ibm/power/7063CR1&release=MC825&platform=All&function=all


3. Review the readme files and suggested order of installation:

V9R1M921 iFix MH01808/MH01809 or earlier, install Install iFix MH01813/MH01814:

https://delivery04.dhe.ibm.com/sar/CMA/HMA/0892s/3/MH01813.readme.html

Pre-Requisite iFix MH01853/MH01854:

https://delivery04.dhe.ibm.com/sar/CMA/HMA/08wt7/4/MH01853.readme.html

Service Pack (942) MH01876/MH01877 fix:

https://delivery04.dhe.ibm.com/sar/CMA/HMA/09cvk/4/MH01876.readme.html

iFix for M942 MH01898/MH01899:

https://delivery04.dhe.ibm.com/sar/CMA/HMA/0a0hd/1/MH01898.readme.html
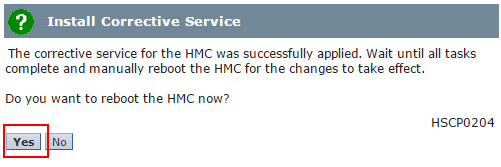
4. Reboot the HMC
Restart the HMC before you begin the updates. To check the last reboot use the command who -b. To restart the HMC, click HMC Management > Console Management > Shut Down or restart the Management Console > Restart HMC then click OK


5. Select one of the following tabs for the method you want to use to update the HMC
.iso images: Instructions for downloading the fixes and installing them from media
Ordering Using DVDs: Instructions for ordering the media from IBM and installing from optical media.
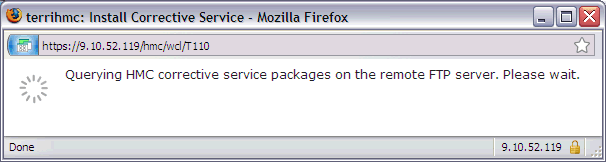
Network: Instructions for installing the fixes directly from the IBM FTP site (or alternately a local FTP server).

Tab navigation

.iso images

Instructions for downloading the fixes and installing them from media

Step 1: Download the Corrective fixes
Click each link to download direct from the IBM FTP server.

Download iFix
7042 x86 (MH01813): MH01813_x86.iso
7063 ppc (MH01814): MH01814_ppc.iso

Download iFix
7042 x86 (MH01853): MH01853_x86.iso
7063 ppc (MH01854): MH01854_ppc.iso

Download Service Pack
7042 x86 (MH01876): HMC_Update_V9R1M942_x86.iso
7063 ppc (MH01877): HMC_Update_V9R1M942_ppc.iso

Download iFix
7042 x86 (MH01898): MH01898_x86.iso
7063 ppc (MH01899): MH01899_ppc.iso

Step 2: Burn copy the fixes to media.
Available options are:
a) Burn the iso file as image to DVD-R.
This is the traditional method used in the past and requires one DVD per fix.

b) Copy one or more iso files to media.
The fixes are copied to media as data. The media can be CD-R, DVD-R, or USB flash. Multiple fixes (iso files) can be placed on the same media if space permits.

Step 3: Install the fixes using the following installation instructions.

1
Install iFix PTF MH01813_x86.iso or MH01814_ppc.iso
To install, load the media on the HMC:
- If using DVD, load media into the DVD drive on the HMC.
- If using USB flash drive, plug flash drive into USB port. Wait until you hear three beeps (or approximately one minute) for the HMC to detect the flash drive.

a. In the navigation bar area, click HMC Management > Console Management
b. In the Console Management panel, click the Update the Hardware Management Console button. The "HMC Install Corrective Service Wizard" panel is displayed.
c. On the Current HMC Driver Information panel, click Next.
d. On the Select Service Repository panel, click Removable Media, then click Next.
e. On the Installation and Configuration Options panel, select either CD-ROM or DVD-RAM, or USB Flash Memory Device, then click Next.
f . On the Select Service Package panel,
Data files: click MH01813_x86.iso or MH01814_ppc.iso, then click Next.
DVD image: select media image - no description, then click Next.
g. On the Confirm Service Installation panel, click Finish.
The HMC interface retrieves the update package from the DVD and begins the installation process.
h. The HMC Install Corrective Service Progress panel indicates "Corrective Service installation was successful". Then, click OK.
i. Restart the HMC after the installation of the update has completed. The restart ensures all changes are available immediately. To reboot immediately, select Yes.
It is mandatory that you restart the HMC after each PTF.
Note: The HMC reboot may take several minutes longer than normal as some parts of the fix are applied during the reboot.


j. At the Hardware Management Console login prompt, log in using your user ID and password.
2

 
Install iFix PTF MH01853_x86.iso or MH01854_ppc.iso
To install, load the media on the HMC:
- If using DVD, load media into the DVD drive on the HMC.
- If using USB flash drive, plug flash drive into USB port. Wait until you hear three beeps (or approximately one minute) for the HMC to detect the flash drive.

a. In the navigation bar area, click HMC Management > Console Management
b. In the Console Management panel, click the Update the Hardware Management Console button. The "HMC Install Corrective Service Wizard" panel is displayed.
c. On the Current HMC Driver Information panel, click Next.
d. On the Select Service Repository panel, click Removable Media, then click Next.
e. On the Installation and Configuration Options panel, select either CD-ROM or DVD-RAM, or USB Flash Memory Device, then click Next.
f . On the Select Service Package panel,
Data files: click MH01853_x86.iso or MH01854_ppc.iso, then click Next.
DVD image: select media image - no description, then click Next.
g. On the Confirm Service Installation panel, click Finish.
The HMC interface retrieves the update package from the DVD and begins the installation process.
h. The HMC Install Corrective Service Progress panel indicates "Corrective Service installation was successful". Then, click OK.
i. Restart the HMC after the installation of the update has completed. The restart ensures all changes are available immediately. To reboot immediately, select Yes.

It is mandatory that you restart the HMC after each PTF.
Note: The HMC reboot may take several minutes longer than normal as some parts of the fix are applied during the reboot.


j. At the Hardware Management Console login prompt, log in using your user ID and password.
3.
Install Service Pack PTF MH01876_x86.iso or MH01877_ppc.iso
To install, load the media on the HMC:
- If using DVD, load media into the DVD drive on the HMC.
- If using USB flash drive, plug flash drive into USB port. Wait until you hear three beeps (or approximately one minute) for the HMC to detect the flash drive.

a. In the navigation bar area, click HMC Management > Console Management
b. In the Console Management panel, click the Update the Hardware Management Console button. The "HMC Install Corrective Service Wizard" panel is displayed.
c. On the Current HMC Driver Information panel, click Next.
d. On the Select Service Repository panel, click Removable Media, then click Next.
e. On the Installation and Configuration Options panel, select either CD-ROM or DVD-RAM, or USB Flash Memory Device, then click Next.
f . On the Select Service Package panel,
Data files: click MH01876_x86.iso or MH01877_ppc.iso, then click Next.
DVD image: select media image - no description, then click Next.
g. On the Confirm Service Installation panel, click Finish.
The HMC interface retrieves the update package from the DVD and begins the installation process.
h. The HMC Install Corrective Service Progress panel indicates "Corrective Service installation was successful". Then, click OK.
i. Restart the HMC after the installation of the update has completed. The restart ensures all changes are available immediately. To reboot immediately, select Yes.

It is mandatory that you restart the HMC after each PTF.
Note: The HMC reboot may take several minutes longer than normal as some parts of the fix are applied during the reboot.

j. At the Hardware Management Console login prompt, log in using your user ID and password.
4.
Install iFix for M942 PTF MH01898_x86.iso or MH01899_ppc.iso
To install, load the media on the HMC:
- If using DVD, load media into the DVD drive on the HMC.
- If using USB flash drive, plug flash drive into USB port. Wait until you hear three beeps (or approximately one minute) for the HMC to detect the flash drive.

a. In the navigation bar area, click HMC Management > Console Management
b. In the Console Management panel, click the Update the Hardware Management Console button. The "HMC Install Corrective Service Wizard" panel is displayed.
c. On the Current HMC Driver Information panel, click Next.
d. On the Select Service Repository panel, click Removable Media, then click Next.
e. On the Installation and Configuration Options panel, select either CD-ROM or DVD-RAM, or USB Flash Memory Device, then click Next.
f . On the Select Service Package panel,
Data files: click MH01898_x86.iso or MH01899_ppc.iso, then click Next.
DVD image: select media image - no description, then click Next.
g. On the Confirm Service Installation panel, click Finish.
The HMC interface retrieves the update package from the DVD and begins the installation process.
h. The HMC Install Corrective Service Progress panel indicates "Corrective Service installation was successful". Then, click OK.
i. Restart the HMC after the installation completes. The restart ensures all changes are available immediately. To reboot immediately, select Yes.
It is mandatory that you restart the HMC after each PTF.
Note: The HMC reboot can take several minutes longer than normal as some parts of the fix are applied during the reboot.
 

j. At the Hardware Management Console login prompt, log in using your user ID and password.


Ordering / Using DVDs

Instructions for ordering the on media from IBM and installing from optical media.

Step 1: Order the V9R1 corrective service fix on DVD
Click the appropriate links to order the PTF. For each PTF: log in with your IBM ID; confirm your address; submit the order.

iFix
7042 x86 MH01813
7063 ppc MH01814

iFix
7042 x86 MH01853
7063 ppc MH01854

Service Pack (942)
7042 x86 MH01876
7063 ppc MH01877

iFix
7042 x86 MH01898
7063 ppc MH01899


Step 2: Install the fixes by using the following instructions.

1.
Install iFix
To install the iFix, load the media into the DVD drive on the HMC.

a. In the navigation bar area, click HMC Management > Console Management
b. In the Console Management panel, click the Update the Hardware Management Console button. The "HMC Install Corrective Service Wizard" panel is displayed.
c. On the Current HMC Driver Information panel, click Next.
d. On the Select Service Repository panel, click Removable Media, then click Next.
e. On the Installation and Configuration Options panel, select either CD-ROM or DVD-RAM, or USB Flash Memory Device, then click Next.
f . On the Select Service Package panel,
DVD image: select media image - no description, then click Next.
g. On the Confirm Service Installation panel, click Finish.
The HMC interface retrieves the update package from the DVD and begins the installation process.
h. The HMC Install Corrective Service Progress panel indicates "Corrective Service installation was successful". Then, click OK.
i. Restart the HMC after the installation completes. The restart ensures all changes are available immediately. To reboot immediately, select Yes.

It is mandatory that you restart the HMC.
Note: The HMC reboot can take several minutes longer than normal as some parts of the fix are applied during the reboot.


j. At the Hardware Management Console login prompt, log in using your user ID and password.
2.
Install iFix
See step 2. Number 1 for instructions.
3.
Install Service Pack
To install the Service Pack, load the media into the DVD drive on the HMC.

a. In the navigation bar area, click HMC Management > Console Management
b. In the Console Management panel, click the Update the Hardware Management Console button. The "HMC Install Corrective Service Wizard" panel is displayed.
c. On the Current HMC Driver Information panel, click Next.
d. On the Select Service Repository panel, click Removable Media, then click Next.
e. On the Installation and Configuration Options panel, select either CD-ROM or DVD-RAM, or USB Flash Memory Device, then click Next.
f . On the Select Service Package panel,
DVD image: select media image - no description, then click Next.
g. On the Confirm Service Installation panel, click Finish.
The HMC interface retrieves the update package from the DVD and begins the installation process.
h. The HMC Install Corrective Service Progress panel indicates "Corrective Service installation was successful". Then, click OK.
i. Restart the HMC after the installation completes. The restart ensures all changes are available immediately. To reboot immediately, select Yes.

It is mandatory that you restart the HMC.
Note: The HMC reboot can take several minutes longer than normal as some parts of the fix are applied during the reboot.
j. At the Hardware Management Console login prompt, log in using your user ID and password.
4.
Install iFix
See Step 2. Number 1 for instructions.


Network

Instructions for installing Corrective Service fixes from the IBM FTP site or a local network server
This section describes installing the fixes from a network server or direct from the IBM FTP site.
 
Prerequisites
To install the fix directly from the IBM FTP server:
a. The HMC must have network connectivity to the Internet
b. The external firewall must allow FTP

Alternative: Stage the updates on a local server
If the HMC does not have direct access to the IBM FTP site, the files can be downloaded and placed on a local server. The HMC supports installing fixes over the network using FTP, sftp and nfs protocols. To upgrade from a local server instead of direct from the IBM FTP site, do the following:
a. Use FTP to do a binary download of the upgrade files from the IBM server to a directory on a local FTP server:
 
        IBM Server:  public.dhe.ibm.com/software/server/hmc/fixes                     
                   x86 File:    MH01813_x86.iso                     
                   ppc File:    MH01814_ppc.iso            
        IBM Server: public.dhe.ibm.com/software/server/hmc/fixes                     
                   x86 File:    MH01853_x86.iso                     
                   ppc File:    MH01854_ppc.iso                   
        IBM Server:  public.dhe.ibm.com/software/server/hmc/updates                    
                   x86 File:    HMC_Update_V9R1M942_x86.iso                     
                   ppc File:    HMC_Update_V9R1M942_ppc.iso     
                   IBM Server: public.dhe.ibm.com/software/server/hmc/fixes
                    x86 File:    MH01898_x86.iso
                    ppc File:    MH01899_ppc.iso
                    
                  
b. Adjust the instructions below to point to your local server instead of the IBM server.
1. Install iFix
To install the iFix MH01813_x86.iso/MH01814_ppc.iso using command line and perform the required reboot, use one of the following commands:
7042/x86: updhmc -t ftp -h public.dhe.ibm.com -u anonymous -p abc123 -r -f /software/server/hmc/fixes/MH01813_x86.iso
7063/ppc: updhmc -t ftp -h public.dhe.ibm.com -u anonymous -p abc123 -r -f /software/server/hmc/fixes/MH01814_ppc.iso

To install using the GUI, do the following:

a. In the navigation bar area, click HMC Management > Console Management
b. In the Console Management panel, click the Update the Hardware Management Console button. The "HMC Install Corrective Service Wizard" panel is displayed.
c. On the Current HMC Driver Information panel, click Next.
d. On the Select Service Repository panel, click Remote Server, then click Next.
e. On the Installation and Configuration Options panel:
(If using a local FTP server, modify the entries as appropriate for your local FTP server)
Remote server type: FTP
 
  	Remote Server:      public.dhe.ibm.com  	
        User ID:            anonymous  	
        Password:           [your email address]  	
        Remote directory:   /software/server/hmc/fixes  
Click Next.
f. Wait while a list of available updates is retrieved.
Wait while a list of available updates is retrieved
g. On the Select Service Package panel, scroll down to MH01813_x86.iso or MH01814_ppc.iso, click to select, and click Next.

Tip: You can use your browser's find feature (Ctrl+f on the HMC) to search for the package.

h. On the Confirm Service Installation panel, click Finish.
The HMC interface retrieves the update package from the FTP site and begins the installation process.
Note: The file is placed temporarily in the directory /dump/efix. To monitor progress of the download portion of the update, open a restricted shell session and type the following command:
while true; do ls -l /dump/efix ; sleep 30; done (Use ctl+c to end it). This command displays file size every 30 seconds to monitor download progress. The total size is available in the readme file.

i. The HMC Install Corrective Service Progress panel indicates "Corrective Service installation was successful". Click OK.

j. Restart the HMC after the installation completes. The restart ensures all changes are available immediately. To restart immediately, click Yes.

It is mandatory that you restart the HMC after each update.
Note: The HMC reboot can take several minutes longer than normal as some parts of the fix are applied during the reboot.


k. At the Hardware Management Console log-in prompt, log in using your user ID and password.
2.
Install iFix
To install the iFix MH01853_x86.iso/MH01854_ppc.iso using command line and perform the required reboot, use one of the following commands:
7042/x86: updhmc -t ftp -h public.dhe.ibm.com -u anonymous -p abc123 -r -f /software/server/hmc/fixes/MH01853_x86.iso
7063/ppc: updhmc -t ftp -h public.dhe.ibm.com -u anonymous -p abc123 -r -f /software/server/hmc/fixes/MH01854_ppc.iso

To install using the GUI, do the following:

a. In the navigation bar area, click HMC Management > Console Management
b. In the Console Management panel, click the Update the Hardware Management Console button. The "HMC Install Corrective Service Wizard" panel is displayed.
c. On the Current HMC Driver Information panel, click Next.
d. On the Select Service Repository panel, click Remote Server, then click Next.
e. On the Installation and Configuration Options panel:
(If using a local FTP server, modify the entries as appropriate for your local FTP server)
Remote server type: FTP
 
  	Remote Server:      public.dhe.ibm.com  	
        User ID:            anonymous  	
        Password:           [your email address]  	
        Remote directory:   /software/server/hmc/fixes
Click Next.
f. Wait while a list of available updates is retrieved.
Wait while a list of available updates is retrieved
g. On the Select Service Package panel, scroll down to MH01853_x86.iso or MH01854_ppc.iso, click to select, and click Next.

Tip: You can use your browser's find feature (Ctrl+f on the HMC) to search for the package.

h. On the Confirm Service Installation panel, click Finish.
The HMC interface retrieves the update package from the FTP site and begins the installation process.
Note: The file is placed temporarily in the directory /dump/efix. To monitor progress of the download portion of the update, open a restricted shell session and type the following command:
while true; do ls -l /dump/efix ; sleep 30; done (Use ctl+c to end it). This command displays file size every 30 seconds to monitor download progress. The total size is available in the readme file.

i. The HMC Install Corrective Service Progress panel indicates "Corrective Service installation was successful". Click OK.

j. Restart the HMC after the installation completes. The restart ensures all changes are available immediately. To restart immediately, click Yes.
It is mandatory that you restart the HMC after each update.
Note: The HMC reboot can take several minutes longer than normal as some parts of the fix are applied during the reboot.


k. At the Hardware Management Console log-in prompt, log in using your user ID and password.
3.

Install Service Pack
To install the Service Pack HMC_Update_V9R1M942_x86.iso/HMC_Update_V9R1M942_ppc.iso using command line and perform the required reboot, use one of the following commands:
7042/x86: updhmc -t ftp -h public.dhe.ibm.com -u anonymous -p abc123 -r -f /software/server/hmc/updates/HMC_Update_V9R1M942_x86.iso
7063/ppc: updhmc -t ftp -h public.dhe.ibm.com -u anonymous -p abc123 -r -f /software/server/hmc/updates/HMC_Update_V9R1M942_ppc.iso

To install using the GUI, do the following:

a. In the navigation bar area, click HMC Management > Console Management
b. In the Console Management panel, click the Update the Hardware Management Console button. The "HMC Install Corrective Service Wizard" panel is displayed.
c. On the Current HMC Driver Information panel, click Next.
d. On the Select Service Repository panel, click Remote Server, then click Next.
e. On the Installation and Configuration Options panel:
(If using a local FTP server, modify the entries as appropriate for your local FTP server)
Remote server type: FTP
 

  	Remote Server:      public.dhe.ibm.com  	
        User ID:            anonymous  	
        Password:           [your email address]  	
        Remote directory:   /software/server/hmc/updates
Click Next.
f. Wait while a list of available updates is retrieved.
Wait while a list of available updates is retrieved
g. On the Select Service Package panel, scroll down to HMC_Update_V9R1M942_x86.iso or HMC_Update_V9R1M942_ppc.iso, click to select, and click Next.

Tip: You can use your browser's find feature (Ctrl+f on the HMC) to search for the package.

h. On the Confirm Service Installation panel, click Finish.
The HMC interface retrieves the update package from the FTP site and begins the installation process.
Note: The file is placed temporarily in the directory /dump/efix. To monitor progress of the download portion of the update, open a restricted shell session and type the following command:
while true; do ls -l /dump/efix ; sleep 30; done (Use ctl+c to end it). This command displays file size every 30 seconds to monitor download progress. The total size is available in the readme.

i. The HMC Install Corrective Service Progress panel indicates "Corrective Service installation was successful". Click OK.
j. Restart the HMC after the installation completes. The restart ensures all changes are available immediately. To restart immediately, click Yes.
It is mandatory that you restart the HMC after each update.
Note: The HMC reboot can take several minutes longer than normal as some parts of the fix are applied during the reboot.


k. At the Hardware Management Console log-in prompt, log in using your user ID and password.
4.

Install iFix
To install the iFix MH01898_x86.iso/MH01899_ppc.iso using command line and perform the required reboot, use one of the following commands:
7042/x86: updhmc -t ftp -h public.dhe.ibm.com -u anonymous -p abc123 -r -f /software/server/hmc/fixes/MH01898_x86.iso
7063/ppc: updhmc -t ftp -h public.dhe.ibm.com -u anonymous -p abc123 -r -f /software/server/hmc/fixes/MH01899_ppc.iso

To install using the GUI, do the following:

a. In the navigation bar area, click HMC Management > Console Management
b. In the Console Management panel, click the Update the Hardware Management Console button. The "HMC Install Corrective Service Wizard" panel is displayed.
c. On the Current HMC Driver Information panel, click Next.
d. On the Select Service Repository panel, click Remote Server, then click Next.
e. On the Installation and Configuration Options panel:

(If using a local FTP server, modify the entries as appropriate for your local FTP server)
Remote server type: FTP

  	Remote Server:      public.dhe.ibm.com  	
        User ID:            anonymous  	
        Password:           [your email address]  	
        Remote directory:   /software/server/hmc/fixes  

Click Next.

f. Wait while a list of available updates is retrieved.

Wait while a list of available updates is retrieved

g. On the Select Service Package panel, scroll down to MH01898_x86.iso or MH01899_ppc.iso, click to select, and click Next.

Tip: You can use your browser's find feature (Ctrl+f on the HMC) to search for the package.

h. On the Confirm Service Installation panel, click Finish.
The HMC interface retrieves the update package from the FTP site and begins the installation process.
Note: The file is placed temporarily in the directory /dump/efix. To monitor progress of the download portion of the update, open a restricted shell session and type the following command:
while true; do ls -l /dump/efix ; sleep 30; done (Use ctl+c to end it). This command displays file size every 30 seconds to monitor download progress. The total size is available in the readme file.

i. The HMC Install Corrective Service Progress panel indicates "Corrective Service installation was successful". Click OK.

j. Restart the HMC after the installation completes. The restart ensures all changes are available immediately. To restart immediately, click Yes.

It is mandatory that you restart the HMC after each update.

Note: The HMC reboot can take several minutes longer than normal as some parts of the fix are applied during the reboot.

k. At the Hardware Management Console log-in prompt, log in using your user ID and password.


Verifying a Successful Update

After the HMC was restarted, do the following to verify that the HMC upgrade was successful:

1.
In the upper right corner of the page, click the menu Help > About...
2. Point your mouse over the HMC Version link on the Content panel to display the Version information. You will see the following:

x86:
Version=Version:9
Release: 1
Service Pack: 942
HMC Build level 2109060506
MH01876 - HMC V9R1 M942
MH01898 - iFix for HMC V9R1 M942
","base_version=V9R1
"

ppc:
Version=Version:9
Release: 1
Service Pack: 942
HMC Build level 2109060506
MH01877 - HMC V9R1 M942
MH01899 - iFix for HMC V9R1 M942
","base_version=V9R1


Backup of HMC Data, and Requirements for Recovery of HMC

It is recommended that you perform a backup of the HMC. Record the current HMC version/fix information in the backup description field. Instructions for the HMC backup are provided at the following link:
https://www.ibm.com/docs/en/power8/8408-44E?topic=hmc-backing-up-critical-data

[{"Product":{"code":"SSB6AA","label":"Power System Hardware Management Console Physical Appliance"},"Business Unit":{"code":"BU054","label":"Systems w\/TPS"},"Component":"HMC","Platform":[{"code":"PF025","label":"Platform Independent"}],"Version":"Version Independent","Edition":"","Line of Business":{"code":"LOB08","label":"Cognitive Systems"}}]

Document Information

Modified date:
06 March 2023

UID

nas8N1022537