Fix Readme
Abstract
Instructions for patching IBM InfoSphere Information Server, Versions 11.7.0.0, 11.7.0.1, or 11.7.0.2 to 11.7.1.0. This readme file contains guidance for installation of the 11.7.1.0 patch available on Fix Central.
Content
1) Introduction
The steps for patching to Information Server 11.7.1.0 depends on the version of the current installation, and whether Information Server Enterprise Search (ISES) is installed.
In 11.7.1.0, in addition to Enterprise Search, the ISES host contains additional microservices and going forward is referred to as the Microservices tier.
You must install the Microservices tier if you plan to use any of the following features:
1. Information Server Enterprise Search
2. Watson Knowledge Catalog (WKC)
NOTE:
Although WKC is available for installation in 11.7.1.0, fix packs after 11.7.1.0 require it to be uninstalled. Hence, do not attempt to install WKC.
3. The new Information Governance Catalog and Information Analyzer console
Before patching to 11.7.1.0:
- Information Server 11.7.0.0 or 11.7.0.1 or 11.7.0.2 must be installed.
- If ISES is installed, it must be at 11.7.0.1 or 11.7.0.2.
- The DataClick component is discontinued in 11.7.1.0, and must be uninstalled. See technote for details.
- See technote for issues that you might need to address before the installation, and also issues that can affect you after the installation.
Note: If you need to patch an environment that already has Information Server 11.7.1.0 installed, you must use technote instead of this technote.
2) What is new in 11.7.1 installations
2.1) Environment
For the Information Server host system, ensure that your system meets the requirements listed in Information Server 11.7.1 System requirements. Refer to the pre-installation checklist while checking your system.
Microservices tier system requirements and configuration
Disk space requirements
There are three locations that need to have sufficient free disk space available and their requirements are mutually exclusive. For example, if all three locations are placed on the same partition you need at least 600 GB of free disk space.
The following procedure and commands are for illustration purposes only and might vary depending on whether you are using single or multiple nodes and the file location of the Docker volume. You might also have restrictions on your folder names.
1. User data
In prior releases, when installing Information Server Enterprise Search, you had to specify a raw disk drive as the Persistent Storage location.
In Information Server 11.7.1, the Persistent Storage location must be specified as a directory on a local file system; do not specify a device location. The Update Installer checks the location specified for the UG_LOCAL_STORAGE_DIR property in the uginfo.rsp file. If it is not specified, /var/lib/ibm/ugdata is checked.
User data is stored at this location, and so the space needed varies based on usage; you must have at least 300 GB of free disk space.
2. Docker images
Docker images are loaded into /var/lib/docker. By default, /var/lib/docker is created in the system partition (the root directory /).
The partition containing /var/lib/docker, or if it does not exist, the partition that mounts the /var directory must have a minimum of 200 GB free disk space for the Docker images.
To check the space available in the system partition, execute
# df -H
Filesystem Size Used Avail Use% Mounted on
/dev/mapper/rhel-root 258G 49G 209G 19% /
You can perform the following steps if 200 GB of free space is not available:
a. Add a disk that minimally has 200 GB free space available. For example, if "xvde" is the disk added, the output of executing the lsblk command must indicate
xvde 202:64 0 200G 0 disk
b. Execute fdisk to create a partition on the added disk (xvde).
sudo fdisk /dev/xvde
It prompts you for creation options; specify the following options
select option “n” (to Add a new partition)
select option “p” (Primary partition)
select option “1” (Partition number)
select option for First sector (Accept default: 1)
select option “w” (Write changes)
xvde 202:64 0 200G 0 disk
└─xvde1 202:65 0 200G 0 part
d. Execute the mkfs.xfs command to create a file system in the created partition.
mkfs.xfs /dev/xvde1
sudo mkdir /var/lib/docker
/dev/xvde1 /var/lib/docker xfs defaults,nofail 0 0
xvde 202:64 0 200G 0 disk
└─xvde1 202:65 0 200G 0 part /var/lib/docker
Note: For a multiple nodes environment, ensure that the same configuration settings are also applied on worker nodes.
3. Install location
The installation home directory for the Microservices tier must have 100 GB free disk space.
Requirements related to single/multiple nodes and Watson Knowledge Catalog
You can set up the Microservices tier as a single node or as multiple nodes with a master node and two worker nodes.
NOTE:
Although WKC is available for installation in 11.7.1.0, fix packs after 11.7.1.0 require it to be uninstalled. Hence, do not attempt to install WKC.
The Microservices tier needs to meet the following requirements:
- Red Hat 7.3 or later
-
Single node without Watson Knowledge Catalog: minimum 8 vcpu and 32 GB memory
-
Single node with Watson Knowledge Catalog: minimum 16 vcpu and 64 GB memory
-
Multiple nodes without Watson Knowledge Catalog: minimum 8 vcpu and 32 GB memory on each node
-
Multiple nodes with Watson Knowledge Catalog: minimum 16 vcpu and 64 GB memory on each node
You can run the Microservices tier pre-requirements verification script to validate that the master node meets the requirements for the Microservices tier. You can use this pre-installation checklist while setting up the Microservices tier.
2.2 Provide a password or set up passwordless SSH to install or upgrade the Microservices tier
1. a user with root privileges on the master node
2. setting up passwordless SSH from the user running the install on the Information Server host to the master node
3. setting up passwordless SSH for the root user between the master node and itself
In this case, you do not have to set up passwordless SSH from the Information Server host to the master node.
However, for a multiple nodes environment, you must set up passwordless SSH for the root user from the master node to the worker nodes.
The specified non-root user must have sudo privilege with NOPASSWD enabled.
In this case, you do not have to set up passwordless SSH from the user running the installation on the Information Server host to the master node.
For a multiple nodes environment:
ii. you must set up passwordless SSH for the specified non-root user from the master node to the worker nodes
You must set up passwordless SSH from the user running the installation on the Information Server host to the master node.
For a multiple nodes environment, passwordless SSH must also be set up for the root user from the master node to the worker nodes.
The specified non-root user must have sudo privilege with NOPASSWD enabled.
You must set up passwordless SSH from the user running the installation on the Information Server host to the master node.
For a multiple nodes environment:
i. the specified non-root user must be set up in the same manner on all nodes
ii. passwordless SSH must also be set up for the specified non-root user from the master node to the worker nodes
a. If the file /root/.ssh/id_rsa.pub does not exist, create the SSH Keys with the following command:
> ssh-keygen -f /root/.ssh/id_rsa -q -N ""
b. Copy the SSH public key to the Microservices Tier node with the following command:
> ssh-copy-id -i /root/.ssh/id_rsa.pub root@<enterprise search="" node="">
c. Validate the root passwordless SSH connection to the Microservices Tier node with the following command:
> ssh root@<enterprise search="" node=""> hostname
A non-root user with sudo privileges can be set up for passwordless SSH in the same manner.
2.3) Installing Watson Knowledge Catalog
Although WKC is available for installation in 11.7.1.0, fix packs after 11.7.1.0 require it to be uninstalled. Hence, do not attempt to install WKC.
Watson Knowledge Catalog is available in two plans, Lite and Professional.
• Free for IBM InfoSphere Information Server customers
• Limited to 1 catalog
• Unlimited catalog users
• Unlimited assets in catalog
• Unlimited business glossary terms
• Connectivity is limited to Information Governance Catalog cataloged sources only
• Unlimited catalogs
• Unlimited catalog users
• Unlimited assets in catalog
• Unlimited business glossary terms
• Unlimited policy enforcement
• Connectivity to the application
• Advanced lineage functionality
• Industry Accelerators
• Partner Integrations
3) Downloads
3.1) If you are installing or upgrading the Microservices tier, you can run the Microservices tier pre-requirements verification script to verify that your system meets the requirements for usage as the Microservices tier of IBM InfoSphere Information Server 11.7.1.0. Information on downloading the script from IBM Fix Central, and usage of the script can be found in technote.
3.2) Update the Update Installer to the latest
3.2.1) On the Information Server host, update to an appropriate version of the Update Installer.
For Windows installations, download Update Installer 11.7.1.116 or later. Do not use 11.7.1.105.
For AIX and Linux, you can use Update Installer 11.7.1.116 or later.
3.2.2) Instructions to update the Update Installer.
See section “Installing a new version of the Update Installer before installing an update, fix, or patch” for information on extracting the new Update Installer and running updateImage.sh.
If you used the default directory for Information Server, the Update Installer installs in /opt/IBM/InformationServer/Updates/bin.
3.3) You must download the following images from IBM Fix Central and Passport Advantage depending on your installation choices.
For details on locating the images see http://www.ibm.com/support/docview.wss?uid=ibm10878310
3.3.1) On the Information Server host, download and extract the Information Server 11.7.1.0 ispkg image from IBM Fix Central:
For example, modpack_IS1171_aix64_11700-11702.ispkg
Note that umask must be set to 022 before extracting the image.
3.3.2) On the Microservices tier, download IBM Information Server Enterprise Search v11.7.1 for Linux from Passport Advantage. Do not extract the file.
For example, is-enterprise-search-11.7.1.tar.gz
3.3.3) If you are installing Watson Knowledge Catalog, on the Microservices tier, download the Watson Knowledge Catalog Lite image from Passport Advantage. Do not extract the file.
For example, WKC-lite-11.7.1.tar.gz
1. Watson Knowledge Catalog Professional image to the Microservices tier
For example, WKC-pro-11.7.1.tar.gz
2. Watson Knowledge Catalog Professional Bundle Spec File (IS_V1171_WKC_Pro_bundle_spec.zip) to the Information Server host
The Watson Knowledge Catalog Professional Bundle Spec File must be unpacked into the folder:
<Information Server install location>/_uninstall
> unzip -d /opt/IBM/InformationServer/_uninstall IS_V1171_WKC_Pro_bundle_spec.zip
You must have a directory structure …/_uninstall/ProductBundles/WKCPro/…
4) Installation scenarios on pre-11.7.1 systems
You must address "Known issues while installing or upgrading Information Server to version 11.7.1.0" before the installation.
Ensure that the password specified for your WebSphere Application Server administrator contains acceptable characters. See Naming restrictions for user IDs and passwords for details.
The following sections cover various install scenarios:
5) Post upgrade actions
The following components need post upgrade actions
4.1) Instructions for upgrading Information Server 11.7.0.x without Enterprise Search
Note: If you use Oracle for the XMETA repository and you are adding a Microservices tier, follow the instructions to update the schema.
4.1.1) Upgrade using GUI mode of the Update Installer
4.1.1.1) Login to the Information Server host. Change directory to <IS_HOME>/Updates/bin
For example, cd /opt/IBM/InformationServer/Updates/bin
4.1.1.2) Verify that the Update Installer version is 11.7.1.025 or later (do not use 11.7.1.095, and additionally, on Windows, do not use 11.7.1.105):
./installUpdates -version
4.1.1.3) Initiate the Fix Pack install with the following command:
./installUpdates
This command launches the Update Installer in GUI mode.
4.1.1.4) Provide information as required in each panel to complete the installation.
Click Login.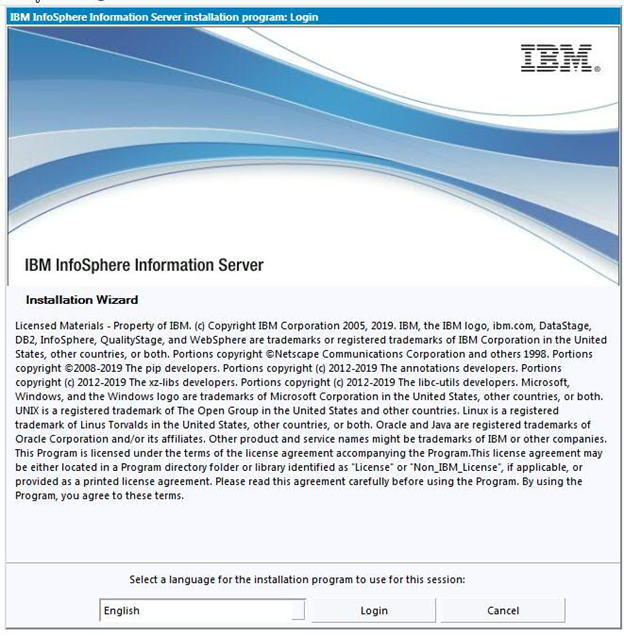
Click Next.
4.1.1.5) The Update Installer displays the Information Server installation directory.
Click Next.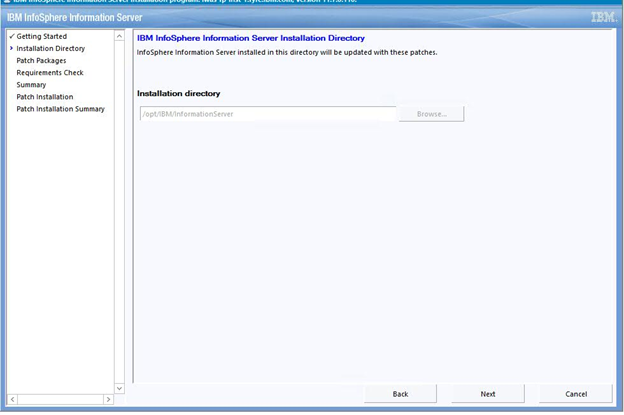
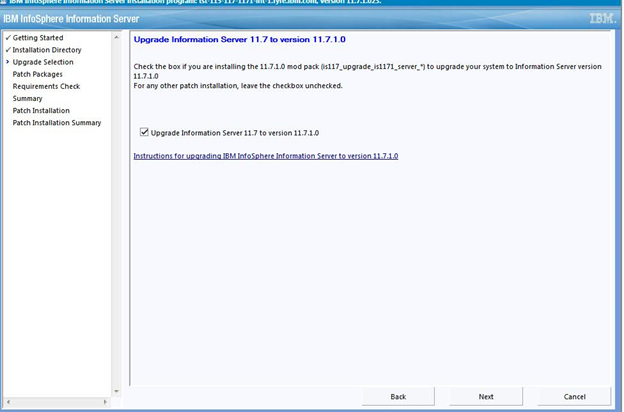
4.1.1.6) Select the checkbox to upgrade to 11.7.1.0
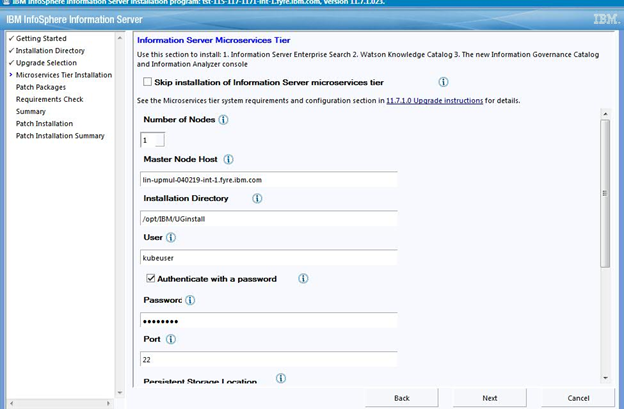
4.1.1.7) In this step, you choose whether to install the Microservices tier and Watson Knowledge Catalog.
NOTE:
Although WKC is available for installation in 11.7.1.0, fix packs after 11.7.1.0 require it to be uninstalled. Hence, do not attempt to install WKC.
4.1.1.7.1) If you do not want to install the Microservices tier and Watson Knowledge Catalog check the "Skip installation of Information Server microservices tier upgrade" checkbox.
Click Next.
Skip forward to step 4.1.1.8.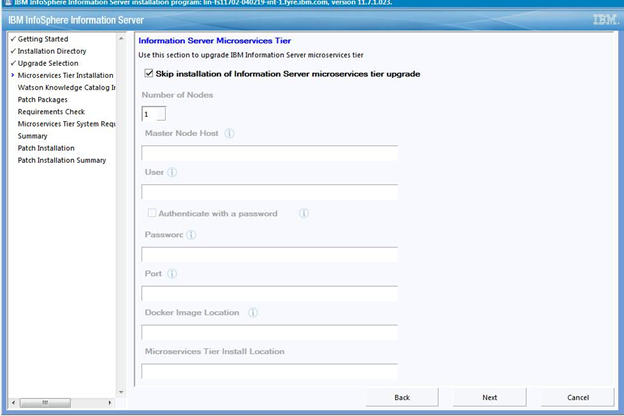
4.1.1.7.2) To install the Microservices tier
a. Deselect the "Skip installation of Information Server microservices tier upgrade" checkbox.
b. For a single node setup, enter 1 for the Number of nodes; for multiple nodes, enter 3.
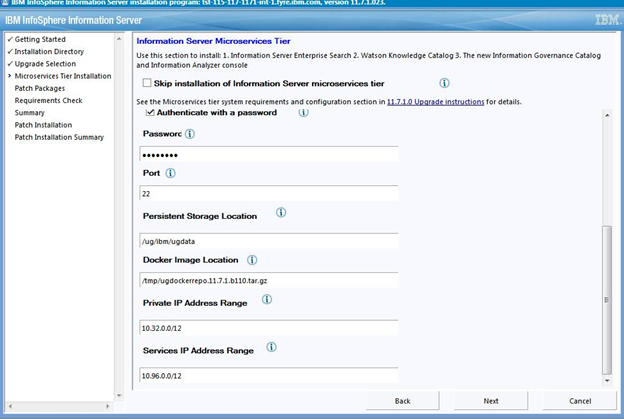
c. For details on "Authenticate with a password" see section 2.2.
d. For the Persistent Storage location, specify a directory on a local file system that has at least 300 GB of free disk space; do not specify a device location.
e. If you specify a non-root user, in /etc/security/limits.conf, the hard and soft setting of nofile and nproc for the specified user must be 10240.
Also, umask must be set to 022 in ~/.bashrc.
f. For information on configuring the Microservices tier with or without Watson Knowledge Catalog see Specifying microservices tier options, 11.7.1.
4.1.1.7.3) If you specified a multiple nodes setup, provide the host names for the worker nodes. Click Next.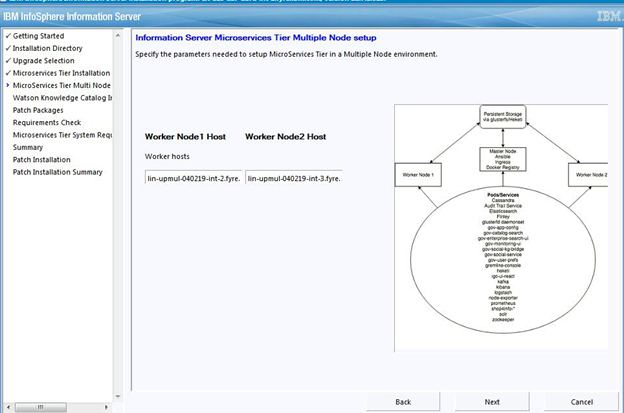
4.1.1.7.4) You can choose to install Watson Knowledge Catalog Lite plan, or the Professional plan, or neither.
See the "Installing Watson Knowledge Catalog" section for information on installing Watson Knowledge Catalog.
You can use the information from steps 3.3.3 and 3.3.4 to complete the following steps.
- To install Watson Knowledge Catalog Lite
a. select the "Install Watson Knowledge Catalog Lite" checkbox
b. provide the location of the Watson Knowledge Catalog Lite image on the Microservices tier
- To install Watson Knowledge Catalog Professional
b. provide the location of the Watson Knowledge Catalog Lite image on the Microservices tier
Note: If you have not downloaded and unpacked the Watson Knowledge Catalog Professional Bundle Spec File, the "Install Watson Knowledge Catalog Professional" checkbox is disabled.

You must accept the license and click Next.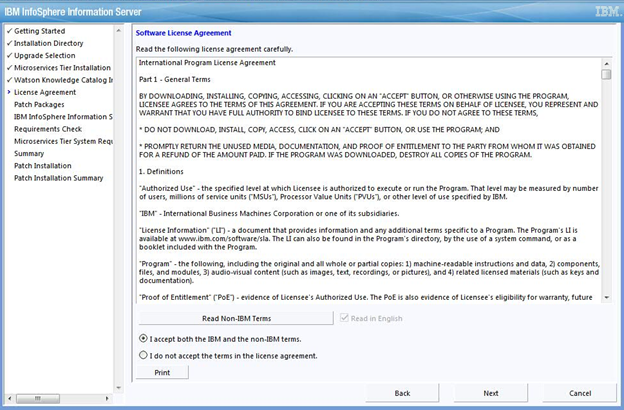
4.1.1.8) In the list of "Packages to be installed", select the 11.7.1.0 ispkg file you downloaded from IBM Fix Central.
Click Next.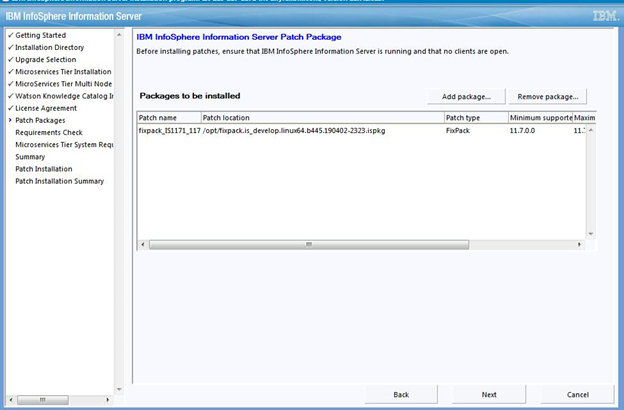
4.1.1.9) Provide the Information Server Administrator user name and password. Accept the certificate and click Next.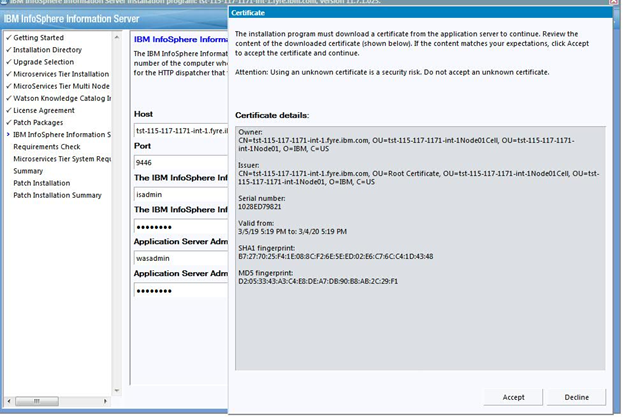
4.1.1.10) On the System Requirements Check page, confirm that all system requirements passed, and then click Next.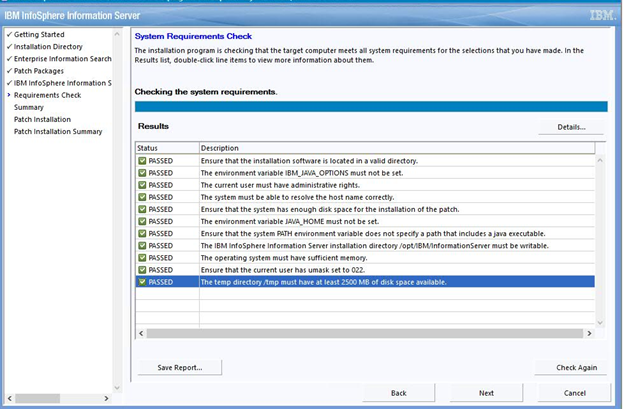
4.1.1.11) If you selected to install the Microservices tier, examine the results from system requirement checks of the Microservices tier. If all is good click Next.
Without Watson Knowledge Catalog: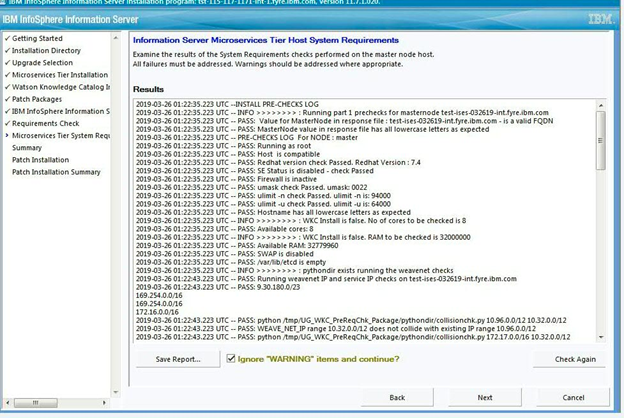
With Watson Knowledge Catalog:
4.1.1.12) Review the Preinstallation Summary and click the Install button to start the installation.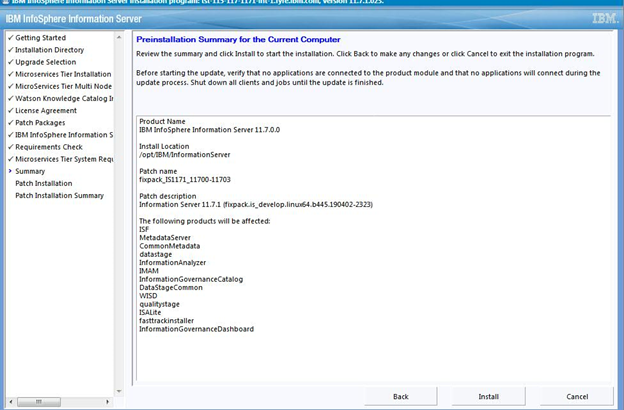
4.1.1.13) Click the Finish button after the installation completes.
4.1.1.14) Click “Advanced” followed by "Accept the Risk and Continue".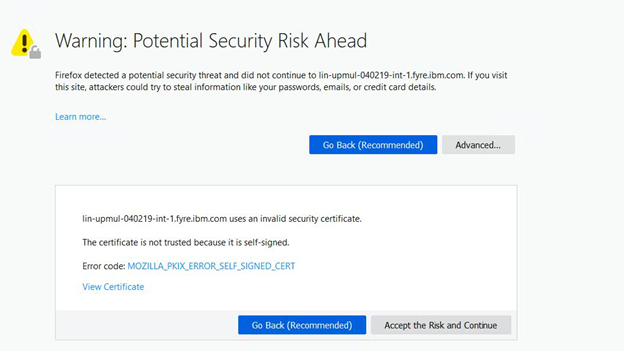
4.1.1.15) The Launchpad is displayed.
4.1.1.15.1) If the Microservices tier was not installed, the Information Server Launchpad is displayed.
4.1.1.15.2) If the Microservices tier was installed without Watson Knowledge Catalog, the Information Server (Microservices) Launchpad is displayed.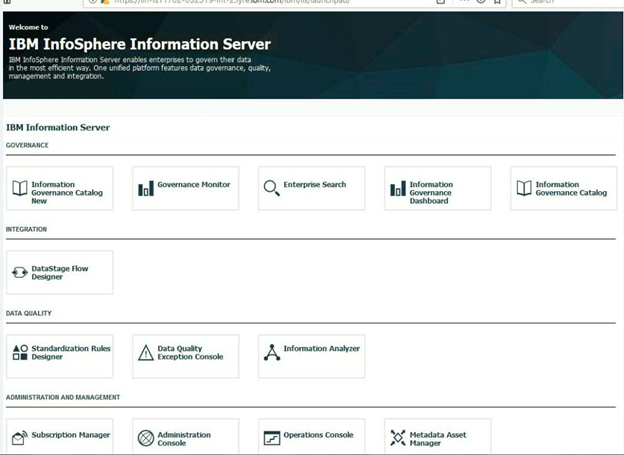
4.1.1.15.3) If the Microservices tier was installed with Watson Knowledge Catalog, the Information Server (Microservices) Launchpad, including an icon for Watson Knowledge Catalog, is displayed.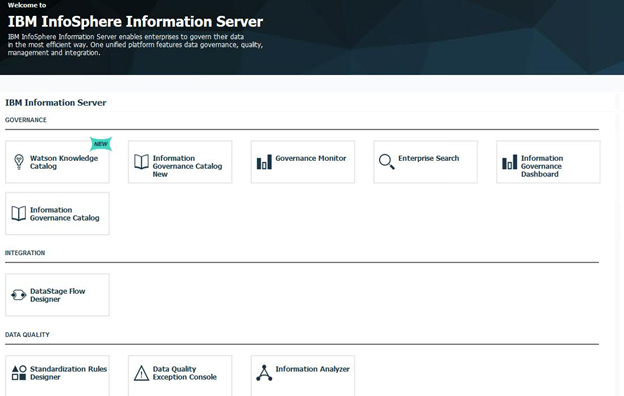
4.1.2) Upgrade using Console mode of the Update Installer on an 11.7.0.x system without Enterprise Search
4.1.2.1) Login to the Information Server host. Change directory to <IS_HOME>/Updates/bin
For example, cd /opt/IBM/InformationServer/Updates/bin
4.1.2.2) Before running the Update Installer, check the System requirements and make sure that your system meets the requirements.
4.1.2.3) Verify that the Update Installer version is 11.7.1.025 or later (do not use 11.7.1.095):
./installUpdates -version
See step 3.2 if you need to update the Update Installer.
4.1.2.4) Run the Update Installer to upgrade Information Server.
For example, installUpdates -i /opt/IBM/InformationServer/ -p /opt/Builds/ISPKG/<ispkg_file_name>.ispkg -verbose -console -properties <property_file_name>
where
<ispkg_file_name> is the ispkg file you downloaded from IBM Fix Central
<property_file_name> is the name of the property file wherein you specify values for the various properties that control the install including whether the Microservices tier is installed, the number of nodes if installed, and whether Watson Knowledge Catalog is installed.
If you are not installing the Microservices tier, a property file is not needed.
The Update Installer prompts you for the Information Server administrator user ID and password, and the WebSphere Administrator user ID and password.
Sample property file
4.2) Instructions for upgrading Information Server 11.7.0.0 with Enterprise Search
Note: You must first upgrade Information Server and Enterprise Search to 11.7.0.1 or 11.7.0.2 before upgrading to 11.7.1.0.
To upgrade to 11.7.0.1, see the 11.7.0.1 upgrade technote.
To upgrade to 11.7.0.2, see the 11.7.0.2 upgrade technote.
After upgrading to 11.7.0.1 or 11.7.0.2, see section 4.3 of this document for the steps to upgrade to 11.7.1.0.
4.3) Instructions for upgrading Information Server 11.7.0.1 or 11.7.0.2 with Enterprise Search
Note: If you currently have 11.7.0.1 installed, see technote related to concerns with the time taken to upgrade to 11.7.1.0 when you have a large Enterprise Search data volume. If you choose to do the steps (in that technote) before the install, you must also do the listed post-install steps. If you don't do the preinstall steps, then the post-install steps are optional.
4.3.1) Upgrade using GUI mode of the Update Installer
4.3.1.1) Login to the Information Server host. Change directory to <IS_HOME>/Updates/bin
For example, cd /opt/IBM/InformationServer/Updates/bin
4.3.1.2) Verify that the Update Installer version is 11.7.1.025 or later (do not use 11.7.1.095):
./installUpdates -version
See step 3.2 if you need to update the Update Installer.
4.3.1.3) Initiate the Fix Pack install with the following command
./installUpdates
This command launches the Update Installer in GUI mode.
4.3.1.4) Provide information as required in each panel to complete the install.
Click Login.
4.3.1.5) Click Next.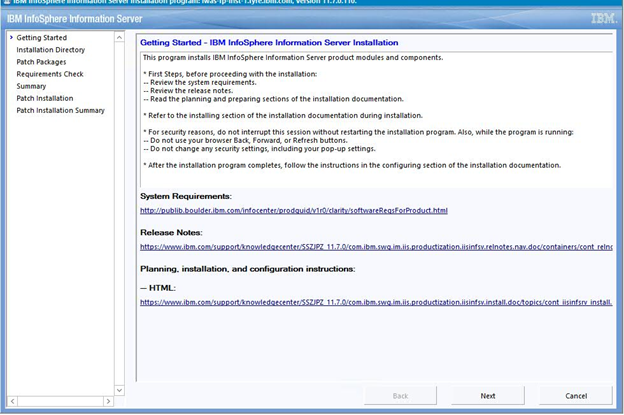
4.3.1.6) The Update Installer displays the Information Server installation directory. Click Next.
4.3.1.7) Select the checkbox to upgrade to 11.7.1.0
4.3.1.8) In this step, choose whether to upgrade the Microservices tier and install Watson Knowledge Catalog.
NOTE:
Although WKC is available for installation in 11.7.1.0, fix packs after 11.7.1.0 require it to be uninstalled. Hence, do not attempt to install WKC.
4.3.1.8.1) If you do not want to upgrade the Microservices tier, check the "Skip the Information Server Enterprise Search" checkbox.
Click Next.
Skip forward to step 4.3.1.9.
4.3.1.8.2) To upgrade the Microservices tier
a. Deselect the "Skip the Information Server microservices tier upgrade" checkbox.
b. For a single node setup, enter 1 for the Number of nodes; for multiple nodes, enter 3.
c. For details on "Authenticate with a password" see section 2.2.
d. For the Persistent Storage location, specify a directory on a local file system that has at least 300 GB of free disk space; do not specify a device location.
e. If you specify a non-root user, in /etc/security/limits.conf, the hard and soft setting of nofile and nproc for the specified user must be 10240.
Also, umask must be set to 022 in ~/.bashrc.
f. For information on configuring the Microservices tier with or without Watson Knowledge Catalog see Specifying microservices tier options, 11.7.1.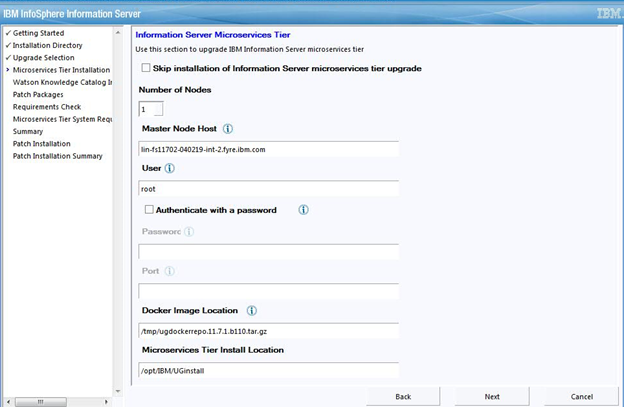
4.3.1.8.3) If you specified a multiple nodes setup, provide the host names for the worker nodes. Click Next.
4.3.1.8.4) You can choose to install Watson Knowledge Catalog Lite plan, or the Professional plan, or neither.
See the "Installing Watson Knowledge Catalog" section for information on installing Watson Knowledge Catalog.
You can use the information from steps 3.3.3 and 3.3.4 to complete the following steps.
- To install Watson Knowledge Catalog Lite
a. select the "Install Watson Knowledge Catalog Lite" checkbox
b. provide the location of the Watson Knowledge Catalog Lite image on the Microservices tier
- To install Watson Knowledge Catalog Professional
b. provide the location of the Watson Knowledge Catalog Lite image on the Microservices tier
Note: If you have not downloaded and unpacked the Watson Knowledge Catalog Professional Bundle Spec File, the "Install Watson Knowledge Catalog Professional" checkbox is disabled. See step 3.3.4 for actions needed.
4.3.1.9) In the list of "Packages to be installed", select the 11.7.1.0 ispkg file you downloaded from IBM Fix Central.
For example, fixpack.is_11_7_1_0.linux64.QA11.180722.ispkg
Click Next.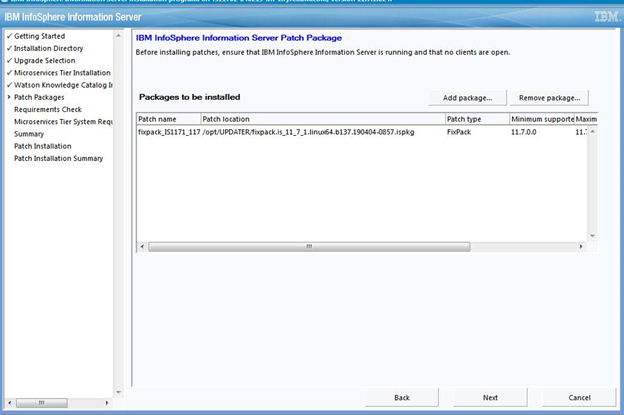
4.3.1.10) Provide the Information Server Administrator user name and password, and the WebSphere Application Server Administrator user name and password.
Accept the certificate and click Next.
4.3.1.11) On the System Requirements Check page, confirm that all system requirements passed, and then click Next.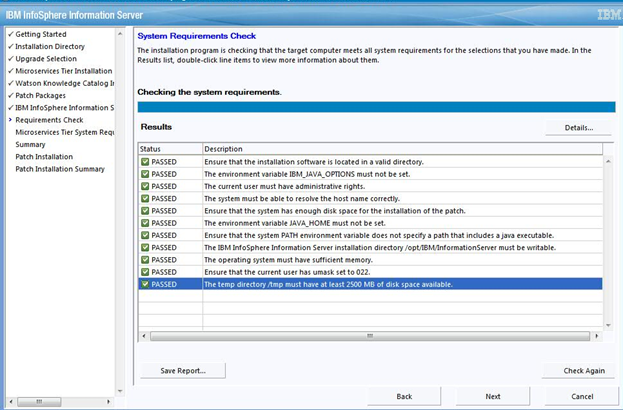
4.3.1.12) If you selected to upgrade the Microservices tier, examine the results from system requirement checks of the Microservices tier. If all is good click Next.
4.3.1.13) Review the Preinstallation Summary and click the Install button to start the installation.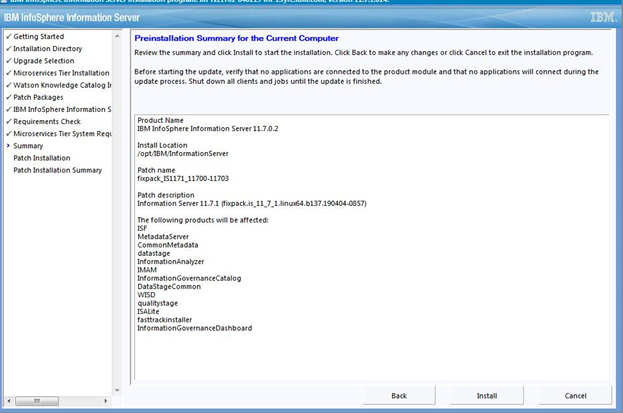
4.3.1.14) Click the Finish button after the installation completes.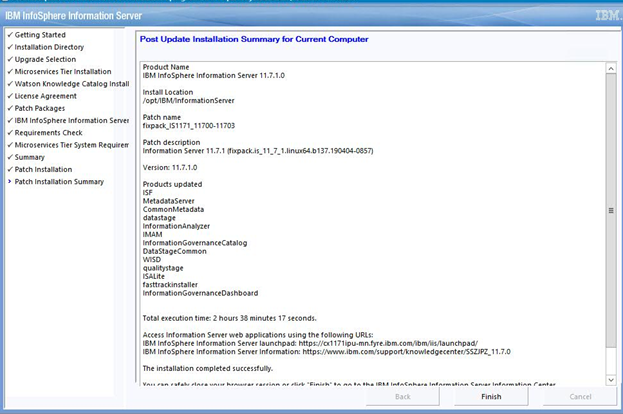
4.3.1.15) Click “Advanced” and then click "Add Exception".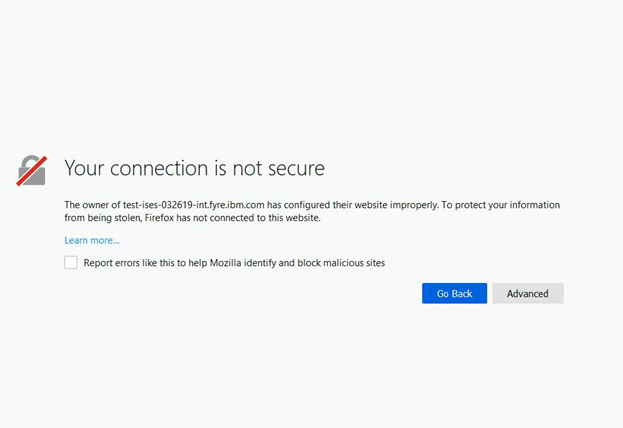
4.3.1.16) Click “Confirm Security Exception”.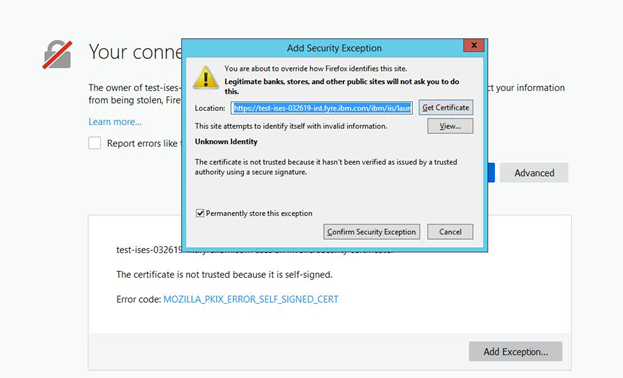
4.3.1.17) The Information Server (Microservices) Launchpad is displayed.
If Watson Knowledge Catalog was not installed: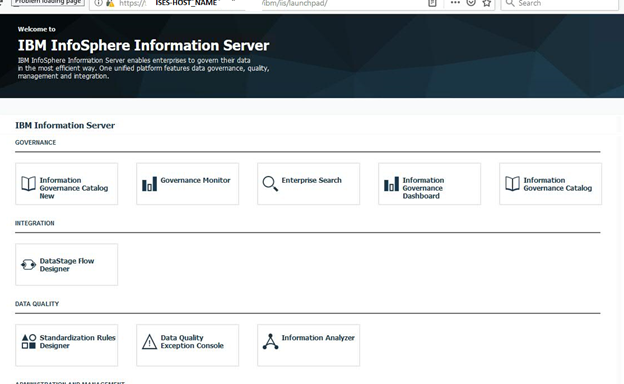
If Watson Knowledge Catalog was installed, the icon for Watson Knowledge Catalog is displayed:
4.3.1.18) See technote for issues you might need to address after the install is completed.
Also, if you upgraded 11.7.0.1 to 11.7.1.0, see the "After upgrade" section in technote. If you chose to do the preinstall steps, you must also do the listed post-install steps (otherwise the postinstall steps are optional).
4.3.2) Upgrade using Console mode (Silent Install) of the Update Installer on an 11.7.0.1 or 11.7.0.2 system with Enterprise Search
4.3.2.1) Login to the Information Server host. Change directory to <IS_HOME>/Updates/bin
For example, cd /opt/IBM/InformationServer/Updates/bin
4.3.2.2) Before running the Update Installer, check the system requirements and make sure that your system meets the requirements.
4.3.2.3) Verify that the Update Installer version is 11.7.1.025 or later (do not use 11.7.1.095, and additionally, on Windows, do not use 11.7.1.105):
./installUpdates -version
See step 3.2 if you need to update the Update Installer.
4.3.2.4) Run the Update Installer to upgrade Information Server.
For example, installUpdates -i /opt/IBM/InformationServer/ -p /opt/Builds/ISPKG/<ispkg_file_name>.ispkg -verbose -console -properties <property_file_name>
where
<ispkg_file_name> is the ispkg file you downloaded from IBM Fix Central
<property_file_name> is the name of the property file wherein you specify values for the various properties that control the install including whether the Microservices tier is installed, the number of nodes if installed, and whether Watson Knowledge Catalog is installed.
Sample property file
The Update Installer prompts you for the Information Server administrator user ID and password, and the WebSphere Administrator user ID and password.
4.3.2.5) See technote for issues you might need to address after the install is completed.
Also, if you upgraded 11.7.0.1 to 11.7.1.0, see the "After upgrade" section in technote. If you choose to do the preinstall steps, you must also do the listed post-install steps (otherwise the postinstall steps are optional).
5.1) Post-upgrade steps for DataStage Flow Designer
If you upgraded Information Server 11.7.0.0 to 11.7.1.0, please refer to this technote for postinstallation instructions
https://www-01.ibm.com/support/docview.wss?uid=ibm10740327
If you upgraded Information Server 11.7.0.1 or later to 11.7.1.0, you can disregard this technote.
Was this topic helpful?
Document Information
Modified date:
28 April 2023
UID
ibm10876256