 IBM InfoSphere Data Click, Version 11.3.1
Making assets available for use in activities
You must import metadata for all sources and targets that you want to make available for InfoSphere® Data Click activities. One reason that you import the metadata is to ensure that connection information is available during the processing of activities.
Before you begin
Before you can successfully import metadata into the metadata repository by using InfoSphere Metadata Asset Manager, you must set up connections to all sources and targets that you want to use in InfoSphere Data Click.
- ODBC connector
- JDBC connector
- DB2® connector
- Oracle connector
- Amazon S3 connector
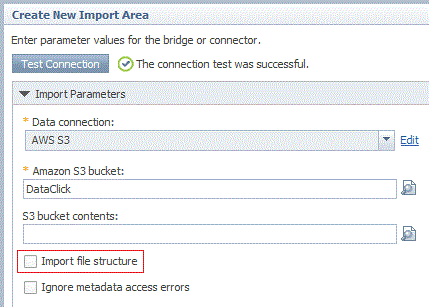
Before you can move data from Amazon S3 by using InfoSphere Data Click, you must create an .osh schema file or specify the format of the file in the first row of each file that you want to move before you import the Amazon S3 metadata into the metadata repository by using InfoSphere Metadata Asset Manager. It is recommended that you create an .osh schema file because it provides more comprehensive details about the structure of the data in your files. If you used the Amazon S3 file as a target in a previous InfoSphere Data Click activity, then an .osh schema file was automatically created for the file by InfoSphere Data Click, so you do not need to create one.
To move data from Amazon S3, you must also verify that the character set of the Amazon S3 files matches the encoding properties that are set for the InfoSphere DataStage® project that you are using in your activity. For example, if the character set of the files in Amazon S3 is set to UTF-8, then the encoding for InfoSphere DataStage should also be set to UTF-8. You must update the APT_IMPEMP_CHARSET property in the InfoSphere DataStage project used for running the activity.
If you are planning on using InfoSphere Data Click to move data into a relational database that connects to InfoSphere Data Click by using the JDBC connector, then you must verify that the relational database has the same NLS encoding as the local operating system.
If you are planning on using InfoSphere Data Click to move data into a Hadoop Distributed File System in InfoSphere BigInsights® on a Linux computer, refer to the snycbi command for information on configuring your computer. See Configuring access to Hive tables (AIX only) and Configuring access to HDFS (AIX only) for information about setting up connections to InfoSphere BigInsights on Windows and AIX® computers.
To import metadata into the metadata repository through the InfoSphere Metadata Asset Manager, you must have the Common Metadata Importer role.
About this task
The following task describes how to import the metadata by using InfoSphere Metadata Asset Manager.
You must import metadata for all sources and targets that you want to use in InfoSphere Data Click activities, as well as every asset that you want to use in the Information Governance Catalog. For every distributed file system that you import by using the HDFS bridge, you must import at least one associated Hive table. The distributed file system and the Hive table become associated when you create a separate data connection to each one, and you specify the same host name in the parameters. For example, in the data connection that connects to the distributed file system by using the HDFS connector, you might specify 9.182.77.14 in the Host field. When you import the associated Hive table, you must specify 9.182.77.14 as part of the URL field in the data connection parameters. For example, jdbc:bigsql://9.182.77.14:7052/default.
To ensure that you can view lineage for your jobs in Information Governance Catalog, enable operational metadata.
Procedure
Results
| In this case | Take this action |
|---|---|
| If the analysis shows problems that you must fix | The Staged Imports tab is displayed. Review the analysis results. If necessary, reimport the staged event. |
| If your administration settings require a preview | The View Share Preview screen is displayed. Preview the result of sharing the import. |
| If your administration settings do not require a preview | The assets are shared to the metadata repository. The Shared Imports tab is displayed. You can browse the assets on the Repository Management tab and work with them in other suite tools. |

 Last updated: 2015-10-21
 PDF version of this information: