Creating roles
Roles provide a way to govern the functions users can access. They are configured in the web.xml and userRoles.properties files within the RDMClientEAR. Roles are given authorization for functions within InfoSphere® MDM Reference Data Management Hub within the acl.properties file.
- Prerequisites
- Creating groups in the WebSphere Application Server repository
- Creating custom groups in InfoSphere MDM Reference Data Management Hub
- Creating and assigning users
About this task
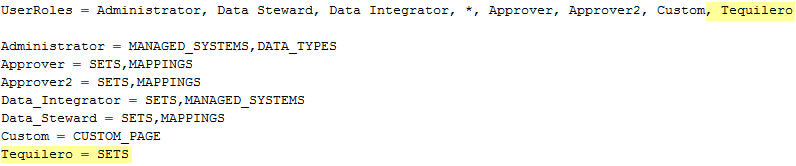
- Steward: access to sets and mappings
- Approver: access to sets and mappings
- Approver 2: access to sets and mappings
- Integrator: access to sets and managed systems
- Administrator: access to managed systems and data types
- Custom: access to the custom page
Procedure
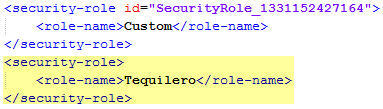
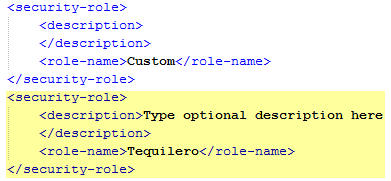
- Open the RDMClientEAR.ear/META-INF/application.xml file
in a plain text editor to add the security-role.
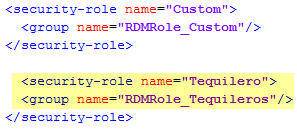
- Open the RDMClientEAR.ear/META-INF/ibm-application-bnd.xml file
in a plain text editor to add the role mapping.
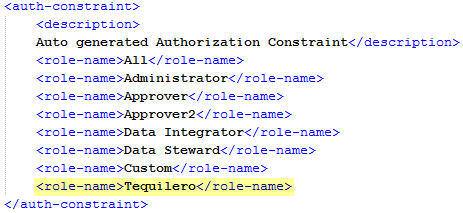
- Open the RDMClientEAR.ear/RDMClientWeb.war/WEB-INF/web.xml file
in a plain text or XML editor to add security constraints for the
role.
- Open the RDMClientEAR.ear/RDMClientWeb.war/WEB-INF/web.xml file
in a plain text or XML editor to add the role.
- Open the RDMClientEAR.ear/RestAPI.war/WEB-INF/web.xml file
in a plain text or XML editor to add the role. Note: It is not necessary to add the security constraint to the RestAPI.war/WEB-INF/web.xml file as you did in the RDMClientWeb.war/WEB-INF/web.xml file.
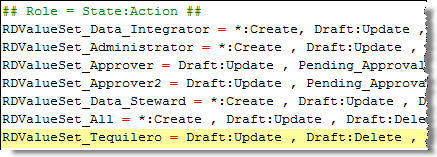
- For each new role, add a line to the Role = State:Action
section by using the format: Role = State:Action.
Multiple state:action pairs are separated by a comma. States are defined
in the table CDRDSTATETP while actions are listed in CDRDACTIONTP.
- Add a line that uses the format role_name = function_name.