Steps for allowing WebSphere users to renew and revoke browser certificates
Perform the following steps to set up a WebSphere SSL configuration that uses client authentication, so that users can renew and revoke browser certificates.
Before you begin
Procedure
- Create a RACF key
ring that contains the PKI Services CA certificate
for the WebSphere Control address space user ID (ASCR1 in this example):
RACDCERT ADDRING(WASKeyring.PKI) ID(ASCR1) - Add the PKI CA certificate to this key ring. The CA certificate
label ("Master PKI CA") is defined in the IKYSETUP exec.
RACDCERT ID(ASCR1) CONNECT(CERTAUTH LABEL('Master PKI CA') RING(WASKeyring.PKI)) - Create a client certificate that is signed by the PKI CA
certificate, and add this client certificate to the key ring.
RACDCERT GENCERT
   ID(ASCR1)
   SUBJECTSDN(CN('DCEIMGLX CLIENT CERT') OU('IBM'))
   WITHLABEL('pki ssl cert')
   SIGNWITH(CERTAUTH LABEL(Master PKI CA’)) TRUST
RACDCERT ID(ASCR1)
   CONNECT(ID(ASCR1) LABEL('pki ssl cert') RING(WASKeyring.PKI) USAGE(PERSONAL))
Tip: The value of SUBJECTDSN does not matter here. The labels in the two commands must be the same, but otherwise do not matter.
- Define the RACF keystore
to WebSphere. On the WebSphere administrator console, on the left
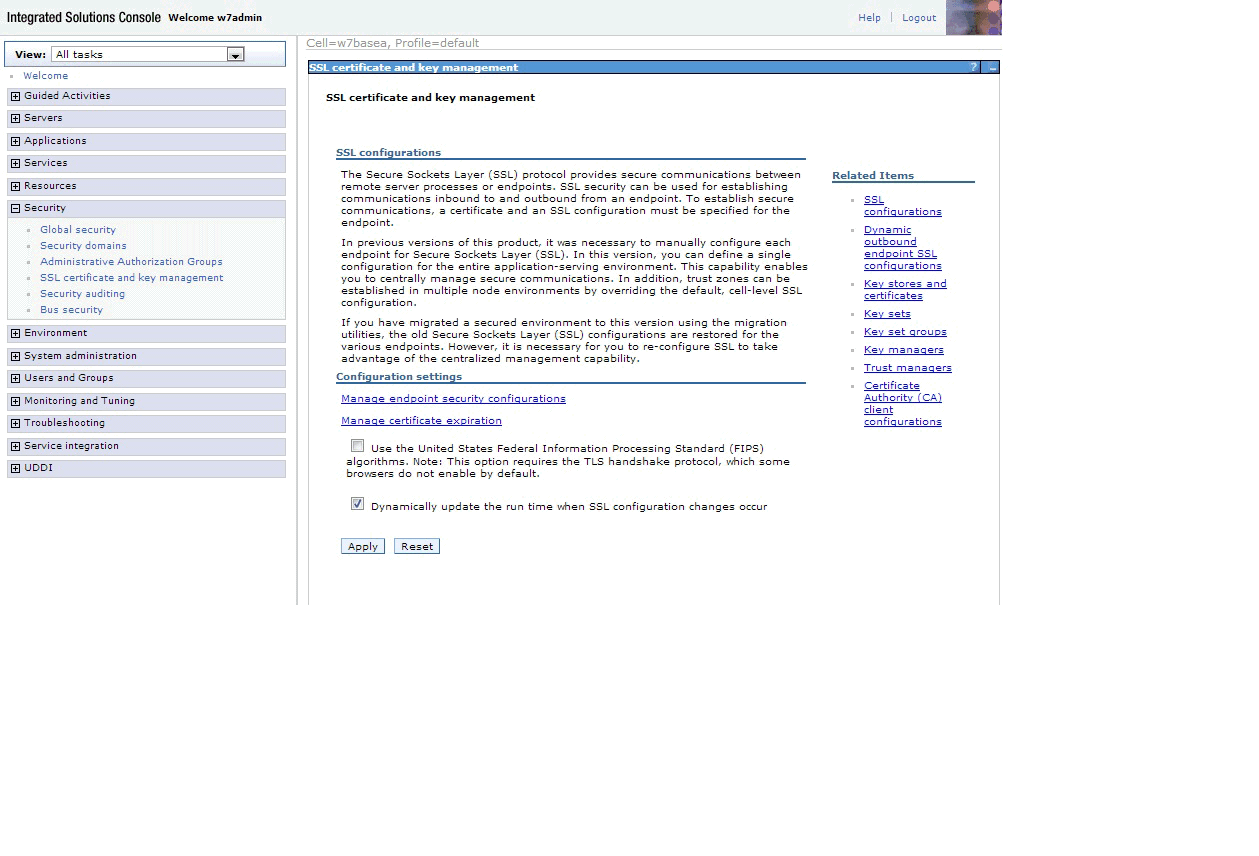
side of the page expand Security and click SSL certificate and key management. You should see a
web page that looks like Figure 1. Figure 1. WebSphere SSL certificate and key management pageClick Key stores and certificates on the right side of the page. On the next page click New to create a new keystore. On the next page, enter a name for your keystore in the Name field. In the Path field enter:
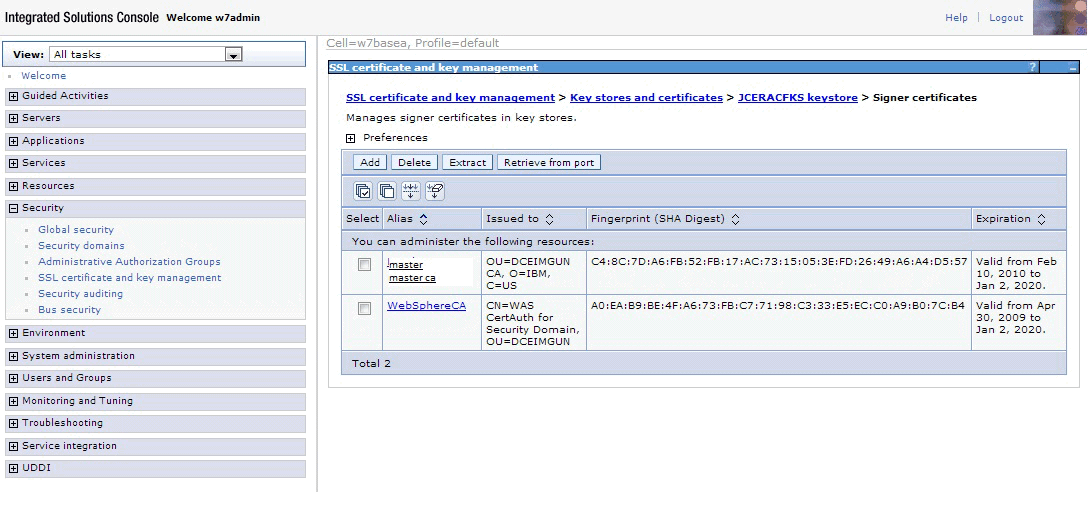
In the Password and Confirm password fields enter a password value of password. Select the Read only check box. See Figure 2safkeyring:///WASKeyring.PKIFigure 2. WebSphere page for creating a new keystoreClick OK and then Save. You should now be able to click the name of the keystore you created and view the signer certificate. See Figure 3.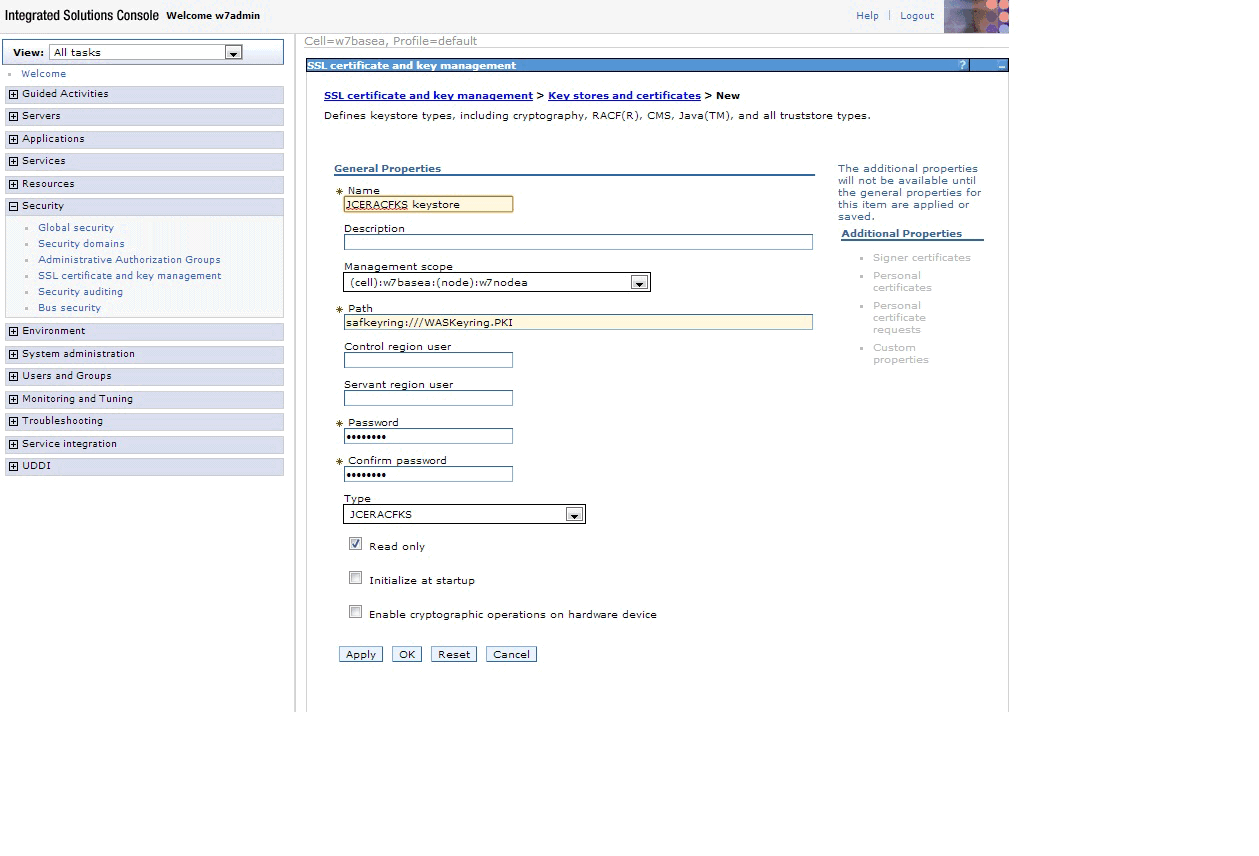 Figure 3. Viewing the signer certificate
- Create a new JSSE type SSL configuration. On the left side
of the page expand Security and click SSL certificate and key management. On the right side
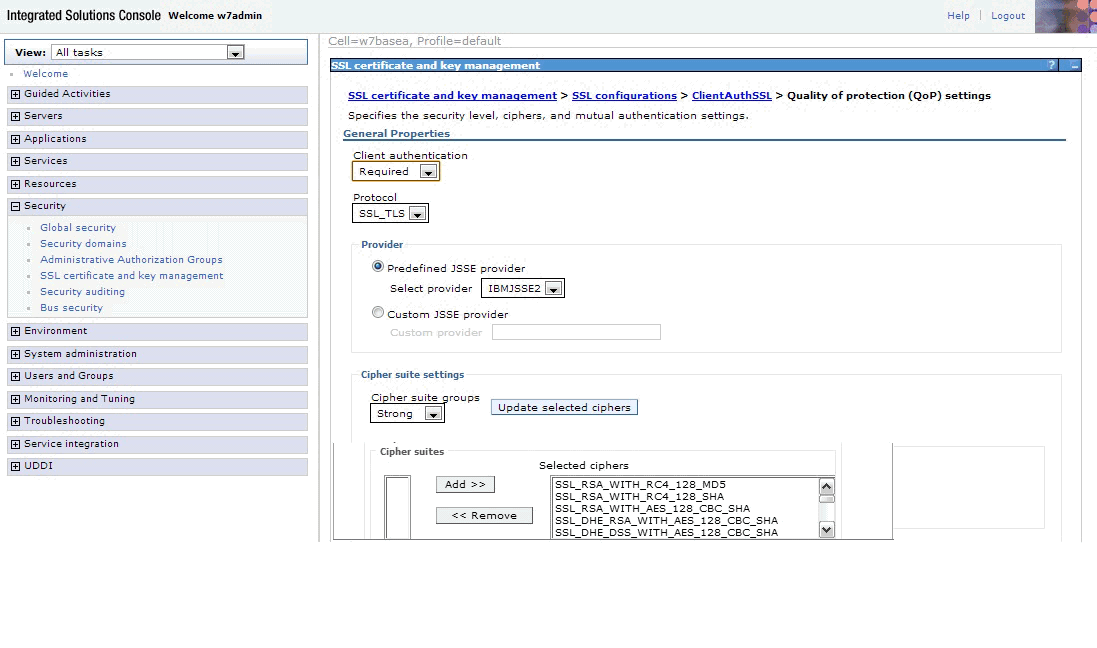
of the page click SSL configurations. (See Figure 1.) The page shown in Figure 4 is displayed. Figure 4. WebSphere new SSL configuration pageIn the Name field enter ClientAuthSSL. In the Trust store name and Keystore name fields, enter the name of the keystore that you just defined. Click Get certificate aliases to get the alias (label) of the default certificate in your key ring. This is the value for Default server certificate alias and Default client certificate alias. Click OK. The page shown in Figure 5 is displayed.
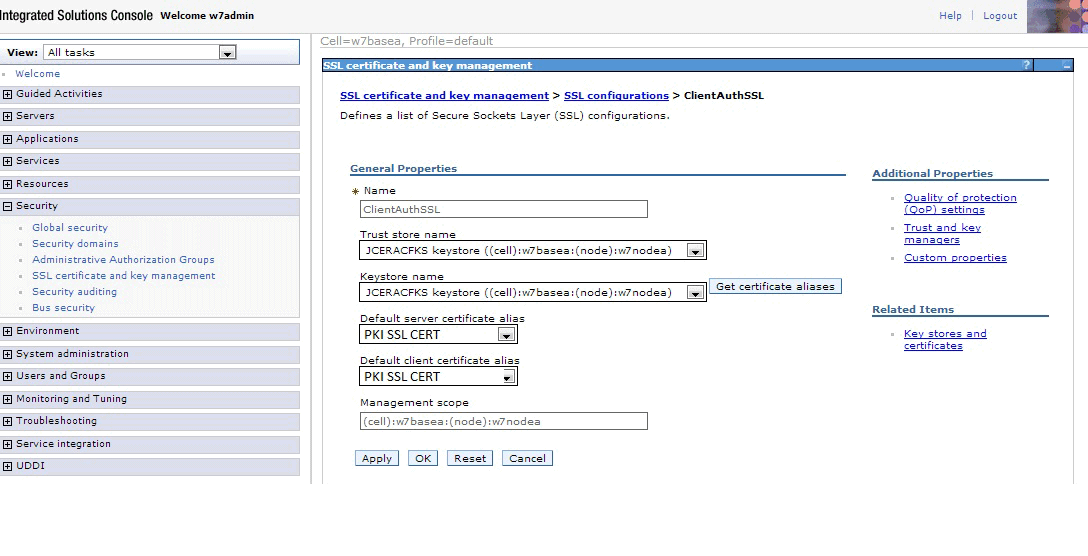 Figure 5. WebSphere quality of protection settings pageIn the Client authentication list, select Required, then click OK.
- Define a new port for your default host. On the left side
of the page, expand Environment and click Virtual Hosts. Then click default host, then click Host Aliases, then click New. On the page that results, the value 9444 in the Port field should match your client
authorization port address in the web.xml file.
See Figure 6. If you must change the authorization port address in the web.xml file, follow the instructions in Steps for creating application domains other than Application2, except in steps 3 and 4 you must find the section that looks like:
and change the 9444 to the value that you want to use.<env-entry> <env-entry-name>_PKISERV_CLIENTAUTH_PORT</env-entry-name> <env-entry-type>java.lang.String,</env-entry-type> <env-entry-value>9444</env-entry-value> </env-entry>Figure 6. Defining a new portClick OK and then Save to save this new port number.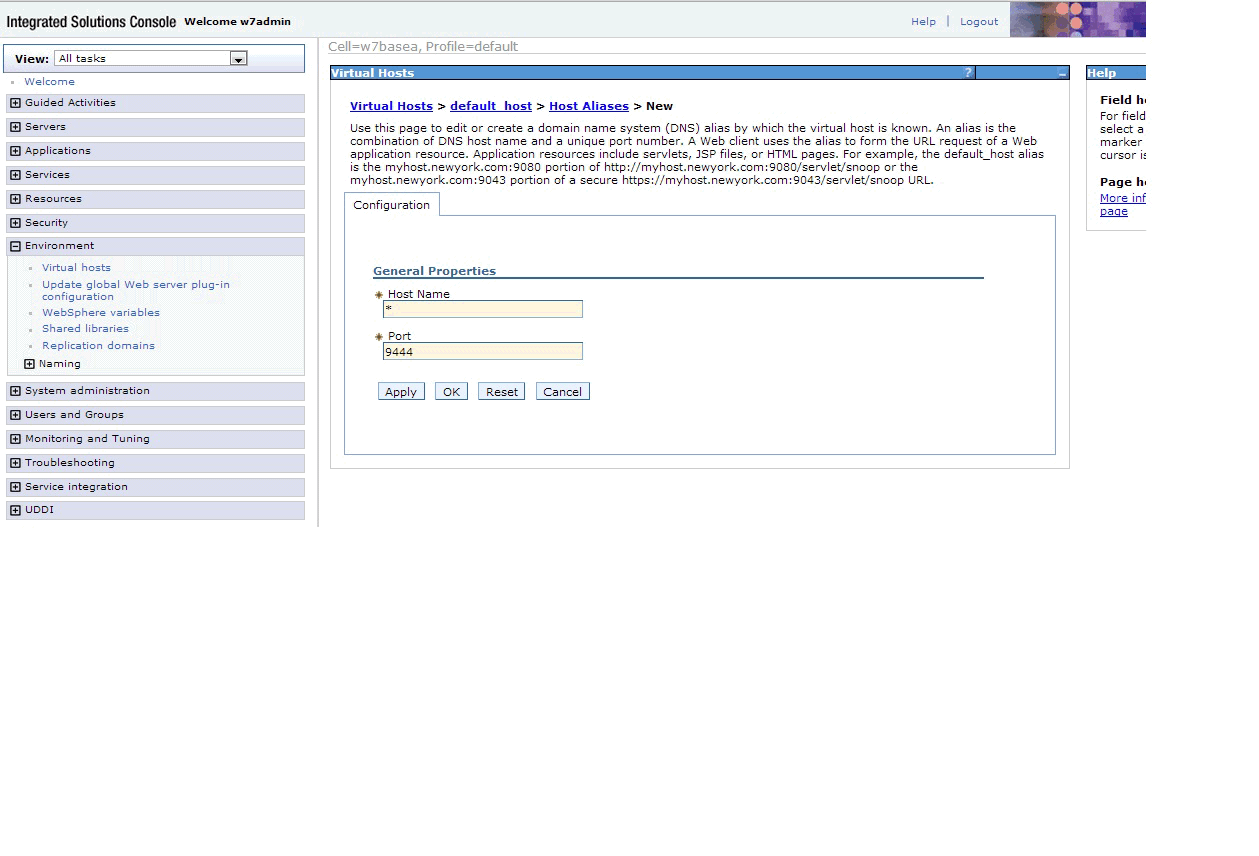
- Assign the new port number to your application server.
On the left side of the page, expand Servers and click Websphere application servers.
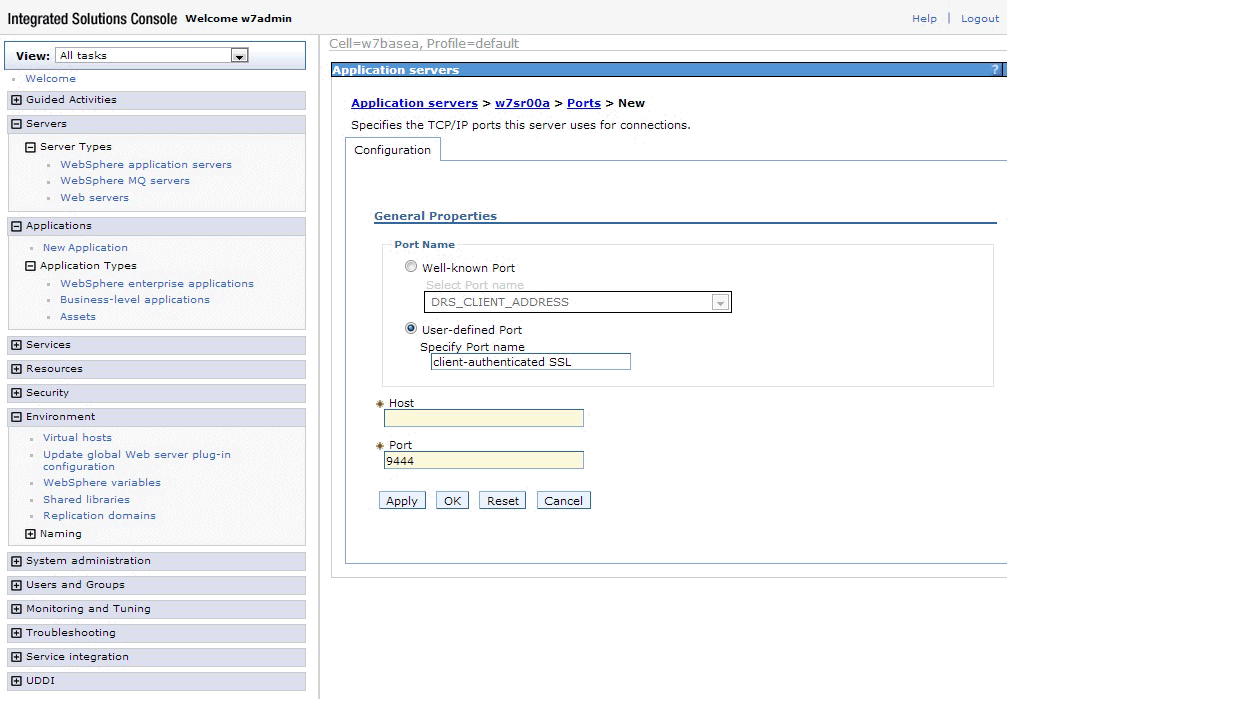
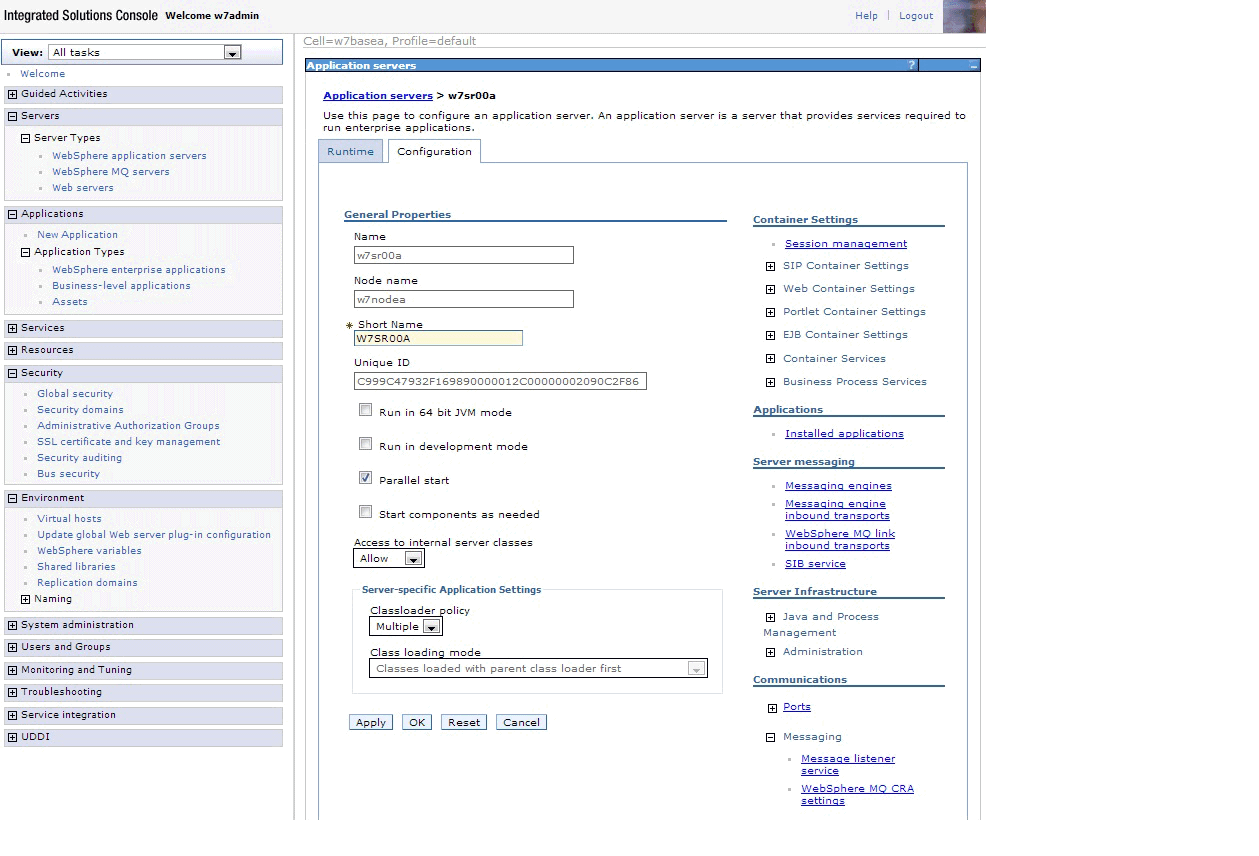
Click the name of your application server. See Figure 7. Figure 7. Assigning a port to the application serverUnder Communications expand Ports and click New. Click User-defined Port, and in the Specify Port name field enter client-authenticated SSL. In the Host field enter *. In the Port field enter 9444. See Figure 8.
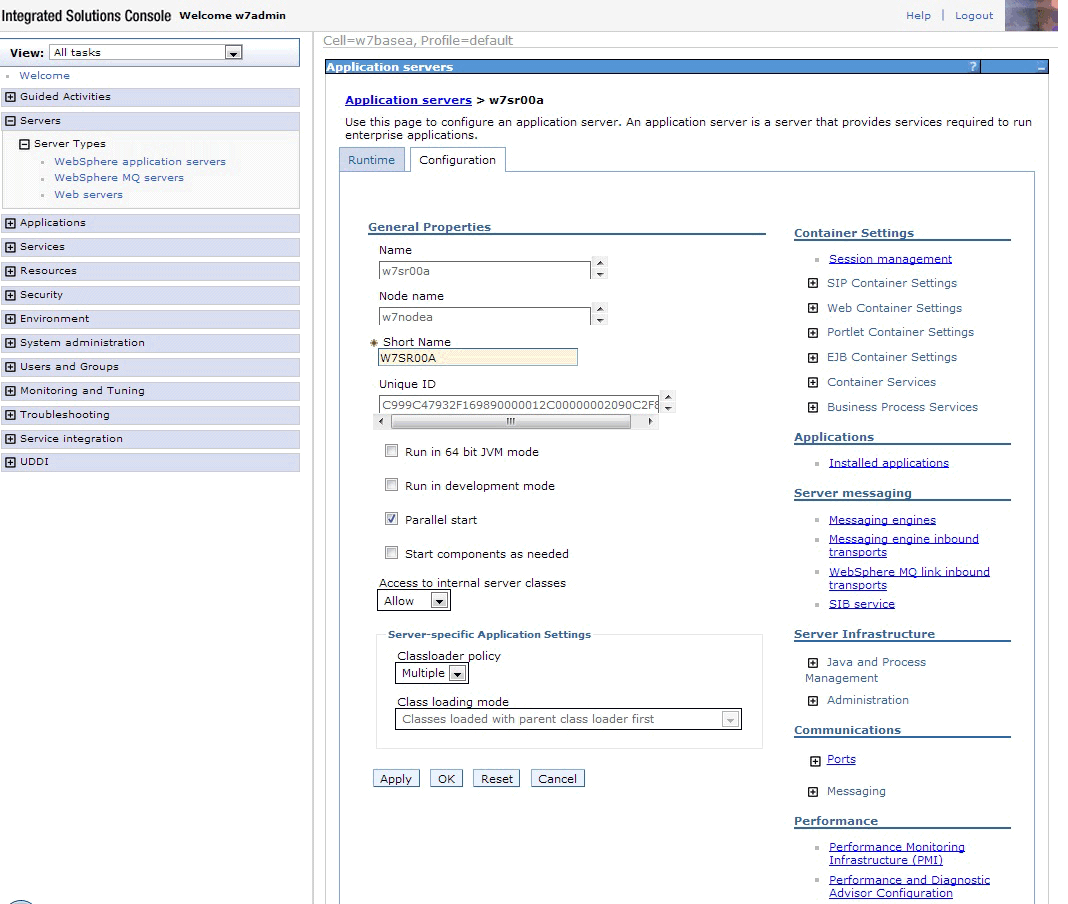 Figure 8. Assigning your new port to the application serverClick OK and Save.
- Define transport chains associated with the new port.
- On the left side of the page expand Servers and click Websphere application servers.
Click the name of your application server. Expand web container
settings. See Figure 9. Figure 9. Selecting web container transport chains
- Click web container transport chains, and then click New. You should see a page
like Figure 10. Figure 10. Selecting a transport chain template
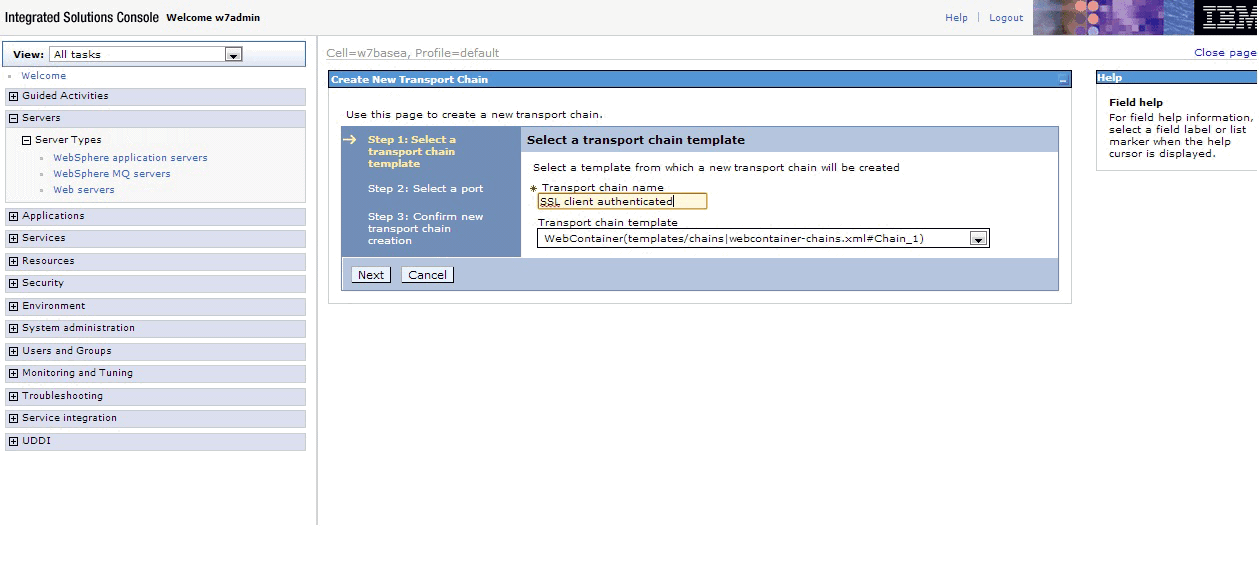
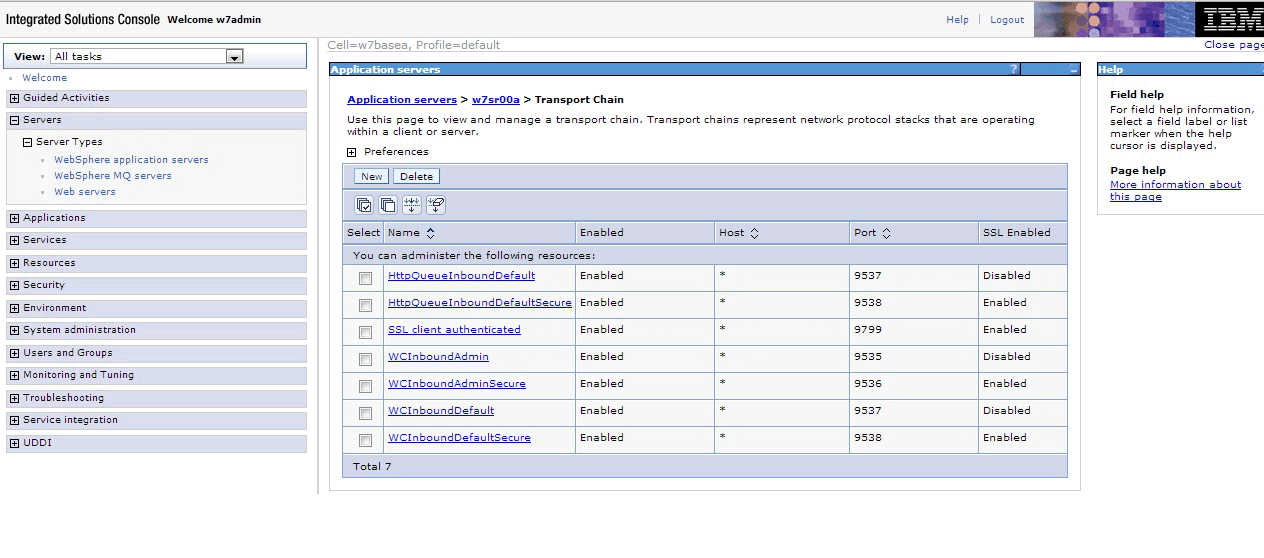
- Choose a secure transport chain template and click Next. On the next page select Use an existing
port, then click Confirm and then Save. A page opens that displays all existing transport
chains. See Figure 11. Figure 11. All existing transport chains
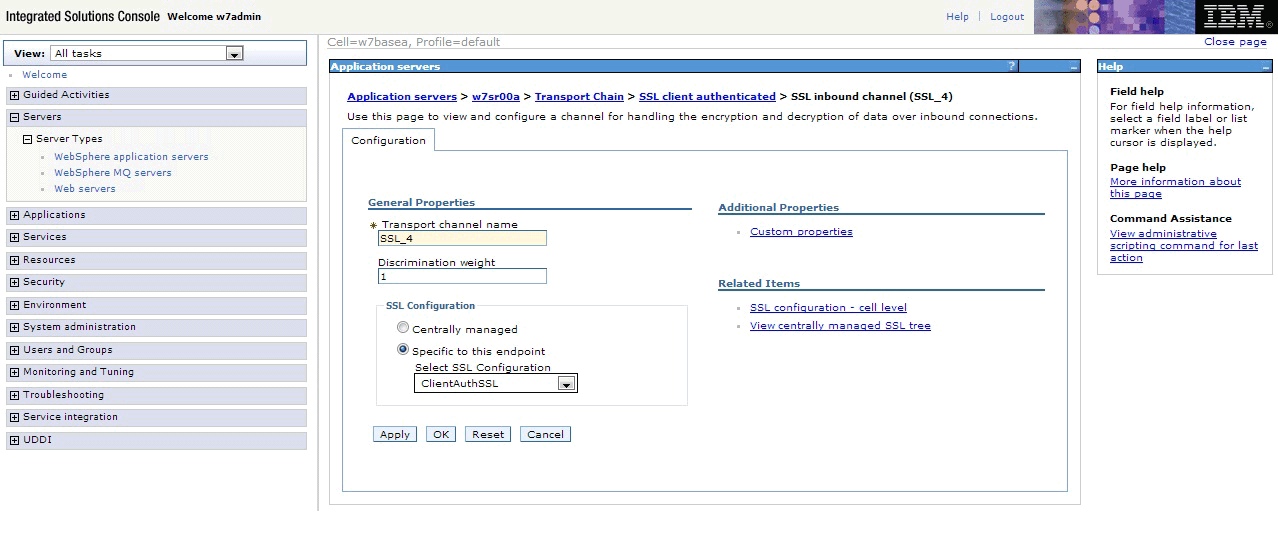
- Click the name of the chain you defined, then click SSL inbound channel. Set the SSL inbound channel properties
to use the SSL configuration you defined (which requires client authentication).
See Figure 12. Figure 12. Setting the SSL inbound channel properties
- On the left side of the page expand Servers and click Websphere application servers.
Click the name of your application server. Expand web container
settings. See Figure 9.
- Stop and restart the WebSphere server so that your changes take effect.
Results
When you are done, you set up a WebSphere SSL configuration that uses client authentication so that users can renew and revoke browser certificates.