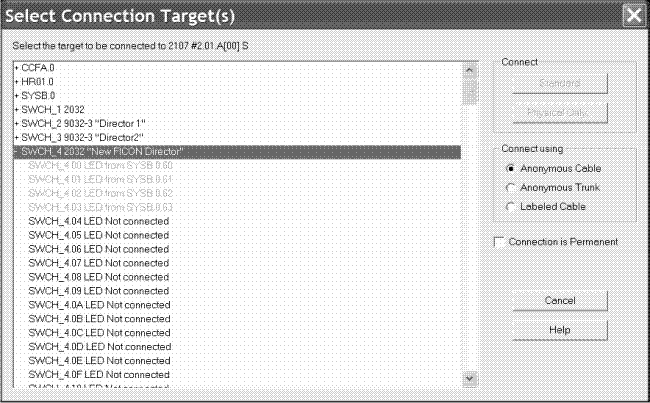
We connect a second channel interface of the new controller through a switch and on to the new CHPIDs.
- Open the Controller dialog for the new controller as before.
- Select a free channel interface and click Connect. This opens the Select Connection Target(s) dialog.
- Choose the new switch from the list and double-click it to expand
it. This lists all of the installed ports in the new switch.

- Select a port with no connection and click Standard in the Connect box. A standard connection makes the physical connection and all appropriate logical definitions, using standard values.
- The Processor and CHPID Connections dialog is opened, where
you can specify the CHPIDs to which the control unit will be defined.

- In the Processor and CHPID Connections dialog, from the
tabs first select the processor you want the control unit to connect
with. Then select the desired CHPID(s), click Add to move them
to the Connected CHPIDs list, and click OK.
The connection is now made including all definitions among the control unit, the switch ports, the CHPID and the processor. Had there been devices connected to the control unit, the definitions would also have been made between the devices and the partitions and the processor.
- You are now in the Controller dialog. Click OK on all open dialogs to close them. The connections between the controller and the switches appear on the diagram. When the controller is selected, the full connection is highlighted from the controller through the switches and the patchports, to the CHPIDs, and finally to the partitions.