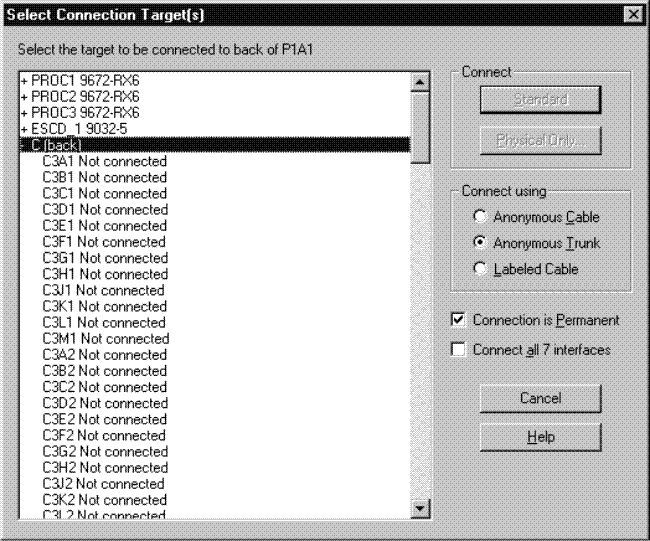
We will now connect the two cabinets back-to-back using a permanent trunk.
- Edit the processor zone cabinet by either selecting Edit --> Cabinet and choosing the cabinet from the list or by double-clicking on the cabinet in the diagram. This opens the Cabinet dialog.
- Add a panel by clicking "Add" in the panel section. This opens the Add Panels dialog. Add a panel with seven rows and columns for the requested panel.
- Click the "Front" radio button in the View section of the Cabinet dialog. Select 7 patchports and click "Connect". This opens the Select Connection Target(s) dialog.
- In the list box, double - click on the back-marked central cabinet.
This expands the list, showing the backs of all patchports in that
cabinet.

- Select the first patchport , C3A1.
- Check Connect all 7 interfaces.
- Select Anonymous Trunk and click Physical Only….
The first 7 patchports of the two cabinets have now been trunked together.