Connecting a channel interface to a CHPID creates a physical route between control units in the controller and the processor. If there is an ESCON or FICON switch or crossbar switch in the connection, the control units may access more than one processor. See Connecting crossbar switches and Connecting switches to processors or other switches for details.
Note:
Although the rest of this section deals with connecting the controller channel interface to a processor CHPID, you can connect the controller to a crossbar switch or an ESCON or FICON switch which eventually leads to the processor CHPID, using the Select Connection Target(s) dialog.

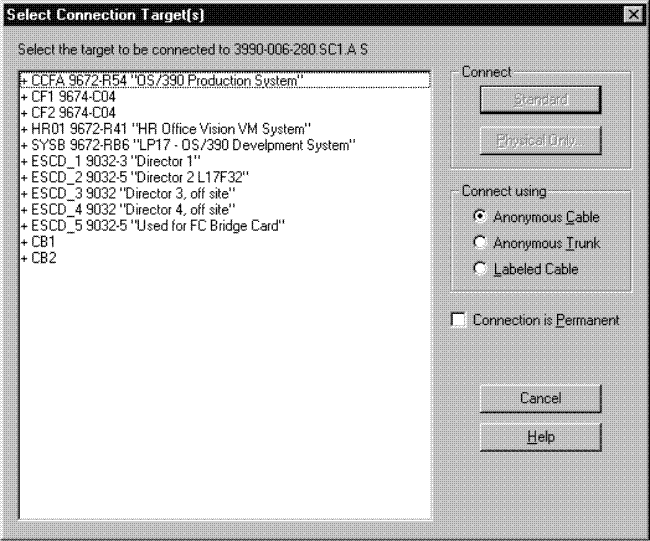
Open the Select Connection Target(s) dialog by selecting a channel interface and pressing the Connect... button in the Controller dialog.
Select a processor CHPID as the target interface to which to connect. The Connection target list box lists all physical connection targets to which you can connect. Double-click on a target object with a plus (+) sign to expand it to display all possible target interfaces. Double-click on a target with a minus (-) sign to contract it. Note that double-clicking on a target interface triggers the Standard connect button. Invalid targets are disabled.
If you are connecting the channel interface to a CHPID that is already connected to another controller, pressing Standard... or Physical Only... will first display the Position Interface dialog. You can position the channel interfaces on the target object before connecting. See Positioning objects along daisy-chained connections for more information about the Position Interface dialog.
After selecting the target CHPID, you choose which type of connection to make: physical or standard (customization of the connection is possible here). Depending on whether a connection should be established directly to a CHPID or to a switch port, further user interaction differs. Let's consider first that a connection should be established between a controller and a port of a switch. Depending on the user interaction on the Processor and CHPID Connections dialog, HCM uses standard values for the attributes of the connection or the ones that the user has specified in the Edit Control Unit <=> Processor Definitions dialog, which appears after pressing the Attributes... button in the Processor and CHPID Connections dialog. The standard values for the attributes are determined by HCD and depend on the UIMs for the control units or devices involved, the type of CHPID involved, and existing connections. In the second case, where a connection between a controller and a CHPID is considered, HCM allows you to customize the attributes of selected logical definitions via the Edit Control Unit <=> Processor Definitions dialog.