Finish setting up security by enabling access to the Common
Object Request Broker Architecture (CORBA) name service for all service
groups, creating an IBM® Sametime® Bandwidth Manager
administrator, and adding the administrator to all security roles.
About this task
Follow these steps to set up administrative security and
create an administrator account for the Sametime Bandwidth Manager
application. The Bandwidth Manager administrator account is separate
from the WebSphere® administrator.
Procedure
- On the server where Sametime Bandwidth Manager
is installed, log in to the Integrated Solutions Console as the WebSphere administrator.
- Disable Java 2 security
on local resources:
- In the navigation tree, click .
- In the "Java 2
security" section, deselect the option Use Java 2 security
to restrict application access to local resources.
- Click Apply, and then click Save in
the Messages box at the beginning of the page.
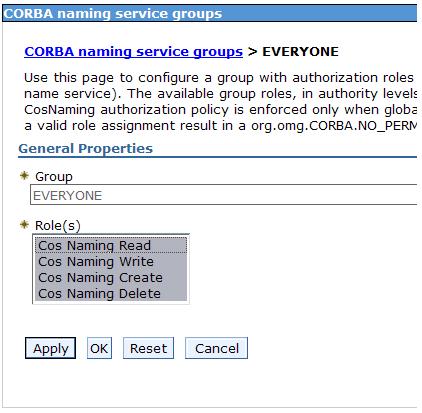
- Enable access to the CORBA name service for all service
groups:
- In the navigation tree, click .
- In the service groups table, click the EVERYONE link.
- In the "General Properties" section, add the following Roles by
clicking within the list and then using Shift+click to add each role
until all are selected:
- Cos Naming Read
- Cos Naming Write
- Cos Naming Create
- Cos Naming Delete
A selected role appears highlighted.
- Click Apply, and then click Save in
the "Messages" box at the beginning of the page.
- Create a new user as the Sametime Bandwidth Manager
administrator.
This user should not be listed in the
LDAP directory, and is not the same as the WebSphere Application Server administrator.
- In the navigation tree, click .
- Click the Create button at the
beginning of the users table.
- Fill in information for the new administrator:
- User ID
- First name
- Last name
- Password
- Confirm password
- Click the Create button at the
end of the page to generate the new account. Enable administrative
security when you are prompted to do so.
- When the message The user was created successfully appears,
click the Close button.
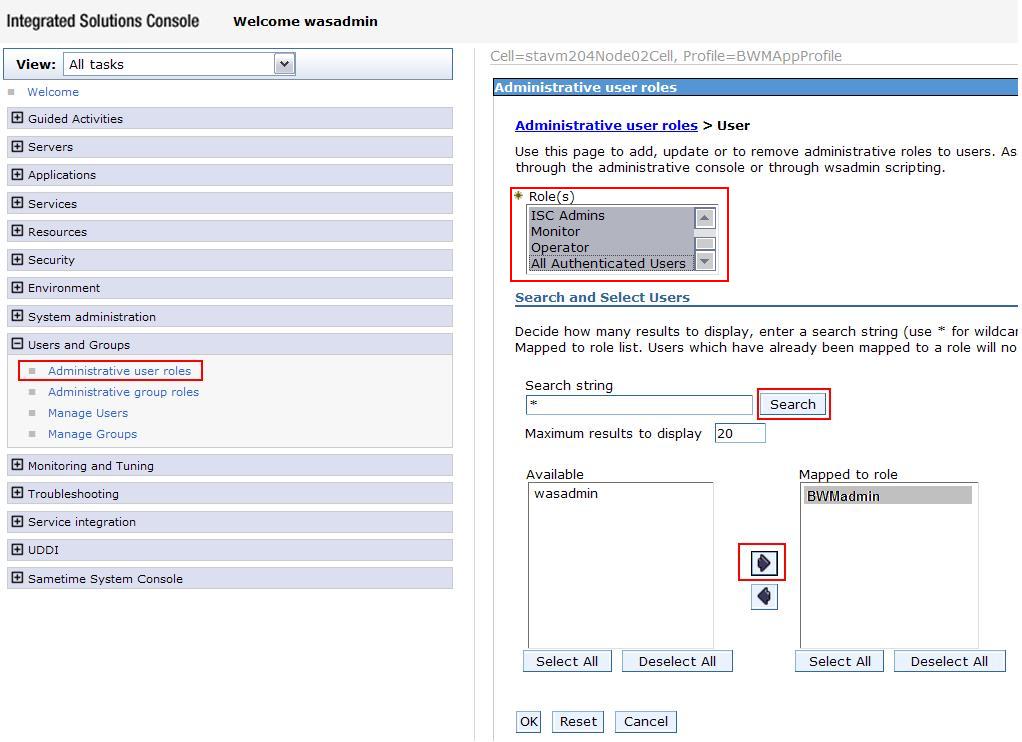
- Now add the new administrator to all security roles:
- In the navigation tree, click .
- Click Add at the beginning of
the roles table.
- In the "Roles" list at the beginning of the page, use
Shift+click to add each role until all are selected.
Tip: Only the "All Authenticated Users" is required but you
should select all roles to ensure that the new administrator has full
access to the Bandwidth Manager application.
- In the "Search and Select Users" section of the page,
click the Search button that follows the Search
string field.
The search results appear
in the "Available" list that follows the field.
- Select the administrator you created earlier, and click
the Add button (the right-arrow button) to
add that user to the "Mapped to role" list.
- Click OK, and then click Save in
the Messages box at the beginning of the page.
- Stop and restart the IBM WebSphere Application Server:
- Open a command window.
- Change to the profile directory of the WebSphere Application Server hosting the
Bandwidth Manager.
- Run the following commands:
Supply your WebSphere administrative credentials
when stopping the server. Be sure the server has fully stopped before
starting it again.
Linux
./stopServer.sh server1 -username was_admin_user -password was_admin_password
./startServer.sh server1
Microsoft Windows
stopServer.bat server1 -username was_admin_user -password was_admin_password
startServer.bat server1