Before you migrate, run a command
to find potential issues in the source environment that must be fixed
before you can migrate. The command also makes you aware of changes
to make after you migrate.
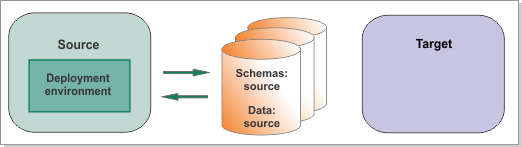
Figure 1. Sample environment after V8.5.6 is installed
on the target. The source environment is running and transferring
data to and from its databases. The target has been created but does
not contain a deployment environment.
Before you begin
If the source environment is
a network deployment environment, ensure that the deployment manager,
nodes, and deployment environment have been started. If the source
environment is a stand-alone environment, ensure that the stand-alone
server has been started.
Before
migrating, use the failed event manager to find and manage failed
events. Make sure that all failed events are deleted or resubmitted
before the migration. After migration, failed events from the source
environment cannot be handled again.
About this task
The BPMMigrationPreValidation command
validates your applications, data sources, and messaging engines.
It generates a report that shows the current status of your source
environment. You can see the changes that you must make so that migration
can proceed smoothly, as well as the changes that you must make after
migration.
Procedure
- Copy the migration.properties sample file and rename
it to source_migration.properties. Update the file with the configuration
information for the source environment. Check all the properties and edit them if required, following the
instructions in the sample file.
- If you installed the new version of the product on the same computer as the source environment,
the sample file is in
install_root_8.5\util\migration\resources\migration.properties.
- If you installed the new version of the product on a different computer and copied the migration
files to the source environment, the sample file is in
remote_migration_utility\util\migration\resources\migration.properties.
If you are migrating multiple deployment environments, you must use a different
source migration properties file for each one where you assign values to the following parameters:
- source.application.cluster.name
- source.messaging.cluster.name
- source.support.cluster.name
- source.web.cluster.name
These cluster name parameters must have different values between deployment environments.
However, within the same migration properties file, the values can be the same.
If you are migrating from a stand-alone environment, leave the cluster name
parameters empty.
If you are migrating from a single cluster environment, enter a value for the
application cluster name, for example:
- source.application.cluster.name=SingleCluster
- source.messaging.cluster.name=
- source.support.cluster.name=
- source.web.cluster.name=
If you are migrating from a network deployment environment, input the names of
the clusters that exist in your source environment, for example:
- source.application.cluster.name=ApplicationCluster
- source.messaging.cluster.name=MessagingCluster
- source.support.cluster.name=SupportCluster
- source.web.cluster.name=
In addition, you must specify values for the following parameters in each file:
- admin.username
- admin.password
- bpm.home
- profile.name
For admin.username and admin.password, use the
WebSphere primary administrative user name. You can find the primary administrative user name in the
administrative console by going to .
The bpm.home parameter is the installation root of your source product. Make
sure that the file separators are forward slashes (/). Use the full path. Do not use the tilde
character (˜) to stand for the home directory. For example:
bpm.home=C:/IBM/WebSphere/AppServer
- Optional: Update other configuration
files in the install_root_8.5\util\migration\resources directory,
following the instructions in the files.
- Update the soap.client.props file to change
the com.ibm.SOAP.requestTimeout property if the SOAP
invocation is timing out at the current setting.
- Update the ssl.client.props file to change
the keystore and truststore.
- Update the logging.properties file to set
the default logging level to FINEST if you need to capture more detail
in the log.
Do not update any of the other files.
- Run the command to check for migration readiness.
where:
This command finds potential issues
in the source environment that must be fixed before you can migrate,
and also makes you aware of changes that you must make after you migrate.
The command performs the following checks:
- Profile validation:
- Validates that the source product and version is supported
for migration
- Performs the following checks:
- Whether any existing service integration bus (SIB) message is
in a transaction
- Whether too many SIB messages are stuck in a queue
- Whether any failed events are not processed
- Notifies you of changes that you must make after you migrate,
including the following changes:
- Authentication aliases that are not migrated because
you added them in the source environment
- Data sources that are not migrated because you added
them in the source environment
- Notifies you of the key changes that occur during migration, including
the following changes:
- Notifies you of current configuration that you might need to
fix after migration, including the following configuration:
- Lightweight Third-Party Authentication (LTPA) key file
- Topology information
- Database validation:
- Notifies you if the volume of data will increase the
downtime required for migration
- Checks for customized indexes
- Analyzes the tables for migration impact and, if required,
recommends actions that you can take before migration
- Checks that the log file size is sufficient and,
if not, provides the command that you should run to update it
The command displays each validation
rule as it runs. After all the validation rules are finished, you
see a message similar to the following message:
Generating the report for migration prevalidation...
Migration prevalidation was completed. You can review the report in: C:\reports
- If the report does not open automatically,
go to the report directory that you specified and open the index.html file
in a browser to view the report. View
each of the areas in the report. Wherever you see an error or warning,
you can click it for more information.
- Investigate the warnings and fix the problems.
Run the BPMMigrationPreValidation command again
and make sure that all problems are fixed before you proceed with
the migration.