Preventive Service Planning
Abstract
Starting with TSM FastBack 6.1.12.4,TSM FastBack Consolidated Reports are supported. This publication provides instructions for a user to install, configure, and use Tivoli Storage Manager FastBack Consolidated Reports.
Content
IBM TSM FastBack Consolidated Reports
Background
The IBM Tivoli Storage Management (TSM) FastBack product can generate backup reports using Business Intelligence Reporting Tools (BIRT) through IBM Tivoli Common Reporting (TCR) on each FastBack server. These reports are limited to a single server and only collect backup statistics and there are no reports for Data Replication (DR). This requires the FastBack administrator to access each FastBack server to generate backup reports for the overall FastBack environment and it requires additional work to extract information from the FastBack Manager interface to collect and report the DR status of each FastBack Server. To ease the task of administrating multiple FastBack servers, additional reports were created so that only a single server would be needed to generate the overall state and status of FastBack backups and DR.
These new reports are the IBM TSM FastBack Consolidated Reports. Starting with TSM FastBack 6.1.12.4, the administrator is now able to generate XML files on each FastBack server that contain DR and backup data that is then transferred to the reporting server. Once transferred, the data is loaded into tables required for new BIRT reports. The FastBack administrator can then access the DR and backup reports for all FastBack servers on a single server.
Set Up
1. Prior to Installation
Before installing FastBack Reporting, ensure that all the operating system, hardware, and software requirements are met. These new reports are only supported in an English language environment. For more information about these requirements, refer to the following link:
If IBM Tivoli Common Reporting (TCR), Version 1.2.0.x is installed, remove Tivoli Common Reporting 1.2.0.x before installing Tivoli Common Reporting 3.1.2.1.
2. Download and Install JazzSM1.1.2.1
Please refer to the following link:
http://www-01.ibm.com/support/docview.wss?uid=swg24040467
a. Access the IBM Passport Advantage web site. An IBM Customer ID is required to sign in and continue.
b. Select the Find by part number search option under Download finder options. The following parts are needed:
CN6WCML - Jazz for Service Management 1.1.2.1 for Windows, 64-bit
CN6WFML - IBM® Tivoli® Common Reporting 3.1.2.1 for Windows
CN555ML - IBM® WebSphere® Application Server 8.5.5.4 for Jazz
CIW3YML - IBM® DB2® Enterprise Server Edition V10.5 for Windows
Once downloaded, the following zip files will be accessible:
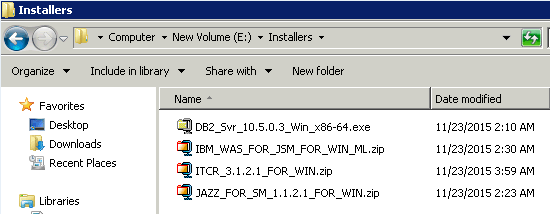
c. Extract the downloaded images and ensure the install directory is set up as follows:
|-ESE [Rename extracted DB2 installation image folder SERVER as ESE]
|-WASRepository [extracted WebSphere Application Server installation image]
|-TCRCognos [extracted Tivoli Common Reporting Cognos® installation image]

d. Perform a full installation.
Double click “Launchpad64.exe” to launch the wizard and select “Full”
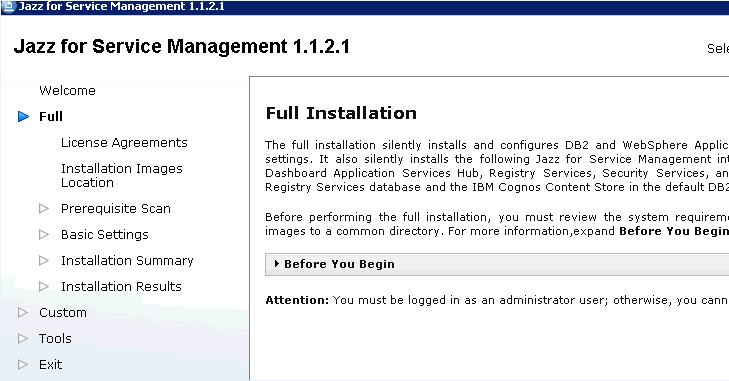
Select “next” to proceed to the “Prerequisite Scan” page, click “scan” and wait to pass the scan.

e. Finish the installation and restart the Windows machine.
f. It is recommended that WAS be run as a windows server, so please follow the instructions at the following link:
http://www-01.ibm.com/support/docview.wss?uid=swg21397335
g. JazzSM 1.1.2.1 will support the WAS 8.5.5.8 fix pack. If WAS needs to be upgraded to V8.5.5.8, please refer to the following links:
8.5.5.8: WebSphere Application Server V8.5.5 Fix Pack 8 and
Readme for IBM WebSphere Application Server V8.5.5.8
3. Install TSM FastBack and Deploy FastBack Reports
a. Install FastBack Reporting.
If the FastBack server is already installed, only install FastBack Reporting as explained in the following steps.
If the FastBack server is not installed, install FastBack Server, FastBack Manager, FastBack Mount and the Administrative Command Line first before following the steps below:
Mount and open the TSMFB_6.1.12.4 image. Enter “Reports” directory and double click “setup.exe “


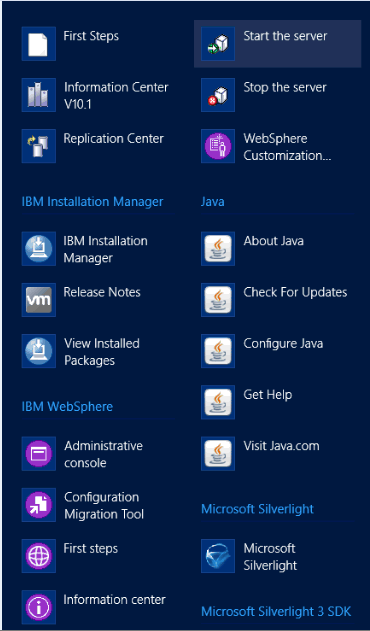
b. Start the Websphere Application Services (WAS) server (From Windows Start menu, select All programs ->IBM WebSphere->IBM WebSphere Application ServerV8.5->Profiles->Start the server)

Alternatively (on Windows 2012), Select “Start the Server” under the IBM Websphere Apps
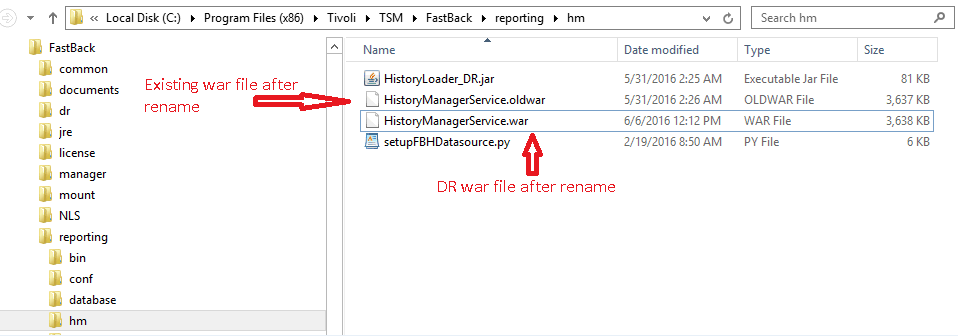
c. The WAR files for the new FB reports are installed in the FastBack reporting hm directory (Eg: C:\Program Files (x86)\Tivoli\TSM\FastBack\reporting\hm):

The existing WAR file needs to be renamed and the DR WAR file needs to be renamed without the _DR (Eg: HistoryManagerService.war -> HistoryManagerService.oldwar and HistoryManagerService_DR.war -> HistoryManagerService.war)
d. The report files for the new FB reports are installed in the FastBack reporting report directory (Eg: C:\Program Files (x86)\Tivoli\TSM\FastBack\reporting\report):

The existing report file needs to be renamed and the _DR zip file needs to be renamed without the _DR: (Eg: FastBack_TCR_Reports.zip -> FastBack_TCR_Reports.oldzip andFastBack_TCR_Reports_DR.zip -> FastBack_TCR_Reports.zip )

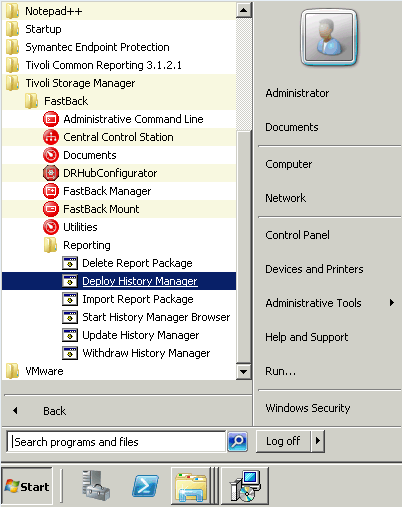
e. Deploy History Manager(From Windows Start Menu, select All program->Tivoli Storage Manager ->FastBack->Reporting-> Deploy History Manager)
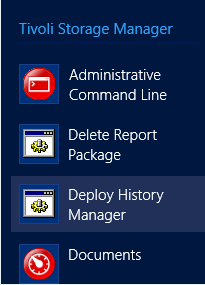
Alternatively (on Windows 2012), Select “Deploy History Manager” under the Tivoli Storage Manager Apps
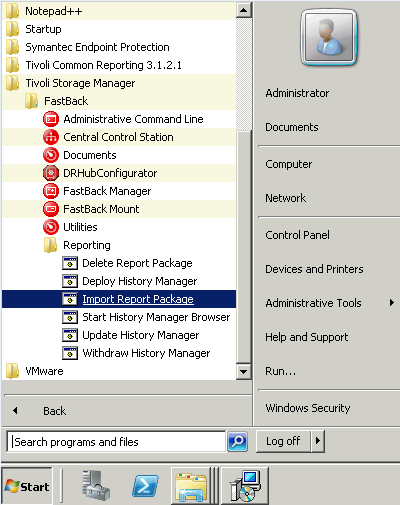
f. Import Report Package(From Windows Start Menu, select All program->Tivoli Storage Manager ->FastBack->Reporting-> Import Report Package)
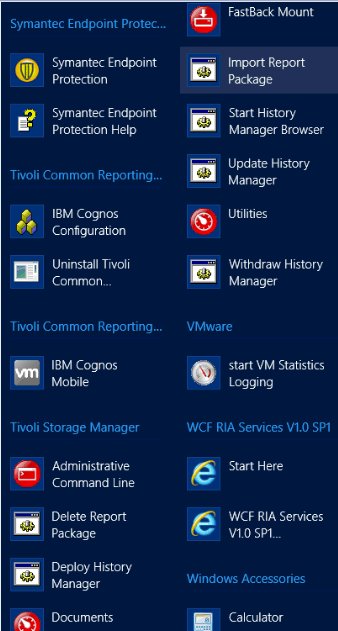
Alternatively (on Windows 2012), Select “Import Report Package” under the Tivoli Storage Manager Apps
g. Launch FB Manager and set “Reporting” tab page.

h. Click “Launch TCR” button to launch FB report portal.


4. Additional Set Up
a. Set the maximum number of keep days
There is a configuration file named “config.property” under “C:\Program Files (x86)\Tivoli\TSM\FastBack\reporting\database\config”. It is used to set maximum number of days to keep DR and backup data.
The maximum number of DAYS_TO_KEEP is 61, if it bigger than 61, 61 will be used as default. When the data is older than the DAYS_TO_KEEP, it will be removed from the database.

Edit the config file with notpad.

b. Exclude Volumes from being “At Risk”
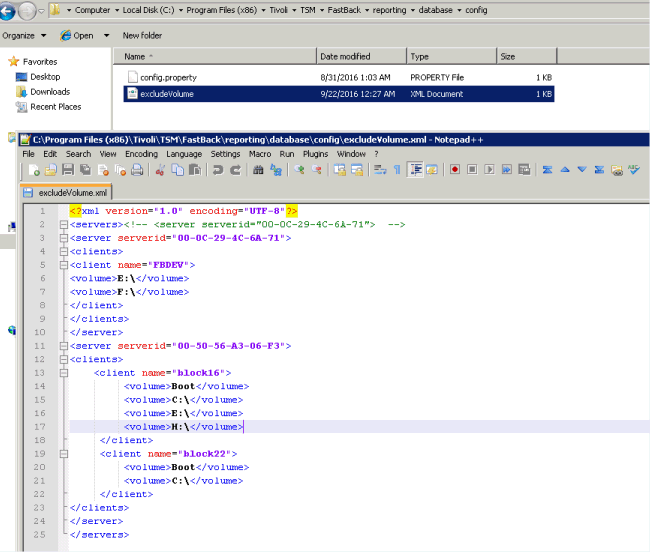
There is a configuration file named “excludeVolume.xml” under “C:\Program Files (x86)\Tivoli\TSM\FastBack\reporting\database\config”. It is used to set the volumes to exclude from placing the volume at risk if it has never been backed up. This is useful for when the volume does not require backup. For example, a volume that only contains temporary data does not require backup. When the volume is excluded, the report generated will show the volume to have a “normal” state because it is expected that the volume will never be backed up.
Set the information in this file to be the volumes on the client that are to be excluded from being at “at risk” and make sure all the information is the same as the generated report xml. For example: The volume “C:\” should not be set as “C:”
Generate and View FastBack Reports.
Note: Before generating the FastBack report files, all FastBack servers need to be upgraded to TSM FastBack 6.1.12.4.
A. On each FastBack Server, generate the report files (.xml)- - - Execute “parselog.exe” under “C:\Program Files (x86)\Tivoli\TSM\FastBack\utilities” 
B. Execution of “parselog.exe” is performed using the following steps:
a. From the FastBack Server machine, launch the FastBack shell.
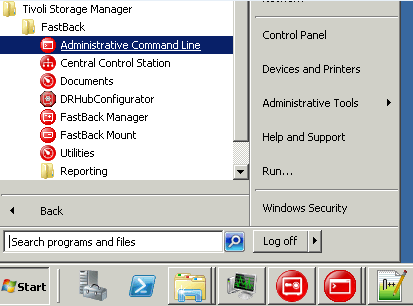
b. Enter “cd ..” , “ cd utilities” and “parselog.exe -dr ”

parselog.exe has 2 parameters: “-dr” and “-bu”. “-dr” is used to generate DR state reports; “-bu” is used to generate backup state reports.
c. The new report .xml is generated in ”C:\ProgramData\Tivoli\TSM\FastBack\ParseLog”
C. Upload the .xml to the FastBack Report server.

a. Copy and paste the .xml from “ C:\ProgramData\Tivoli\TSM\FastBack\ParseLog” to “C:\Program Files (x86)\Tivoli\TSM\FastBack\reporting\database\Report”

Note: Please make sure the earliest .xml files are copied first and added to the database. If more than one BK or DR xml file from the same server are copied, the earlier ones are ignored. It is better to start with the earliest file since there will be more information to collect from each server for the reports.
b. If the data needs to be immediately loaded to the database, just stop and re-start the WAS server. Otherwise, the data will automatically be loaded every hour.

c. As soon as the .xml is imported to FB Report db, it will be deleted from “..\Report”. 
D. View the reports.
a. Launch the FastBack Report portal (Click the “Launch TCR” button from the FastBack Manager toolbox) .

b. Login with the correct credentials.

c. Click “Reporting->Common reporting”

d. Click “Tivoli Products”

e. Click “FastBack Reporting”.
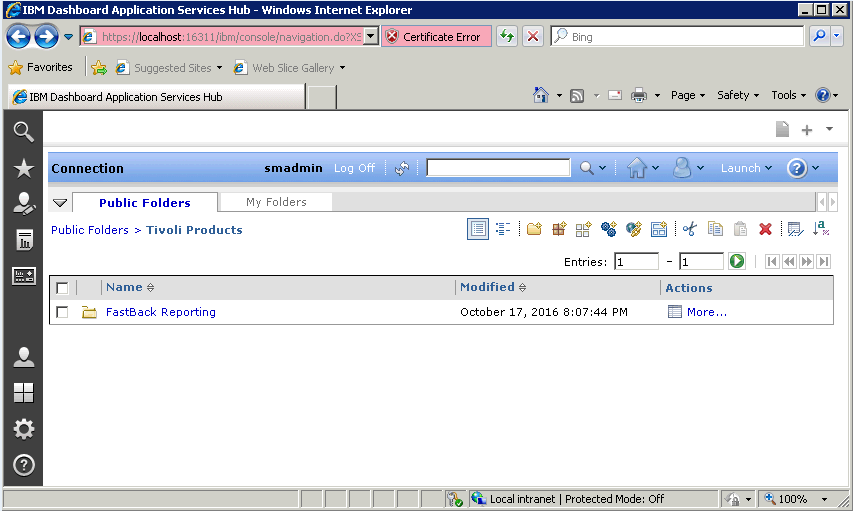
f. Find the new 3 reports.

g.View “FastBack Server and FastBack Client Code Levels” report
Click “FastBack Server and Fast client code levels” ,
![]()
then select a server from FastBack server list and click “Finish” button

The code level report generated:

h. View “FastBack Server Backup State” report.
Click “ FastBack Server Backup State”
![]()
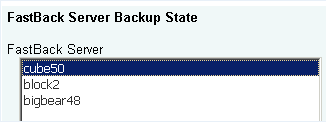
then select a server from FastBack server list and click “Finish” button
There are also two parameters that help determine if a the volume backup is at risk. These are

The “FastBack Server Backup State” report generated.

Click any Server Name,will get the summary report of that FastBack Server.

Click any Client Name, will get the summary report of that FastBack client.

Click any Volume Name , will get the detail history report of that volume.

i. View FastBack DR state report.
Click “FastBack Server Disaster Recovery State”
![]()
then select a server from FastBack server list and click “Finish” button

There are also two parameters that help determine if a FastBack Server is at risk. These are

The summary report generated.
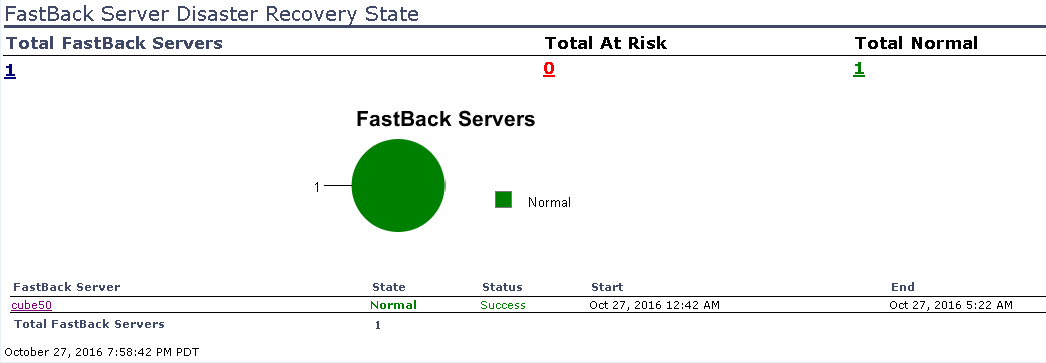
Click any FastBack Server Name, will get the history details report page.

Remove Existing FastBack Reporting to Update to Latest Reporting
a) Delete Tivoli Storage Manager Report Package (Screenshot from Windows 2012, otherwise, from Windows Start Menu, select All Programs->Tivoli Storage Manager->FastBack->Reporting->Delete Report Package)

b) Run the FastBack Reporting uninstaller

c) Remove the FastBack Reporting directory
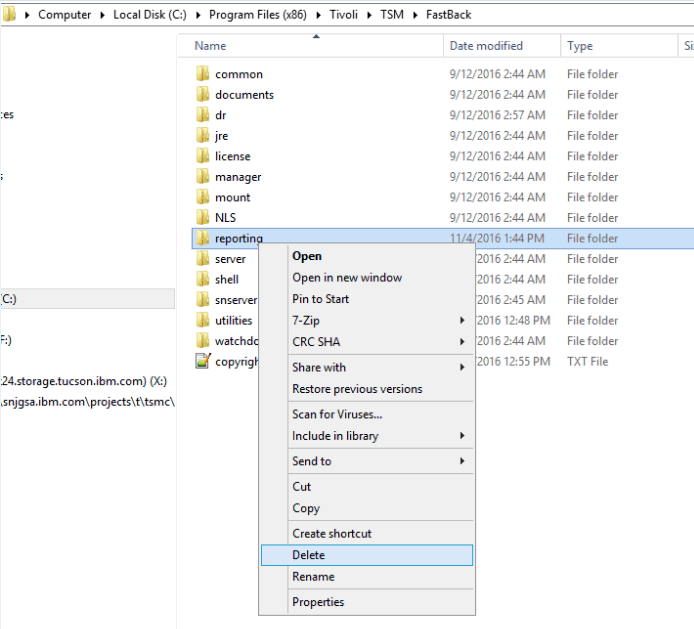
d) Delete the FastBack Reporting Data Source in WebSphere
a. Login to WebSphere localhost:16316/ibm/console/login.do?action=secure
b. Select Resources->JDBC->Data Sources
c. Check FastBack Reporting Data Source
d. Click “Delete”
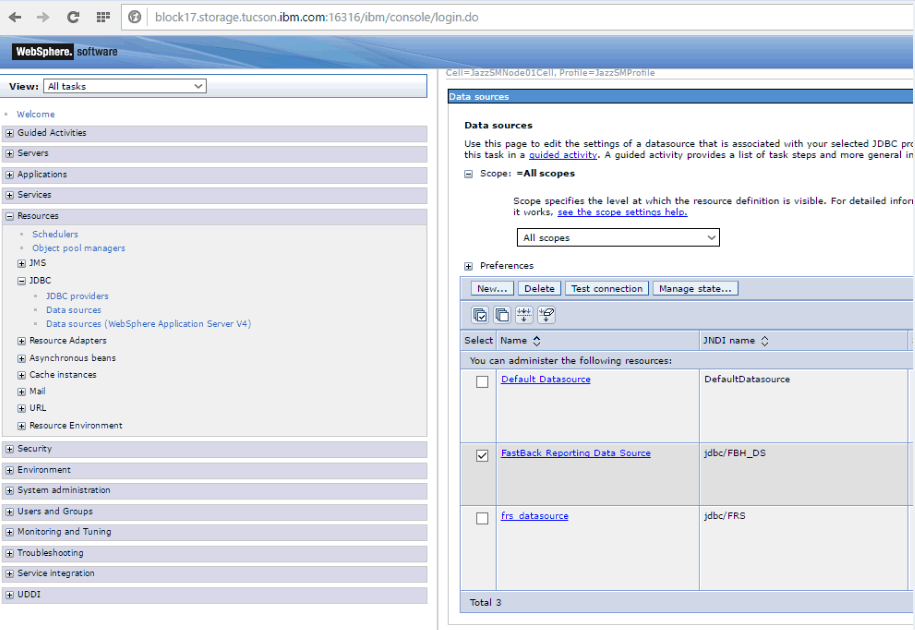
e. Click Save directly to master configuration.

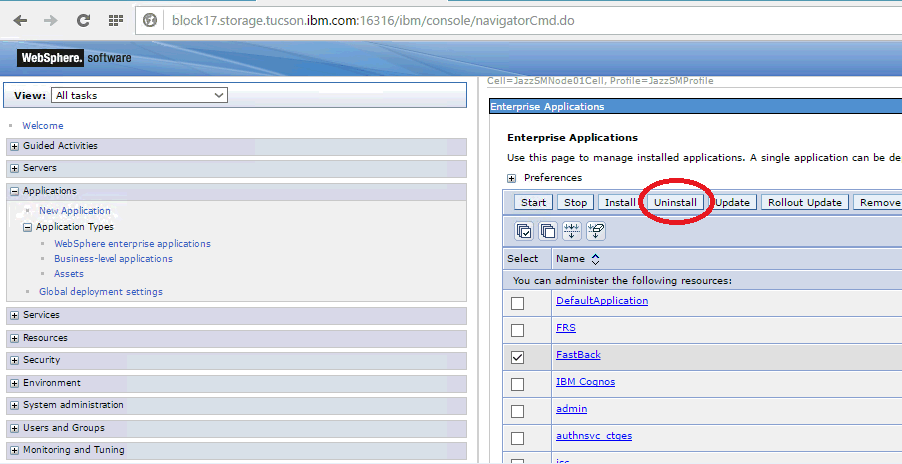
f. It is also recommended to check if the FastBack service has been removed from WAS. This can be done as follows:
i. Select Applications->Application Types->WebSphere enterprise applications
ii. Check FastBack
iii. Click Uninstall

Was this topic helpful?
Document Information
Modified date:
17 June 2018
UID
swg21995523