Troubleshooting
Problem
Cause
For example, at the end of this Technote is a link to the guide for creating a ContentStore on DB2 for Cognos BI version.
However, the I.T. administrator would like a step-by-step guide for creating the ContentStore.
Environment
- DB2 v10.5
- IBM Data Studio v4.1.0.1
- Therefore it is recommended that you do not use these instructions for other Cognos products (for example Cognos BI or Cognos Analytics)
- Instead, please check with your product version's official documentation for the correct steps for your software product/version.
Resolving The Problem
- However, the reader can use the information to translate it into their environment to understand how best to perform the steps.
Steps:
IMPORTANT: Before starting, you must make sure that your DB2 server is *not* configured to be in Oracle-compatible mode.
- In other words, do NOT use the following configuration:
- db2set DB2_COMPATIBILITY_VECTOR=ORA
- For more details, see separate IBM Technote #1677923.
1. Launch the app “Data Studio 4.1.0”:
2. If prompted for a workspace location, accept the defaults (and tick the box to not be prompted again)
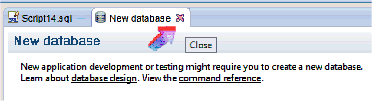
3. Click on the ‘New Database’ icon (near the top-left corner):

4. Choose the relevant parameters to connect to your server, for example:

TIP: You may have to manually enter the port (by default 50000) first, before you can then click ‘refresh’ to choose the ‘Instance name’.
5. Click ‘Finish’
6. Inside the ‘Details’ section, choose a sensible database name for your database (for example ‘COGNOSCS’)
7. Inside ‘Alias’ call the name the same (e.g. COGNOSCS)
8. As a best practice, label the database’s Comment field with “IBM Cognos Content Store”
9. Choose a sensible path for your data (for example ‘D:\’)
10. Select ‘32K’ from the option “Default Bufferpool and table space page size”
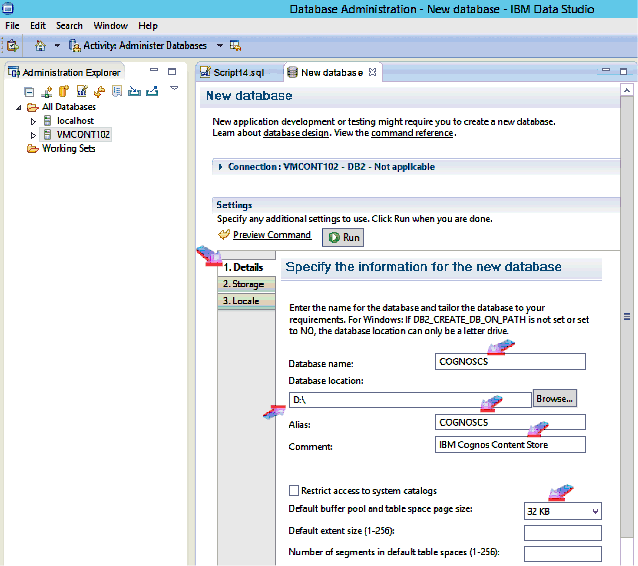
11. Inside ‘Storage’ section accept all the default settings
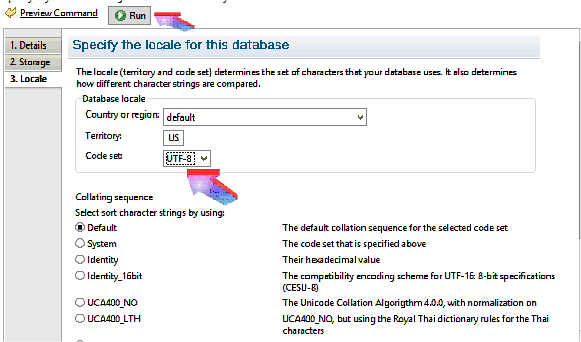
12. IMPORTANT: Inside the 'Locale' (region / character set) section, ensure that the ‘Code Set’ setting is ‘UTF-8’:
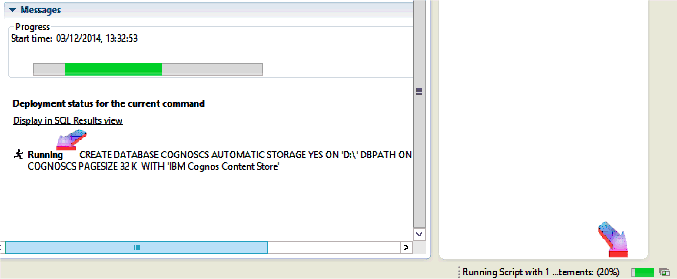
13. Click ‘Run’ (at the top)
14. The system should now show the progress:
15. After a short time, the process should be complete. You can now close the script:
16. Expand your server’s name, then highlight the relevant database (e.g. “COGNOSCS”) and click on the icon ‘New SQL Script’:

17. Decide on a user which is going to be used (by Cognos/Controller) to connect to the database (for example ‘fastnet’)
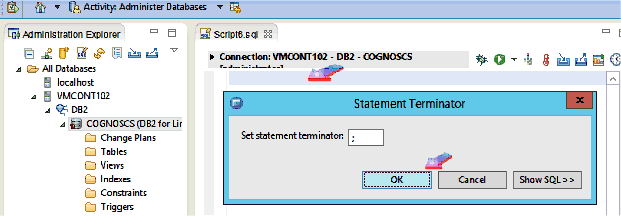
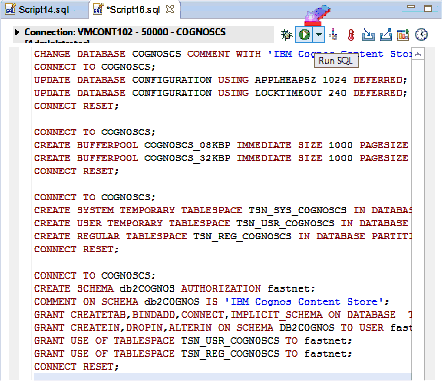
18. Paste the script (see below) into the pane on the right-hand side, choosing ‘;’ as your terminator:
CHANGE DATABASE COGNOSCS COMMENT WITH 'IBM Cognos Content Store';
CONNECT TO COGNOSCS;
UPDATE DATABASE CONFIGURATION USING APPLHEAPSZ 1024 DEFERRED;
UPDATE DATABASE CONFIGURATION USING LOCKTIMEOUT 240 DEFERRED;
CONNECT RESET;
CONNECT TO COGNOSCS;
CREATE BUFFERPOOL COGNOSCS_08KBP IMMEDIATE SIZE 1000 PAGESIZE 8K;
CREATE BUFFERPOOL COGNOSCS_32KBP IMMEDIATE SIZE 1000 PAGESIZE 32K;
CONNECT RESET;
CONNECT TO COGNOSCS;
CREATE SYSTEM TEMPORARY TABLESPACE TSN_SYS_COGNOSCS IN DATABASE PARTITION GROUP IBMTEMPGROUP PAGESIZE 32K BUFFERPOOL COGNOSCS_32KBP;
CREATE USER TEMPORARY TABLESPACE TSN_USR_COGNOSCS IN DATABASE PARTITION GROUP IBMDEFAULTGROUP PAGESIZE 8K BUFFERPOOL COGNOSCS_08KBP;
CREATE REGULAR TABLESPACE TSN_REG_COGNOSCS IN DATABASE PARTITION GROUP IBMDEFAULTGROUP PAGESIZE 8K BUFFERPOOL COGNOSCS_08KBP;
CONNECT RESET;
CONNECT TO COGNOSCS;
CREATE SCHEMA db2COGNOS AUTHORIZATION fastnet;
COMMENT ON SCHEMA db2COGNOS IS 'IBM Cognos Content Store';
GRANT CREATETAB,BINDADD,CONNECT,IMPLICIT_SCHEMA ON DATABASE TO USER fastnet;
GRANT CREATEIN,DROPIN,ALTERIN ON SCHEMA DB2COGNOS TO USER fastnet WITH GRANT OPTION;
GRANT USE OF TABLESPACE TSN_USR_COGNOSCS TO fastnet;
GRANT USE OF TABLESPACE TSN_REG_COGNOSCS TO fastnet;
CONNECT RESET;
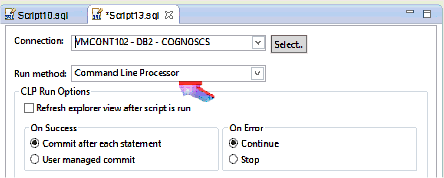
· At the bottom of the screen, select the tab ‘Configuration’:
· Change the “Run method” to “Command Line Processor”:
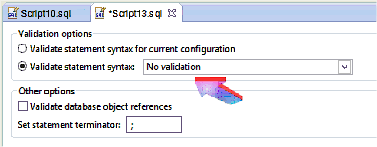
· Now choose the tab ‘Validation’:
· Change “Validate statement syntax” to “No validation”:
19. Click “Run SQL” button:
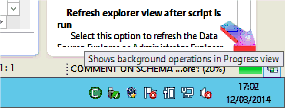
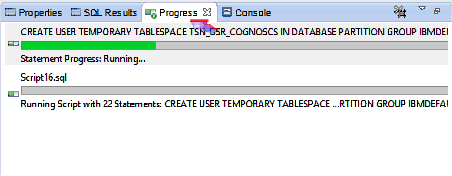
NOTE: To monitor the progress/success of this script, you must now immediately:
· Double-click on the progress information dialogue (near the bottom-right corner, near the clock):
· Click on the ‘Progress’ tab to see each separate section running:
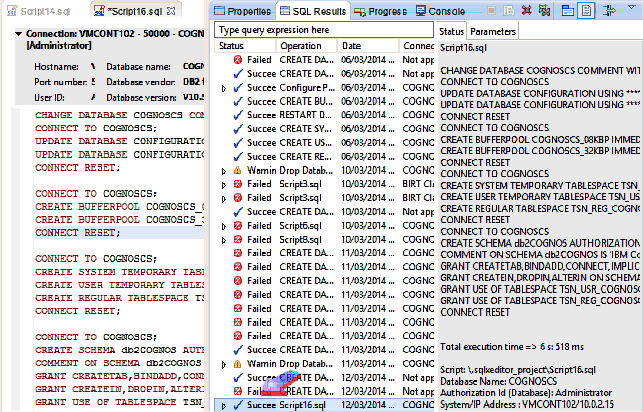
· Finally, click on ‘SQL Results’ to ensure that the final (overall) message is ‘Success’:
Related Information
Was this topic helpful?
Document Information
Modified date:
25 February 2019
UID
swg21667225