Question & Answer
Question
How can I mount a Windows dynamic disk using the Recovery Agent & iSCSI?
Answer
Here are the steps required to mount a Windows dynamic disk using the Tivoli Storage Manager for Virtual Environment recovery agent.
Step 1:
Start the Data Protection for VMware Recovery Agent from Add/Remove programs.
Step 2:
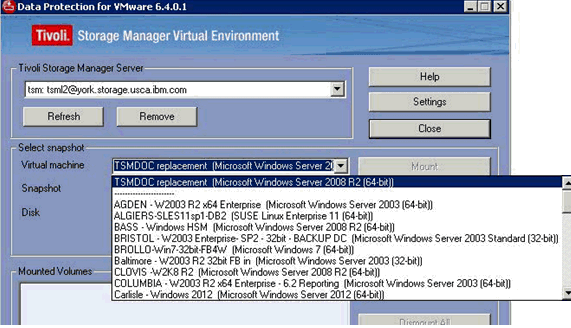
Log in to the Tivoli Storage Manager Server. Choose the Virtual Machine that should be mounted.
Step 3:
Choose the Snapshot and Disk, then click the MOUNT button.

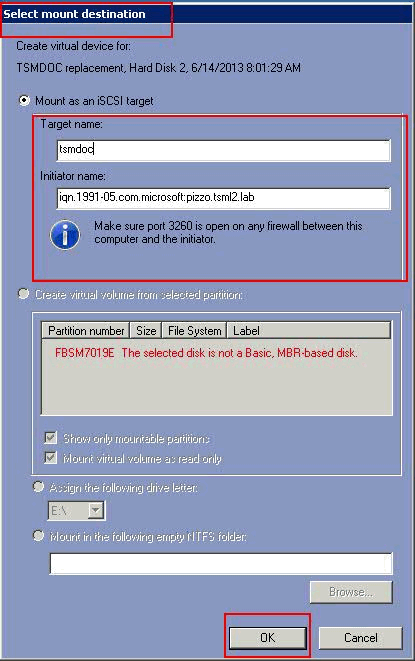
If the disk being mounted is a Windows Dynamic disk, the "Select mount destination" window will report "FBSM7019E The selected disk is not a Basic, MBR-based disk".
To mount this disk, you will need to use iSCSI.

Step 4:
Open the Windows iSCSI Initiator in the Windows Control panel. Click the "Configuration" tab to find the Initiator Name.
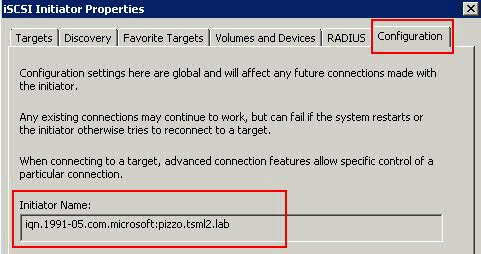
Copy the Initiator Name as it is needed.
Step 5:
In the "Select mount destination" window of the Recovery Agent, paste in the Initiator Name and add a Target Name.
The Target Name can be any name but must be in all lower case letters.
Click the OK button.
Step 6:
After clicking the OK button, the Recovery Agent windows will show the
volume is mounted.

Step 7:
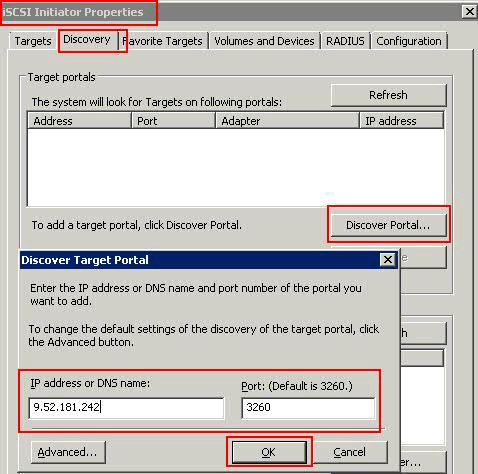
On the iSCSI Initiator Properties window, click the Discovery tab, then Discover Portal.
Add the IP address and port number for the Tivoli Storage Manager proxy machine and click OK.
Step 8:
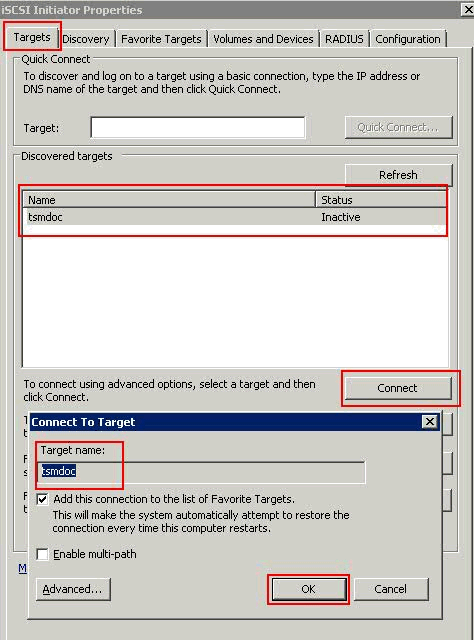
Click on the Targets tab. Click on the Target name that was used in step 5 above then click the
Connect button. This will bring up a smaller window to connect to the Target that was created.
Click OK.
Before Windows will be able to see and use this mounted volume, it needs to be imported via
Windows Disk Manager
Step 9:
In Windows Disk Manager, find the disk that shows as "Foreign". Right click on it and choose
"Import Foreign Disks".
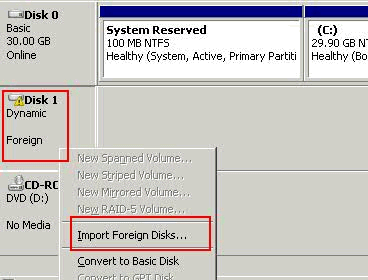
Click OK on the "Import Foreign Disks windows
The disk should now show as Dynamic and online with a Drive letter assigned. It can now be used to restore data.

Note: If there is no drive letter assigned, right click on the volume and choose "Change Drive Letter and Paths" to assign a drive letter.
Steps to dismount the iSCSI target
Step 1:
Close all programs accessing the mount. Example: Windows Explorer or a Windows command prompt.
Step 2:
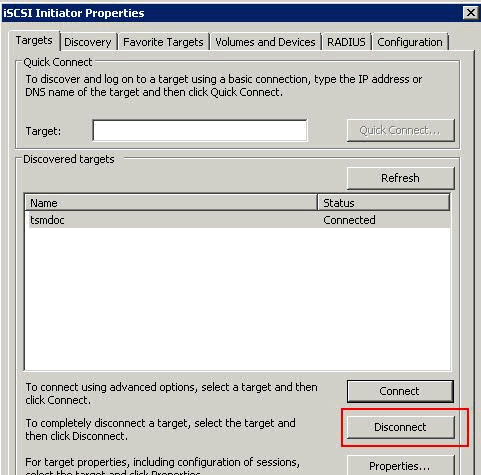
In the iSCSI Initiator Properties screen, disconnect the target.
Step 3:
Dismount the volume in the Tivoli Storage Manager Recovery Agent.

Product Synonym
TSM
Was this topic helpful?
Document Information
Modified date:
17 June 2018
UID
swg21640941