Question & Answer
Question
I want to use OAuth for authentication between IBM Rational DOORS 9.3.0.2 or higher and IBM Rational Change. How do I set this up?
Answer
Follow these steps to set up a template using OAuth authentication.
- Log into Rational Change as the admin user, navigate to System Administration > Integrations > To This Server (Consumer Keys):
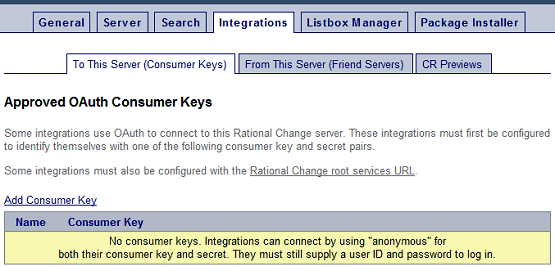
- Select "Add Consumer Key".
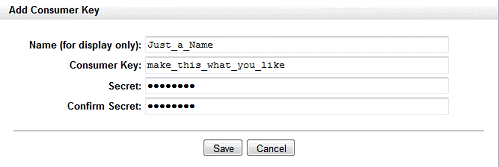
- Enter details:
Name (for display only): This can be anything you wish it to be.
Consumer Key: Again, this can be any key you choose (any character, digit or special character [as far as has been tested]).
Secret: Enter a password of your choice. This should be as secure as you desire.
Confirm Secret: repeat the password from above.
Select "Save":

- Select "Rational Change Root services URL".
There are two displayed.
The first URL: It is possible to use the first one with Rational DOORS 9.4.x.x.. But the second one can also be used.
The second URL: This one must be used with Rational DOORS 9.3.0.2 to 9.3.0.7 and cannot be used with 9.4.x.x.
Make a note of the one you require or return to this page later when setting up Rational DOORS for OAuth authentication:

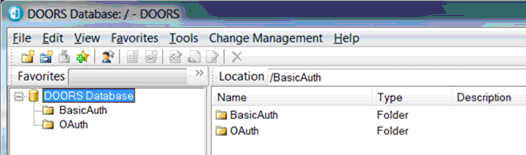
- Log into Rational DOORS client as a database manager or equivalent user. Right-click on "DOORS Database" in the explorer on the left and select Properties, then select the Remote Services tab:
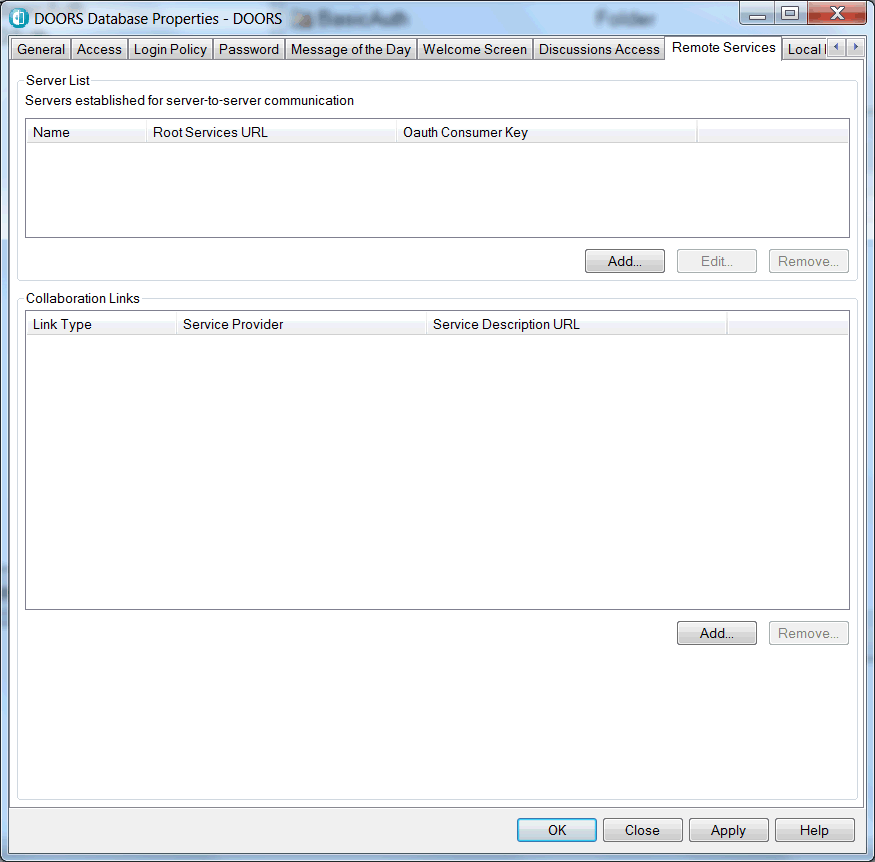
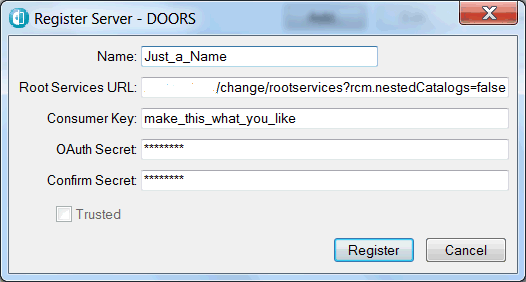
- Under Server List select Add. In the Register Server dialog, enter the details from Steps 3) and 4). Then click Register:
- Under Collaboration Links select Add. Open the Server Drop-Down list and select the required server:

- This will open the following Rational Change login dialog. Here enter User ID and Password and select Allow Access.

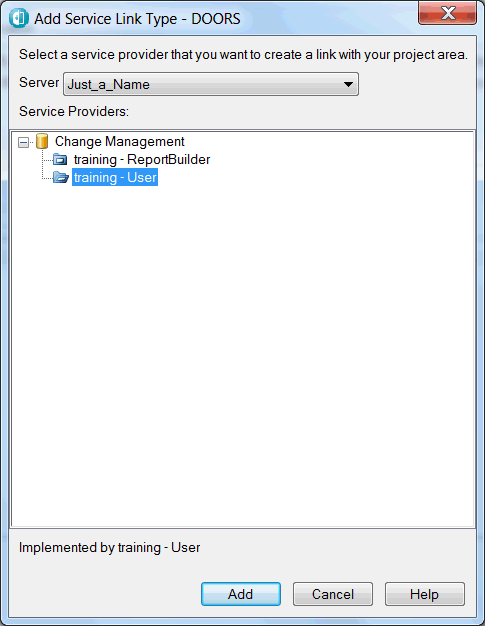
- This will add a Service Provider in the Add Service Link Type window:

- Open the list under Change Management and select "<my_database> - User" option and select Add.
- This will add the Collaboration Link as shown here:

- In Rational DOORS, under Change Management menu, select Define Configuration Template and select Create:

- Enter a Template name of your choice. Select Authentication: OAuth.
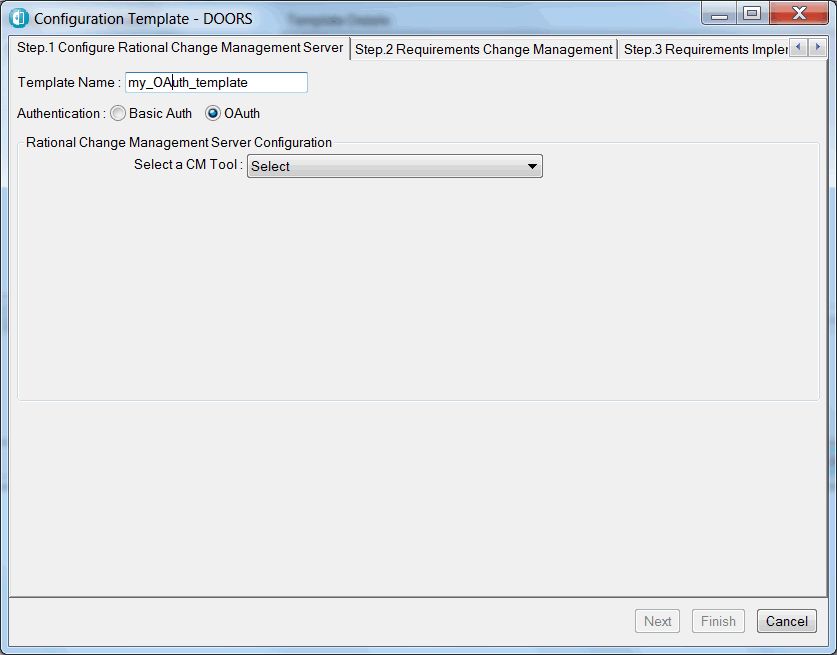
- Under Select a CM Tool, select the Collaboration Link just created and then select Next:

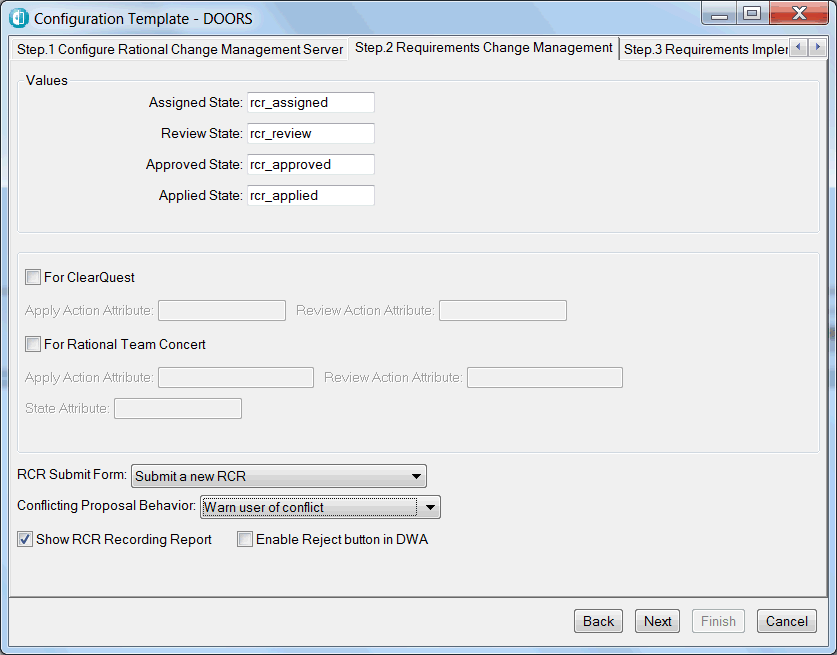
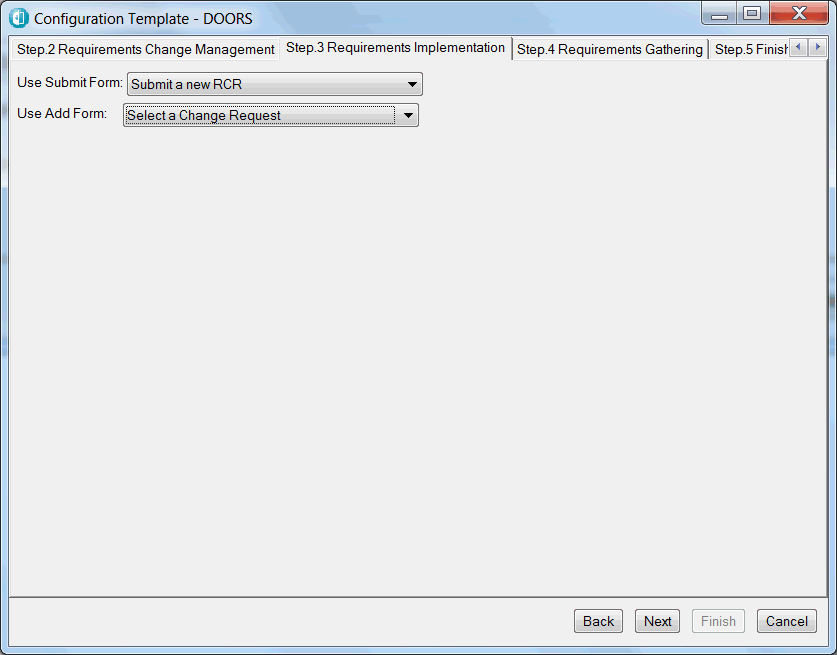
- Enter all required details as you would with a Basic Auth template and as required for your circumstances and select Next:
- Step 16) Make your appropriate selections in step 3 and select Next:
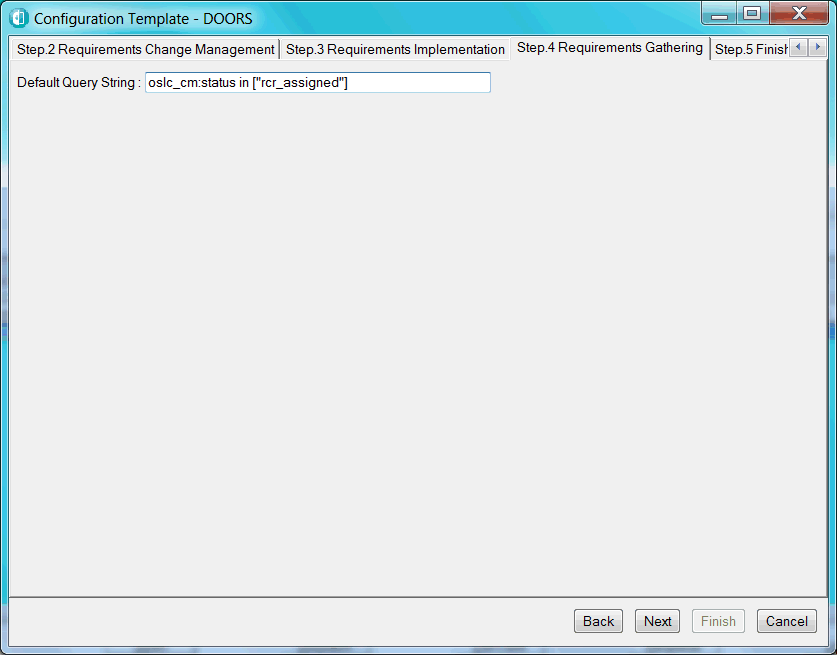
- If required, enter a Default Query String for Requirements Gathering (this can be left empty if Requirements Gathering is not used). Select Next:
- You will see your configuration template details. Click Finish.

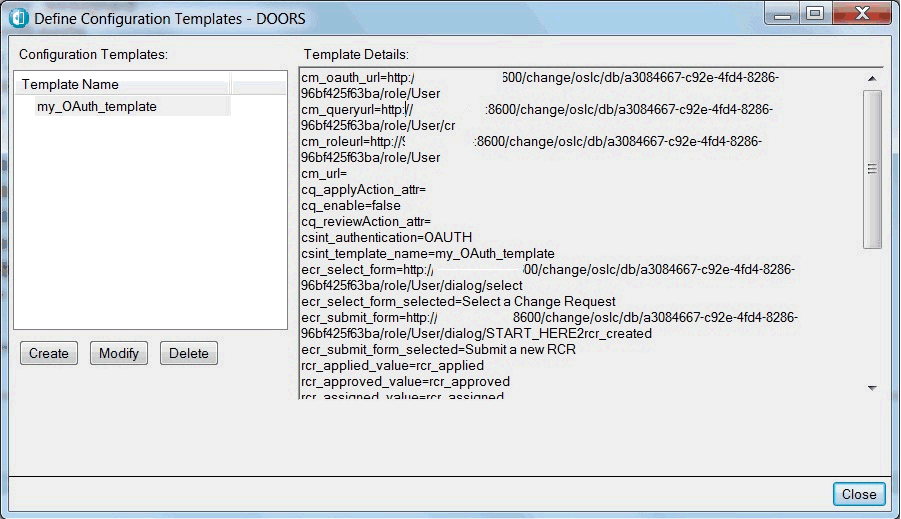
- You will see your added Configuration template with its details under Template Details:
[{"Product":{"code":"SSYQQ2","label":"Rational Change"},"Business Unit":{"code":"BU053","label":"Cloud & Data Platform"},"Component":"Installation","Platform":[{"code":"PF002","label":"AIX"},{"code":"PF033","label":"Windows"},{"code":"PF027","label":"Solaris"},{"code":"PF016","label":"Linux"}],"Version":"5.3;5.2","Edition":"","Line of Business":{"code":"LOB36","label":"IBM Automation"}},{"Product":{"code":"SSKR2T","label":"IBM Engineering Requirements Management DOORS"},"Business Unit":{"code":"BU059","label":"IBM Software w\/o TPS"},"Component":"Integrations: IBM","Platform":[{"code":"","label":""}],"Version":"","Edition":"","Line of Business":{"code":"LOB59","label":"Sustainability Software"}}]
Was this topic helpful?
Document Information
Modified date:
01 May 2020
UID
swg21601142