Question & Answer
Question
How do you setup the integration between IBM Rational ClearCase and IBM Rational Rose?
Answer
| Setting the SourceCodeControlProvider key if you have ClearCase installed |
| Configuring Rational Rose |
| Starting the integration |
| Sharing the model |
| Performing ClearCase Functions |
| Model Merges with Integration |
| Change History |
Setting the SourceCodeControlProvider key if you have ClearCase installed
- Click Start > Run...
- Type regedit
- Click OK
- Navigate to HKEY_LOCAL_MACHINE\SOFTWARE
- Select SourceCodeControlProvider
- Set the value of the ProviderRegKey to Software\Atria\ClearCase

- Close the Registry Editor
- Launch Rose
- Click Add-Ins > Add-In Manager...
- Disable the Version Control Add-In
- Enable the ClearCase Add-in
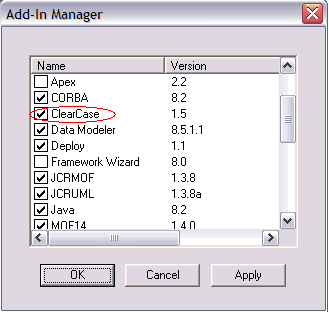
- Click Apply
- Click OK
- Click File > Edit Path Map...
- Type CURDIR in the Symbol field
- Type & in the Actual Path field
- Click Add
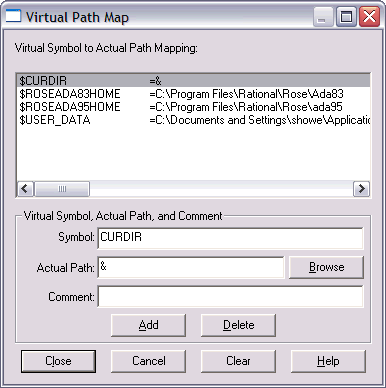
- Click Close
Note: These steps will take place after the model has been created
- Click File > Save As...
- Navigate to the desired ClearCase view
- Click Save
- Right-click on the model
- Click Add to Version Control
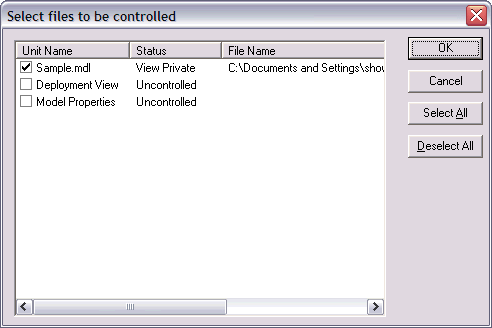
- Select the files to be added to source control
- Click OK
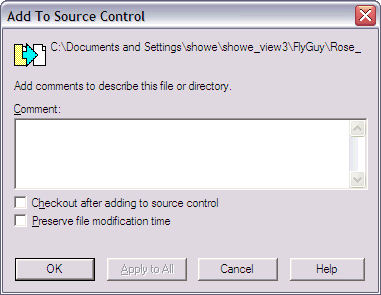
- Click OK
Note: The gray rectangles will indicate the files are controlled and are under source control.
Sharing the model (subsequent users)
- Launch Rose
- Click File > Open...
- Navigate to model through a ClearCase view
- Select the model
- Click Open
Performing ClearCase Functions
All ClearCase functions will be performed at the file level and not the element level. To perform a ClearCase function such as Check Out, follow these steps:
- Select the file
example: *.mdl,*.cat,*.sub - Right-click
- Click the desired ClearCase function
OR
- Click Tools -> ClearCase
- Click the desired ClearCase function
You will be prompted for a merge if you Check In a model file that contains a conflicting change against the selected version.
- Click Yes
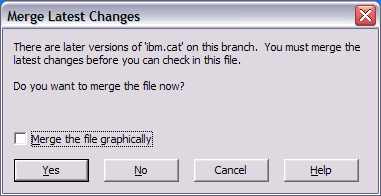
Note: DO NOT enable Merge the file graphically. If user input is needed due to a nontrivial merge, Rose will bring up the Rose Model Integrator.
- In the Rose Model Integrator use the 1, 2, or 3 button to accept the change
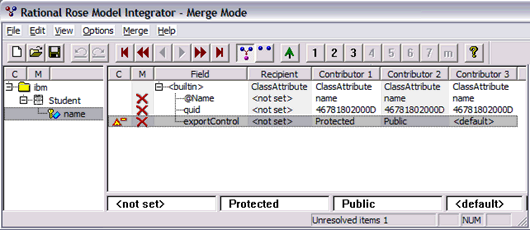
Note: Contributor 1 is the base, Contributor 2 is the remote (repository) version, and Contributor 3 is the local version. The arrows can be used to navigate through the conflicts.
- Once the conflicts have been resolved, close the merge editor by clicking the "x"
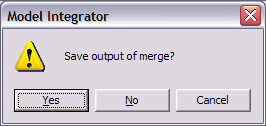
- Click Yes to save the merge result
- Click Yes to check in the model
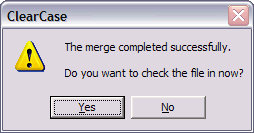
- Click OK

NOTE: This solution contains information about modifying the system registry. Before making any modifications to the Microsoft® Registry Editor, it is strongly recommended that you make a backup of the existing registry. For more information describing how to back up the registry, refer to the Microsoft Knowledge Base article 256986 http://support.microsoft.com/kb/256986.
| Change History | |
| 12 February 2009 | Clarified steps based on client feedback |
| 20 June 2007 | Pre-pended sections: Setting the SourceCodeControlProvider key if you have ClearCase installed Configuring Rational Rose |
| 26 June 2006 | Initial release |
Was this topic helpful?
Document Information
Modified date:
16 June 2018
UID
swg21242730