Download
Abstract
This utility can be installed on any SAN Volume Controller, Storwize V7000, Storwize V5000, Flex System V7000, Storwize V3500, Storwize V3700, FlashSystem V9000, FlashSystem V840, FlashSystem 9100, FlashSystem 9200, Spectrum Virtualize for Public Cloud or Spectrum Virtualize as Software
Download Description
The utility can be used to check for known issues which may cause problems during a SAN Volume Controller, Storwize V7000, IBM Flex System V7000, Storwize V5000, Storwize V3500, Storwize V3700, FlashSystem V9000, FlashSystem V840, FlashSystem 9100, FlashSystem 9200, Spectrum Virtualize for Public Cloud and Spectrum Virtualize as Software update.
The utility can be run as many times as necessary at any time before a system update, but it is now required to have at least one run before an update. The utility performs a readiness check in preparation for a software update and we strongly recommend running this utility immediately prior to applying the update, making sure that there have not been any new releases of the utility since it was previously downloaded.
Running the upgrade test utility is now mandatory for all drive firmware upgrades on Spectrum Virtualize code levels 8.4.2 or later.
The installation and usage of this utility is non-disruptive and does not require any nodes to be restarted, so there is no interruption to host I/O. The utility will only be installed on the current configuration node / node canister.
When preparing for a software update, system administrators should also review the Flash Alerts relating to the SAN Volume Controller, Storwize V7000, IBM Flex System V7000, Storwize V5000, Storwize V3500, Storwize V3700, FlashSystem V9000, FlashSystem V840, FlashSystem 9100, FlashSystem 9200, Spectrum Virtualize for Public Cloud and Spectrum Virtualize as Software version they are intending to install.
Installation Instructions
To use the upgrade test utility, follow these steps:
Download the latest version of the Software Upgrade Test Utility:-
Navigate to Fix Central here, choose your specific product and download from the "Select fixes" page for your product.
Though it is the same utility for SAN Volume Controller, Storwize V7000, IBM Flex System V7000, Storwize V5000, Storwize V3500, Storwize V3700, FlashSystem V9000, FlashSystem V840, FlashSystem 9100, FlashSystem 9200, FlashSystem 9500 Spectrum Virtualize for Public Cloud and Spectrum Virtualize as Software, you need to download from the page for your product in order to pass entitlement checking.
When updating systems running releases v8.x and later:
- From the Dashboard, select Settings > System in the GUI
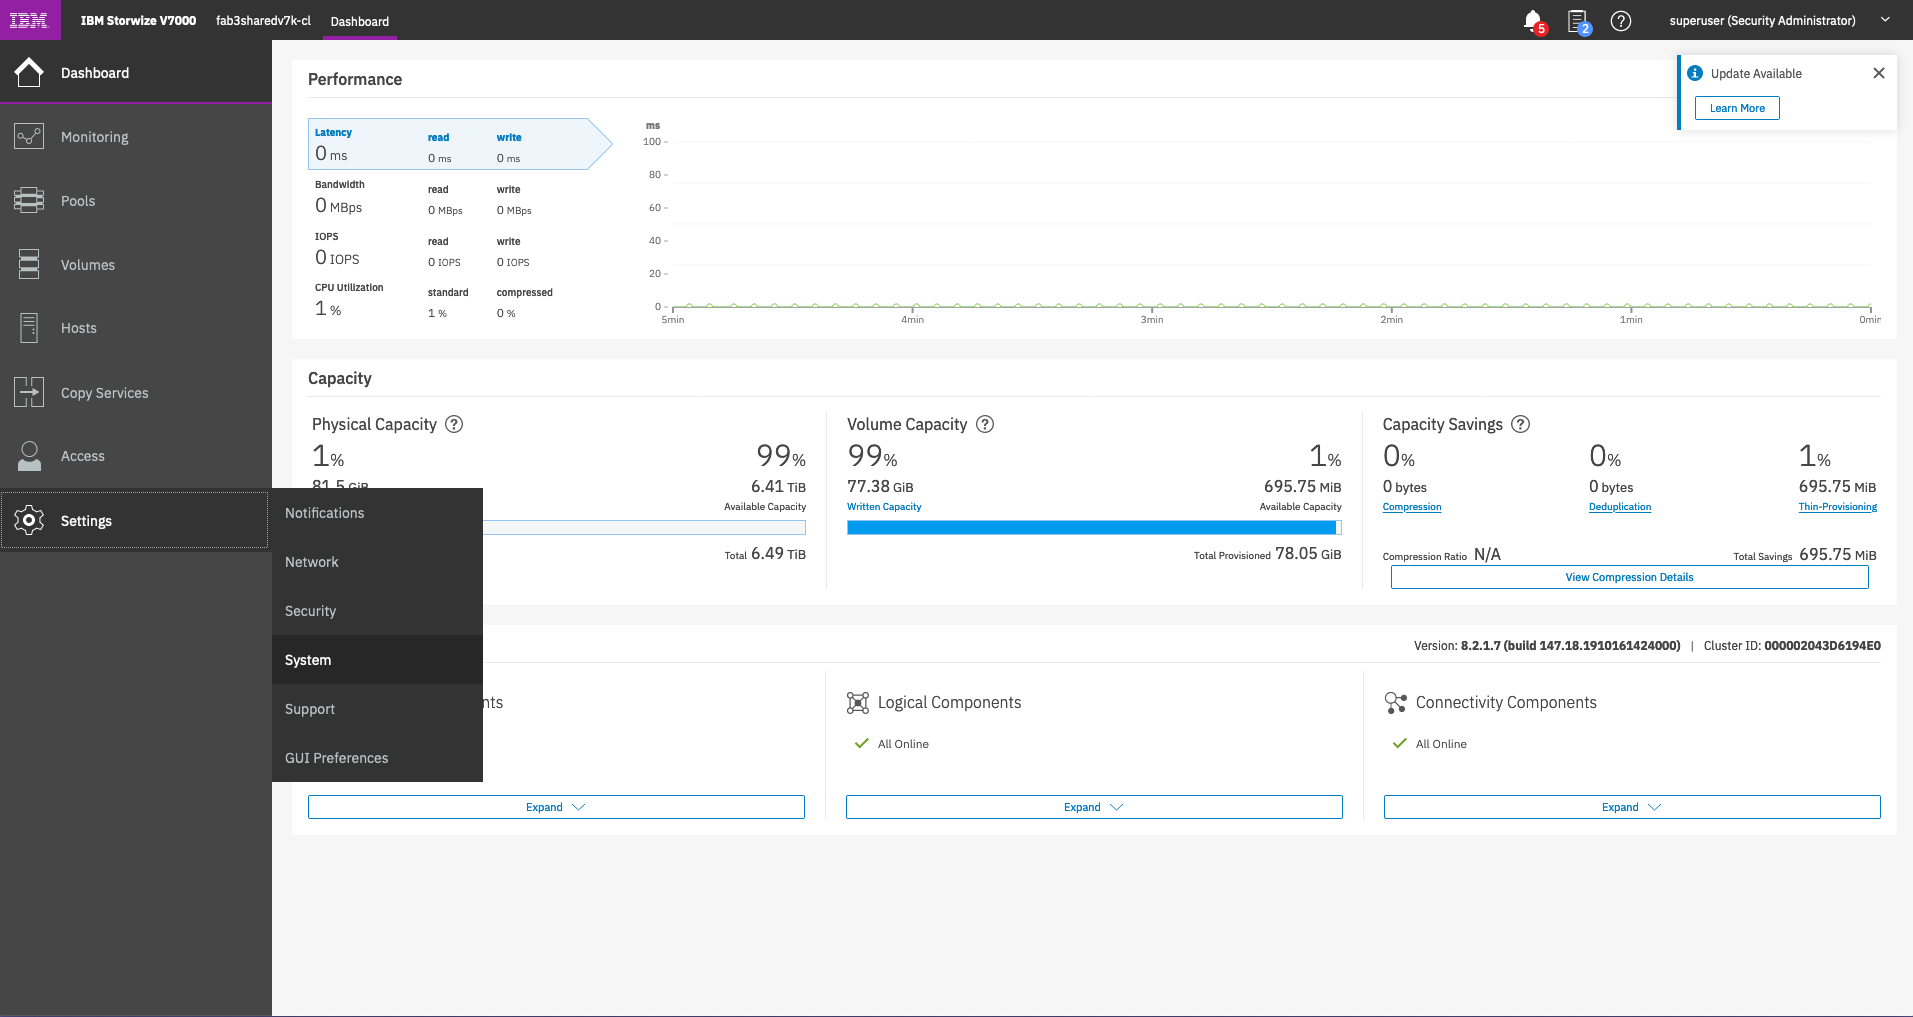
- Select "Update System"
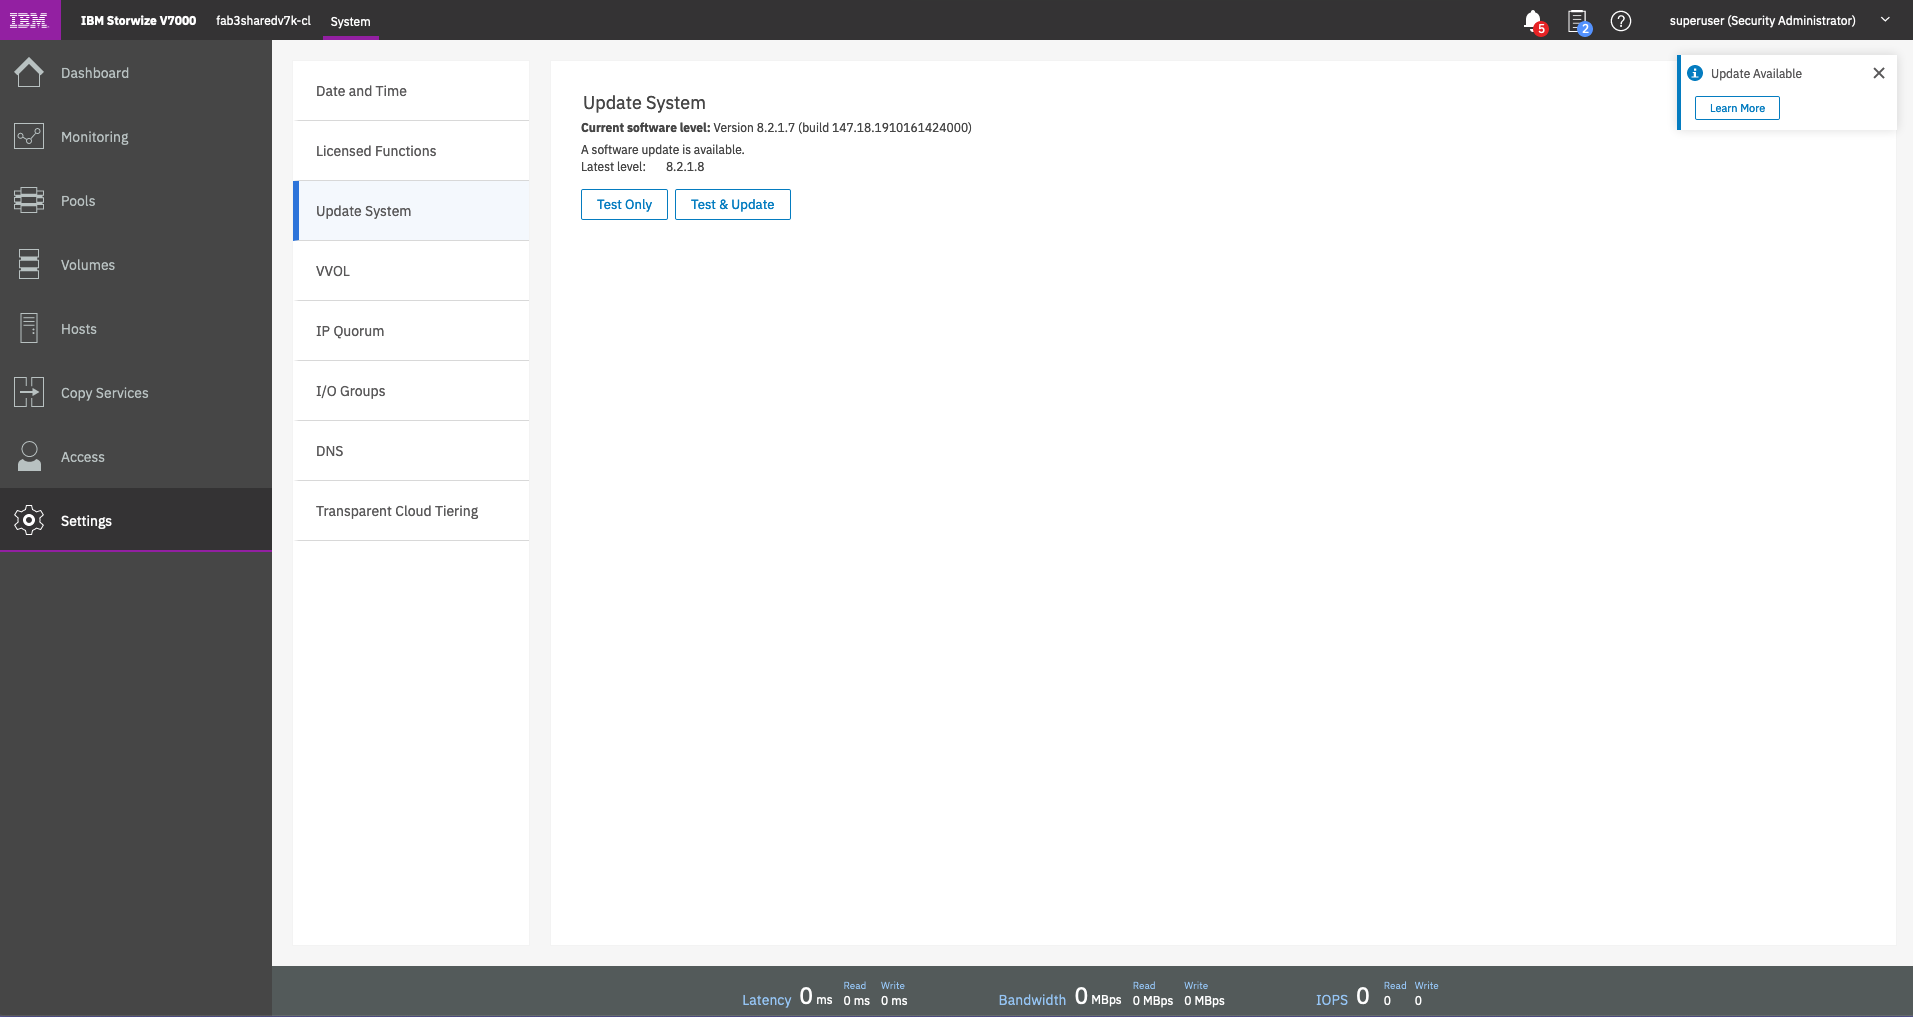
- You can choose to "Update and Test" or just run the utility tool using the "Test Only" button (please details for this at the bottom of the page).
- Click the "Update and Test" button.
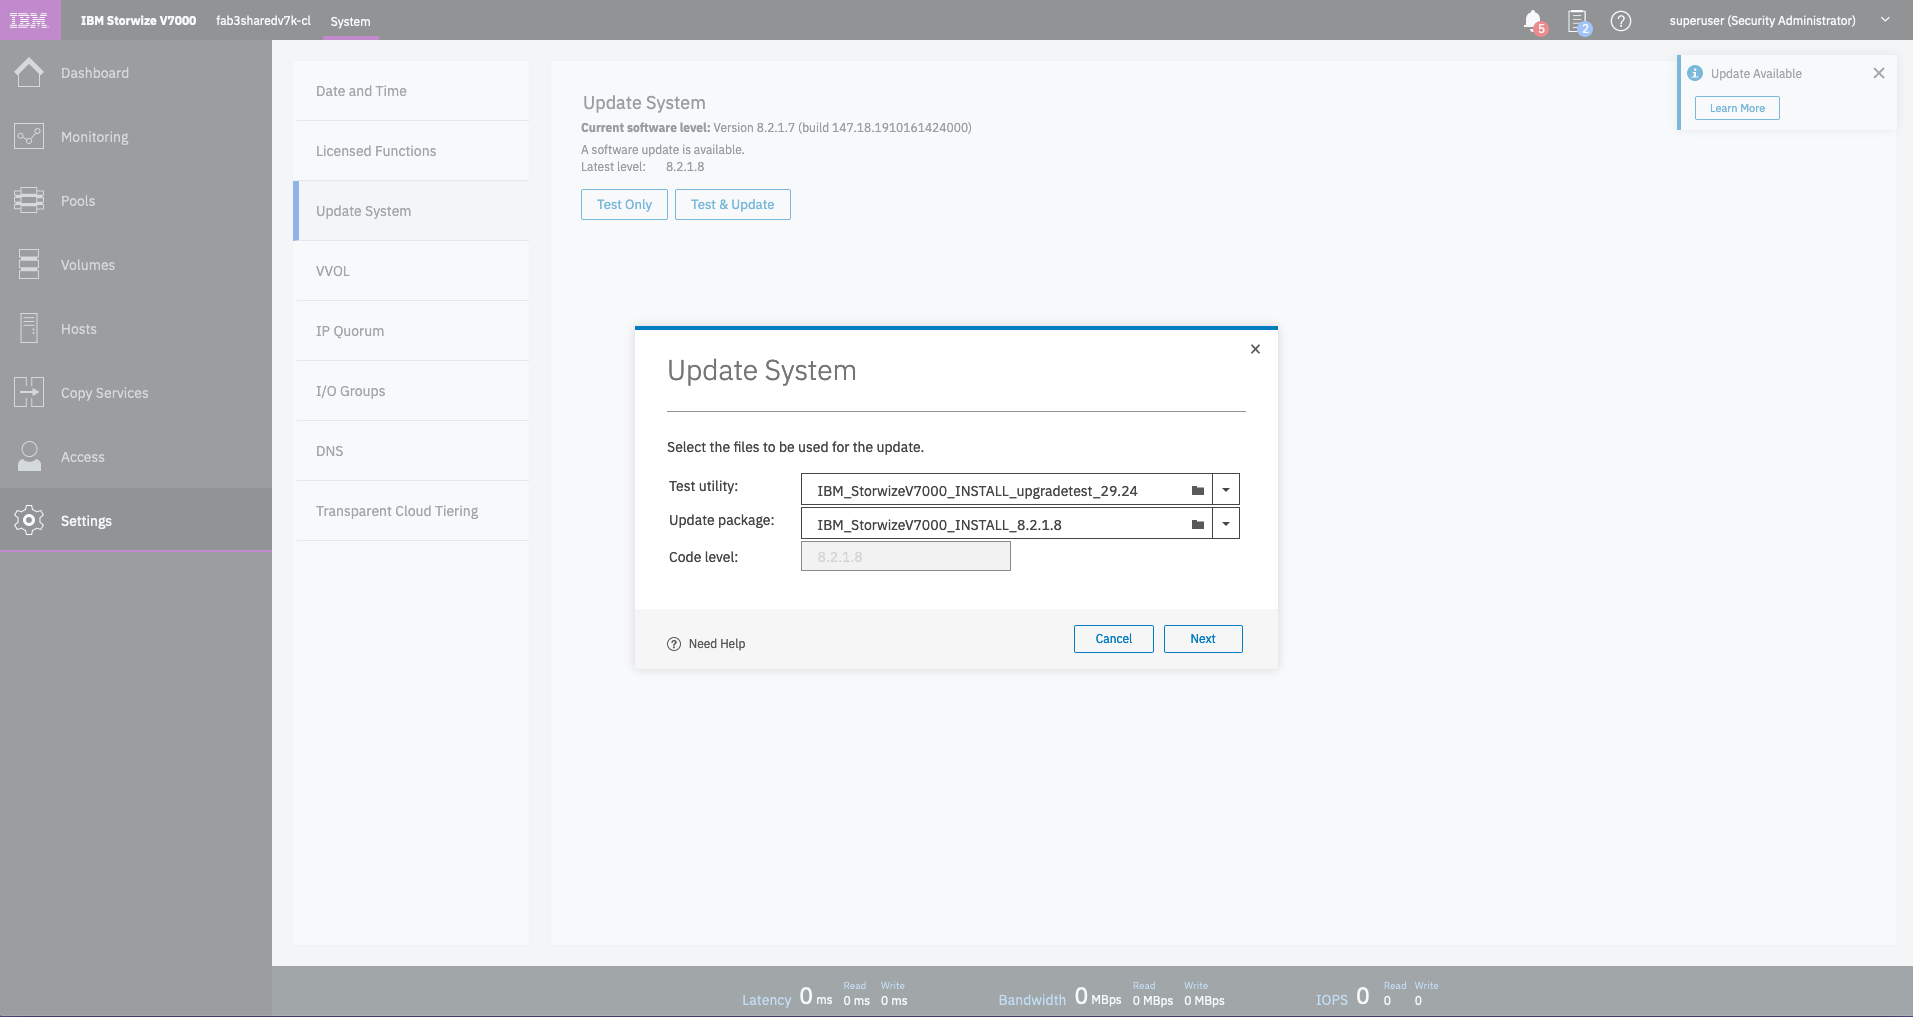
- When prompted, upload the Test utility package and the Update package files and then click "Next" as shown in the following screenshot
- The following panel will ask you to select the type of update. You can choose between an automatic update or a service assistant manual update.
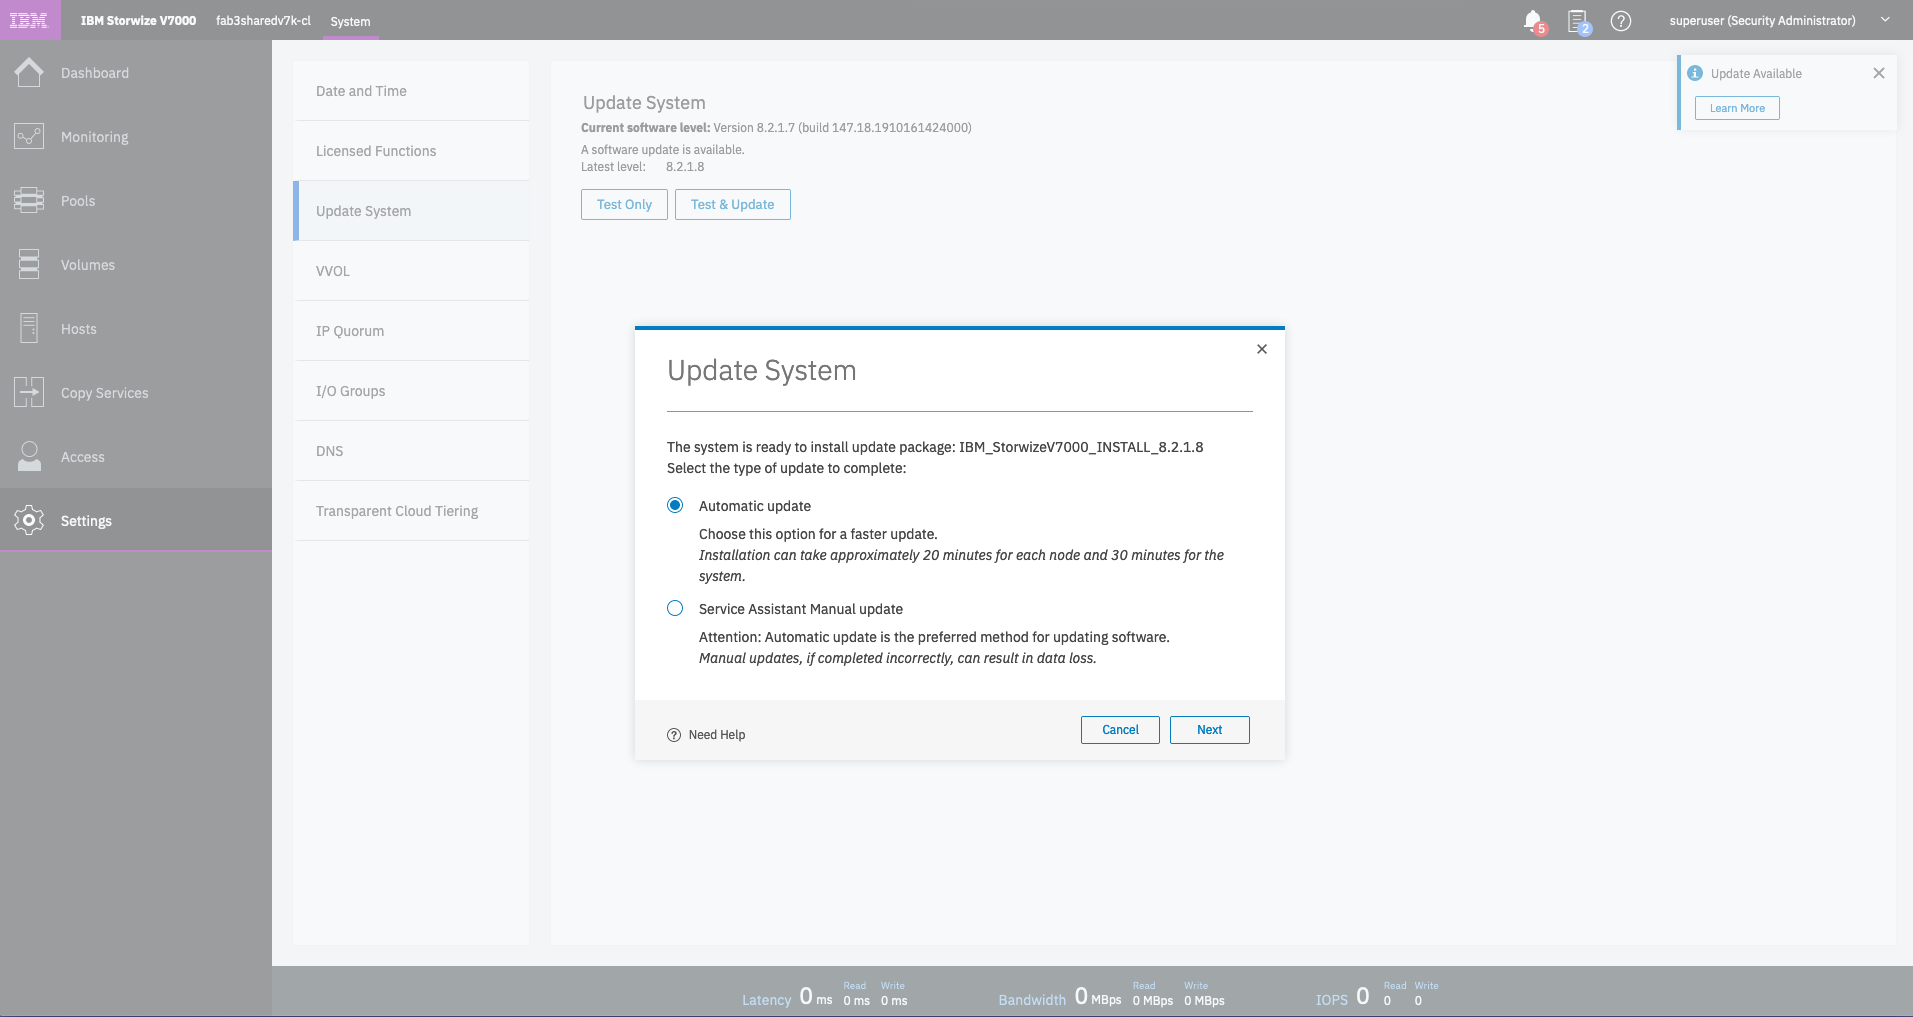
- To proceed after your selection click "Next" to start uploading the packages.
- If there are no warning(s) or error(r)s detected the system update will continue and start updating system nodes / node canisters.
When updating systems running releases between v7.6.0 and v7.8:
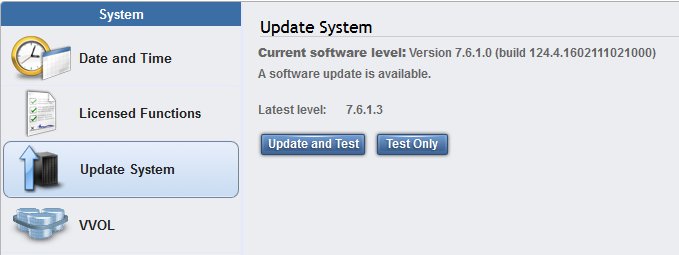
- Go to the Settings > System panel in the GUI
- Select Update System
- You can choose to Update and Test or just run the utility tool from the GUI by selecting Test Only

- Press the Update and Test button. For Test Only please find steps at the bottom of this page.
- When prompted, upload the Test utility package and the Update package file and then press Update as shown in the following screenshot

- The following panel will ask you to select the type of update. You can choose between an automatic update or a service assistant manual update. To proceed after your selection press Finish to start uploading the packages

- If there are no warning(s) or error(r)s detected the system update will continue and start updating system nodes / node canisters.
- If the test upgrade utility detected warning(s) or error(s), you can review the output by selecting Go to Update System and then click Read more to see which actions are required before starting the system update by clicking Resume
- Otherwise you can click Cancel to exit the update wizard.
Note: If you wish to run the Software Upgrade Test Utility on its own and without proceeding with the Software Update, then you have to follow the CLI steps for now. Please find steps at the bottom of this page.
- Go to the Settings > System panel in the GUI
- Select Update Software
- Press the Update button
- When prompted, upload the Test utility package and the Update package file and then press Update as shown in the following screenshot

- The following panel will ask you to select the type of update. You can choose between an automatic update or a service assistant manual update. To proceed after your selection press Finish to start uploading the packages

- If there are no warning(s) or error(r)s detected the system update will continue and start updating system nodes / node canisters.
- If the test upgrade utility detected warning(s) or error(s), you can review the output by selecting Go to Update System and then click Read more to see which actions are required before starting the system update by clicking Resume
- Otherwise you can click Cancel to exit the update wizard
When updating systems running releases between V6.1.0 and the latest V7.3.0 PTF:
- Go to theSettings > General or Configuration > Advanced panel (depending on your code version) in the GUI
- Select Upgrade Software
- Press the Launch Upgrade Wizard button
- When prompted, upload the upgrade test utility package to the system and click Next
- When prompted, enter the software version you intend to upgrade to and click Next. This field will be automatically populated with the latest available software version if it is available
- The following page will contain the results of the upgrade test. Review the output from the upgrade test utility to see if any actions are required before starting the upgrade

When checking drive firmware levels only:
- The utility package can be installed using the standard SVC Console (GUI) or command-line (CLI) software upgrade procedures that are used to install any new software onto the system.
Notes:- An example CLI command to install the package, once uploaded to the system, is
svctask applysoftware -file IBM2145_INSTALL_upgradetest_X.X - If using the CLI to install the package, the return code for the applysoftware command will always be 1, whether the installation has succeeded or failed. The message which is returned when the command completes will report the installation result.
- An example CLI command to install the package, once uploaded to the system, is
- Run the upgrade test utility by logging onto the SVC command line interface and running:
'svcupgradetest -f'. - Review the output to check whether any drives are not at the latest level.
- If you wish to view the complete list of drives that are not at the latest level, run the command:
'svcupgradetest -f -d'.
When updating the drive firmware using the command line at release 8.4 or higher:
- The utility package can be installed using the standard SVC Console (GUI) or command-line (CLI) software update procedures that are used to install any new software onto the system.
Notes:- An example CLI command to install the package, once uploaded to the system, is
svctask applysoftware -file IBM2145_INSTALL_upgradetest_X.X - If using the CLI to install the package, the return code for the applysoftware command will always be 1, whether the installation has succeeded or failed. The message which is returned when the command completes will report the installation result.
- An example CLI command to install the package, once uploaded to the system, is
- Run the upgrade test utility by logging onto the SVC command line interface and running:
'svcupgradetest -w <Drive Firmware File>', where the firmware file has been uploaded to the /upgrade directory.
For example, if planning to update using the firmware contained in IBM_FlashSystem9x00_NVME_DRIVE_ALL_220121, the command would be 'svcupgradetest -wIBM_FlashSystem9x00_NVME_DRIVE_ALL_220121' - Review the output to check whether there have been any problems found by the utility. The output from the command will either state that there have been no problems found, or will direct you to details about any known issues which have been discovered on the system.
When updating using the Command-line (CLI):
- The utility package can be installed using the standard SVC Console (GUI) or command-line (CLI) software update procedures that are used to install any new software onto the system.
Notes:- An example CLI command to install the package, once uploaded to the system, is
svctask applysoftware -file IBM2145_INSTALL_upgradetest_X.X - If using the CLI to install the package, the return code for the applysoftware command will always be 1, whether the installation has succeeded or failed. The message which is returned when the command completes will report the installation result.
- An example CLI command to install the package, once uploaded to the system, is
- Run the upgrade test utility by logging onto the SVC command line interface and running:
'svcupgradetest -v <V.R.M.F>', where V.R.M.F is the version number of the new software being installed.
For example, if planning to update to SVC 7.5.0.2, the command would be 'svcupgradetest -v 7.5.0.2' - Review the output to check whether there have been any problems found by the utility. The output from the command will either state that there have been no problems found, or will direct you to details about any known issues which have been discovered on the system.
When running the utility using the Graphical user interface (GUI) only:
From V8.1.0 and onwards the utility can be installed and run in the GUI on its own.
- Select Test Only from the Update System page
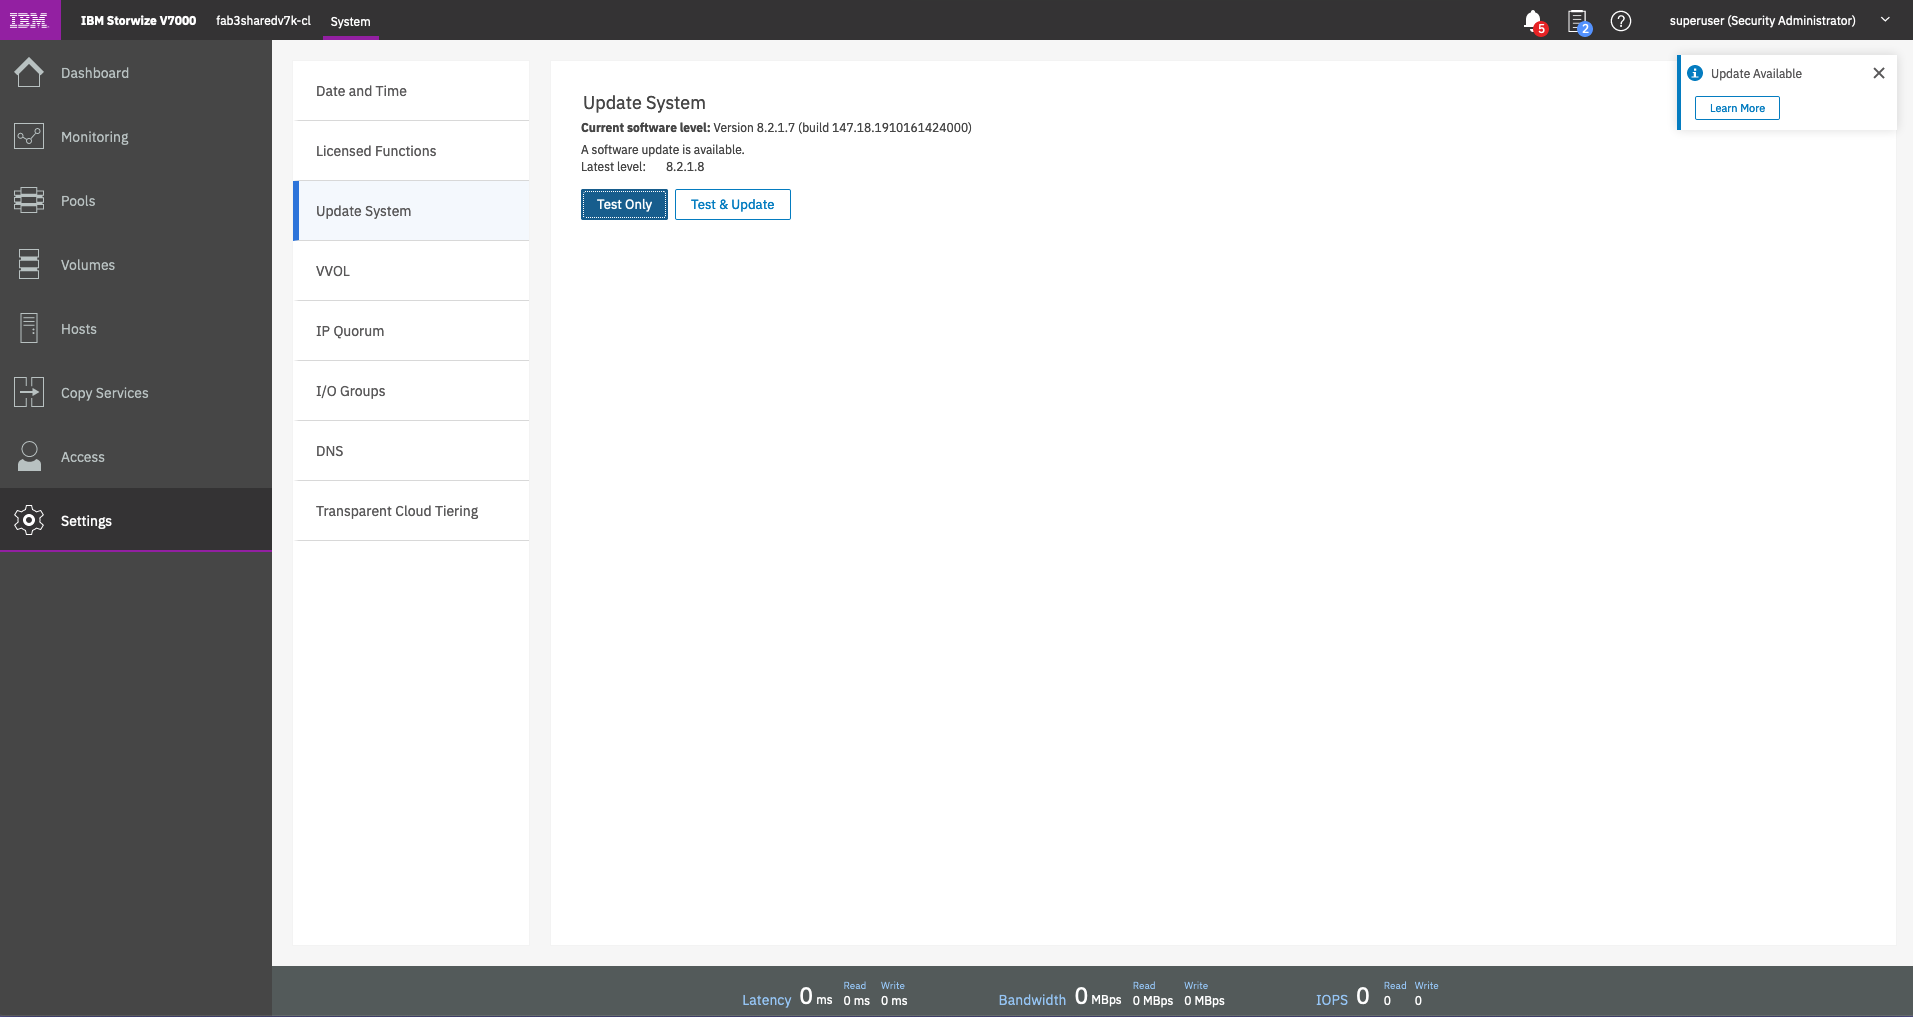
- Upload the Test utility file and enter the Code level you are planning to update to.
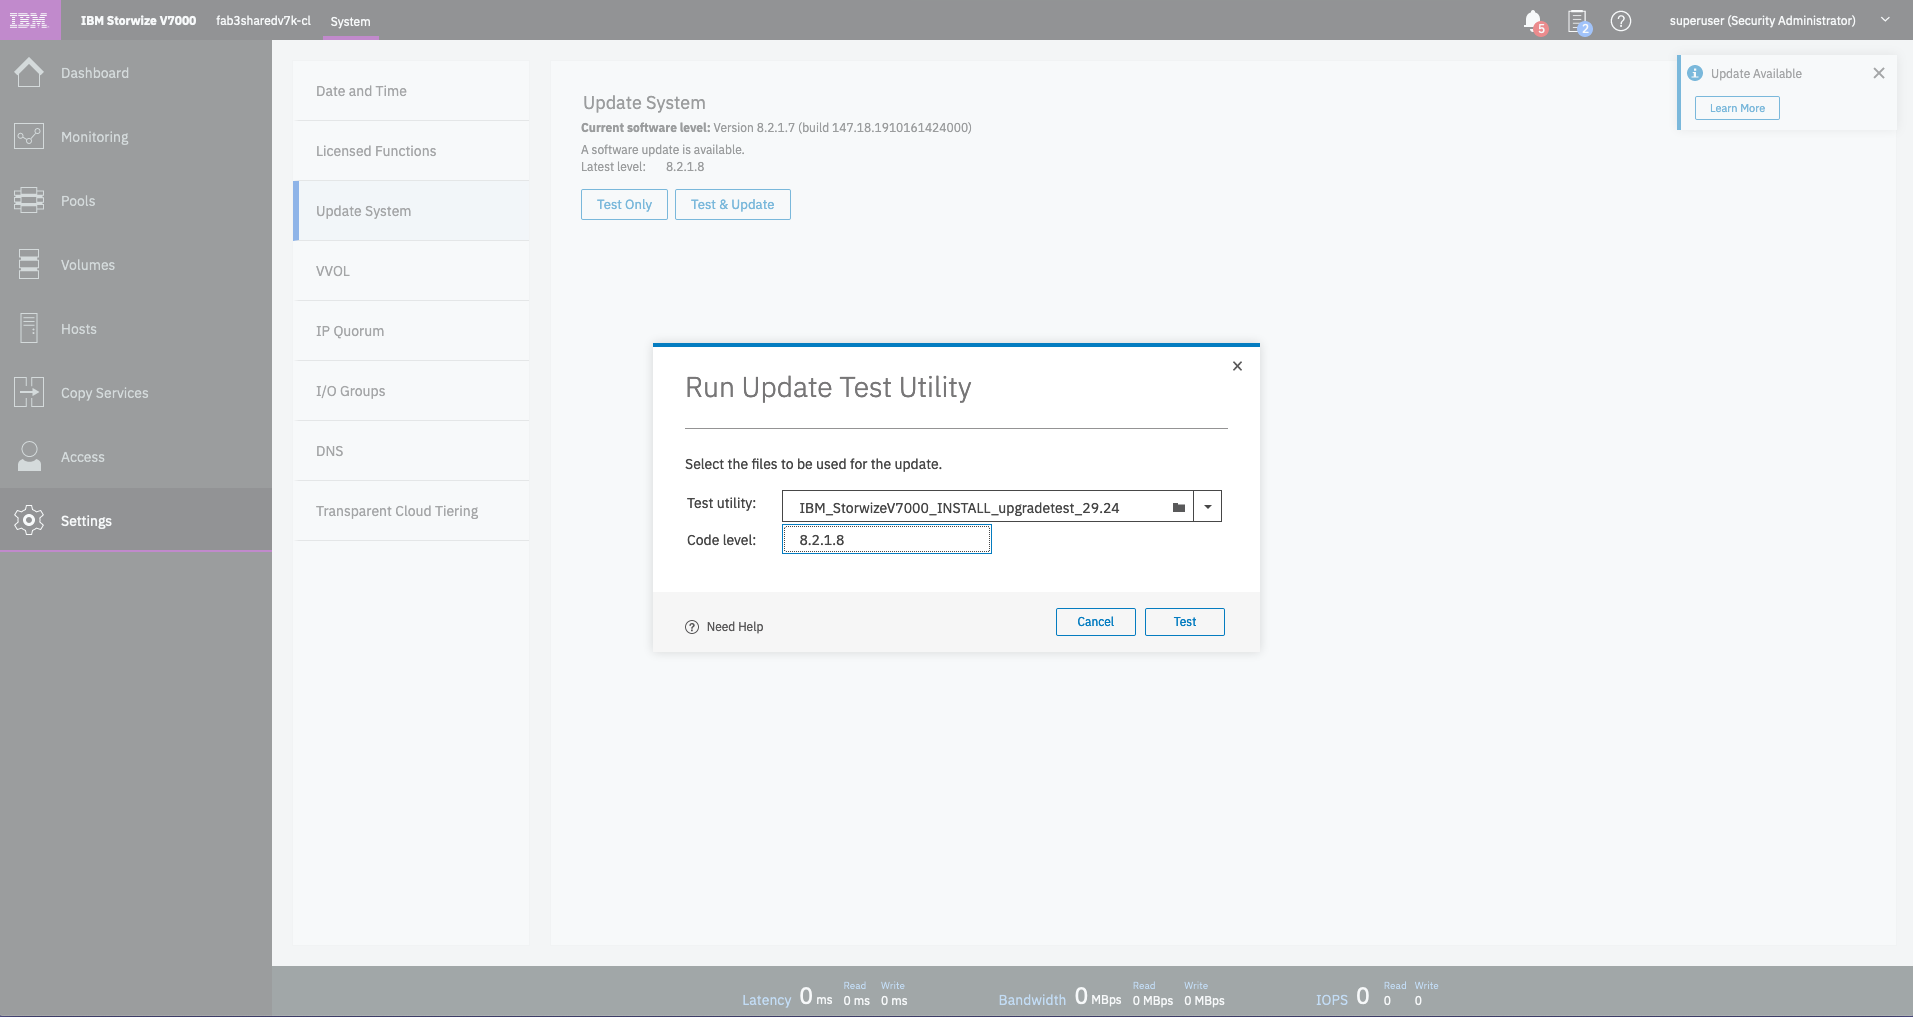
Click "Test" - After the Update Test Utility completed, you will be presented with the results.

- The results will either state that there have been no warnings / problems found, or will direct you to details about any known issues which have been discovered on the system.
From V7.6.0 and onwards the utility can be installed and run in the GUI on its own.
- Select Test Only from the Update System page and upload the Test utility file and enter the Code level you are planning to update to.

- After the file was uploaded and the Update Test Utility completed, you will be presented with the results.
- The results will either state that there have been no warnings / problems found, or will direct you to details about any known issues which have been discovered on the system.
Was this topic helpful?
Document Information
Modified date:
28 March 2023
UID
ssg1S4000585