Troubleshooting
Problem
This document discusses options for printing to a LAN-attached printer that requires an access code or security code.
Resolving The Problem
This document discusses options for printing to a LAN-attached printer that requires an access code or security code.
Some newer printers have added a hardware setting to require an access code to allow printing across the network. In some cases, the access code is only used to authenticate those who have permission to print in color, but can also be used to limit who can print in black and white, as well as in color.
IBM i has no support for sending an access code to the printer hardware. However, there still are a few options to allow the system to print to the printer:
Note: If a modified Workstation Customizing Object (WSCST) is setup to successfully send the access or security code to the printer, you may also need to enter that same code on the printer to have it print the spooled file. Some printer manufacturers use this as an extra layer of security so not only authorized users can print, but only the authorized user is allowed access to the printed output in case it contains confidential material.
Some newer printers have added a hardware setting to require an access code to allow printing across the network. In some cases, the access code is only used to authenticate those who have permission to print in color, but can also be used to limit who can print in black and white, as well as in color.
IBM i has no support for sending an access code to the printer hardware. However, there still are a few options to allow the system to print to the printer:
| 1. | Check whether the printer hardware has a setting to allow full access to certain IP addresses without entering an access code. If so, add the IP address for each system and LPAR to that list. |
| 2. | Discuss this issue with the printer manufacturer to find out the PCL (Printer Control Language) or PJL (Printer Job Language) command needed to gain access to the printer, and create a modified Workstation Customizing Object (WSCST) to send that command to the printer. |
| 3. | Setup the manufacturer's printer driver to send the necessary access codes and print to FILE: using a Windows Test Page or a Windows application, then display the file using Wordpad to see if you can determine the PCL (Printer Control Language) or PJL (Printer Job Language) commands that are sent by the printer driver. For more information, refer to the section titled "Example of Printing to FILE to Determine PJL Commands" below. |
| 4. | Change the printer hardware settings to turn off the requirement to enter an access code. |
| 5. | Configure a PC5250 or TN5250e printer session to print using the Windows printer driver. Note: This may require configuring the printer session to not use Host Print Transform (HPT), or a Printer Definition Table (PDT) file in the case of PC5250. If so, the printer session will not be able to print *AFPDS or *USERASCII spooled files (since that requires using HPT) and will also have limited control over the formatting of their output, including limited control over the font selection. |
Note: If a modified Workstation Customizing Object (WSCST) is setup to successfully send the access or security code to the printer, you may also need to enter that same code on the printer to have it print the spooled file. Some printer manufacturers use this as an extra layer of security so not only authorized users can print, but only the authorized user is allowed access to the printed output in case it contains confidential material.
 Examples of Sending PJL Commands using the Initialize Printer (INITPRT) Tag
 Caution: These exampls are provided as is. Any assistance with editing the Workstation Customization Table must be done through a consulting agreement. Follow the steps in Basic Steps for Creating and Using a Workstation Customization Object for retrieving and editing the WSCST source, edit the source per the information in this document. Return to the Basic Steps document to implement the WSCST object.The following codes have been shown to work with some printers and are being provided as examples of how to send an access code using the Initialize Printer (INITPRT) tag in a modified Workstation Customizing Object (WSCST). However, these examples are provided "as is" and there is no guarantee that they will work with any specific printer models.
If these examples do not work for your situation, you will need to get the working codes from your printer manufacturer.
Note: There is currently a limit of 256 bytes that can be sent to a printer using the Initialize Printer (INITPRT) tag.
For Auditron or Xerox Standard Accounting with a Default Account and a code of 9999, try using the following PJL commands:
~-12345X@PJL JOB
@PJL COMMENT XRXBEGIN
@PJL COMMENT OID_ATT_ACCOUNTING_INFORMATION_AVP "XRX_USERID,1234";
@PJL COMMENT XRXEND
@PJL ENTER LANGUAGE=PCL
which can be sent using the following Initialize Printer (INITPRT) tag:
:INITPRT
DATA ='1B252D31323334355840504A4C204A4F420D0A'X
/* Ec% - 1 2 3 4 5 X @ P J L J O B CRLF */
'40504A4C20434F4D4D454E5420585258626567696E0D0A'X
/* @ P J L C O M M E N T X R X B E G I N CRLF */
'40504A4C20434F4D4D454E54204F49445F4154545F4143434F554E5449'X
/* @ P J L C O M M E N T O I D _ A T T _ A C C O U N T I */
'4E475F494E464F524D4154494F4E5F41565020225852585F5553455249'X
/* N G _ I N F O R M A T I O N _ A V P " X R X _ U S E R I */
'442C31323334223B0D0A'X
/* D , 9 9 3 4 " ; CRLF */
'40504A4C20434F4D4D454E5420585258656E640D0A'X
/* @ P J L C O M M E N T X R X E N D CRLF */
'40504A4C20454E544552204C414E47554147453D50434C0D0A'X
/* @ P J L E N T E R L A N G U A G E = P C L CRLF */
'1B45'X.
/* EcE (PCL Reset Printer command) */
For TOSHIBA eStudio printers, try using the following PJL command:
@PJL COMMENT DSSC PRINT ACCESSCODE=45678
which can be sent using the following Initialize Printer (INITPRT) tag:
:INITPRT
DATA ='40504A4C20434F4D4D454E54204453534320505249'X
/* @ P J L C O M M E N T D S S C P R I */
'4E5420414343455353434F44453D34353637380D0A'X
/* N T A C C E S S C O D E = 4 5 6 7 8 CRLF */
'1B45'X.
/* EcE (PCL Reset Printer command) */
 Example of Printing to FILE to Determine PJL Commands
One option to find out the PCL (Printer Control Language) or PJL (Printer Job Language) command needed to gain access to the printer is to contact the printer manufacturer and ask them.
Another option would be to setup the manufacturer's printer driver to send the necessary access codes, print to FILE: using a Windows Test Page or a Windows application, then display the file using Wordpad to see if you can determine the PCL (Printer Control Language) or PJL (Printer Job Language) commands that are sent by the printer driver.
For example:1. Download and install the printer driver for your printer from the manufacturer's web site.
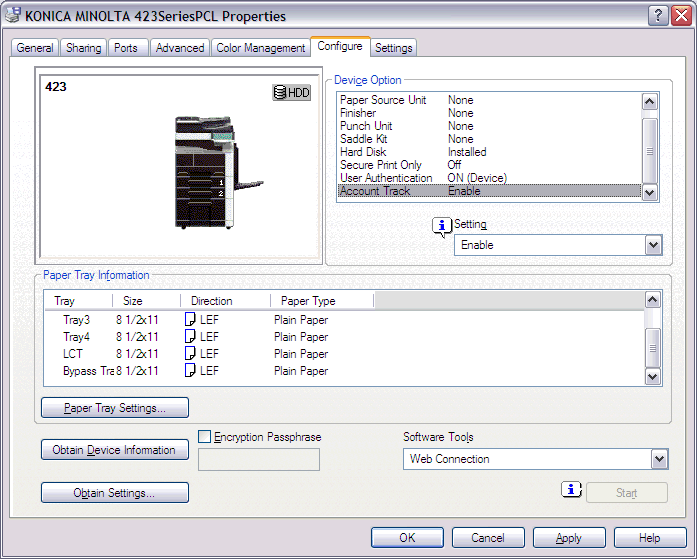
Note: The examples below use the printer driver for the Konica Minolta bizhub 223/283/363/423 printer models.2. Setup the driver to send the access codes as needed, and confirm that you are able to successfully print to the printer from Windows.

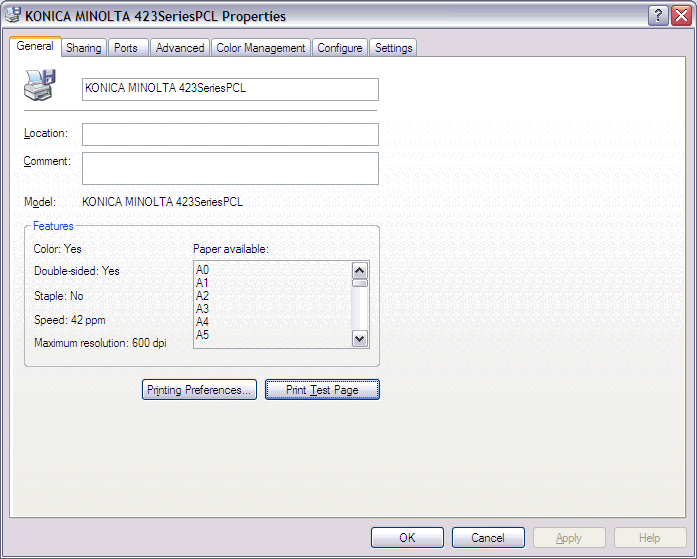
3. Next, change the printer driver to print to the Windows port called "FILE:" which is used to print to a file, then click on the Print Test Page button from the General tab of the driver settings.

4. Type a file name on the Print to File dialog box. For example:

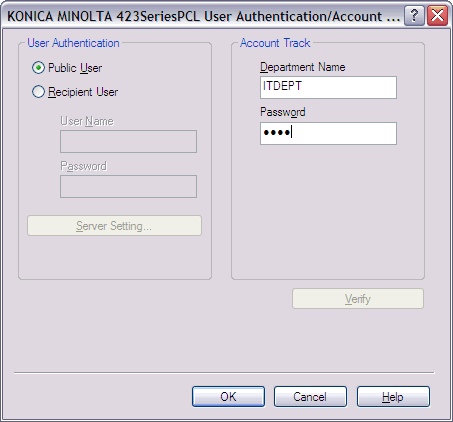
5. Type in the access code or password when prompted. For example:

6. Open the text file (for example, c:\access_code.txt) using Wordpad and see if you can determine the PJL commands that the manufacturer's printer driver sends to the printer for authentication. For example:
@PJL SET BOXHOLDTYPE = PUBLIC
@PJL SET KMUSERNAME = "Public"
@PJL SET KMUSERKEY2 = "5BEA1CC2EC566ACD247E0770377977E9"
...
@PJL SET KMSECTIONNAME = "ITDEPT"
@PJL SET KMSECTIONKEY2 = "8DCEAE1F5DAB5BAD0C640153A2454644"
[{"Type":"MASTER","Line of Business":{"code":"LOB57","label":"Power"},"Business Unit":{"code":"BU058","label":"IBM Infrastructure w\/TPS"},"Product":{"code":"SWG60","label":"IBM i"},"Platform":[{"code":"PF012","label":"IBM i"}],"Version":"7.4.0"}]
Historical Number
555312039
Was this topic helpful?
Document Information
Modified date:
01 October 2020
UID
nas8N1012398