Troubleshooting
Problem
This document explains how to configure the Telnet and IBM i Access Host Servers for Server Authentication with TLS for the first time.
Resolving The Problem
This document explains how to configure the Telnet and IBM i Access Host Servers for Server Authentication with TLS for the first time.
Note: This document was created for configuring a new system. For systems that already have the stores for Digital Certificate Manager, you should ensure that the existing Certificate Authority and server certificates are valid. If they are not valid, you must renew them first and then proceed to Step 12 to assign them to the servers.
To establish a secure 5250 session over TLS using the IBM i Access Family of clients, the Telnet server and IBM i Access Host Servers must be configured to use Secure Sockets. For further information on configuring Secure Sockets and what LPPs must be installed, you should refer to the IBM i Knowledge Center at the following Web site:
https://www.ibm.com/docs/en/i/7.5?topic=security-tls-prerequisites
This document covers creating a System Certificate and assigning the System Certificate to the Telnet and Access for Windows Host Servers applications.
NOTE: Heritage Digital Certificate Manager is now disabled by default due to a security vulnerability exposure. See the following for more details:
Steps using Heritage Digital Certificate Manager
Creating the System Certificate
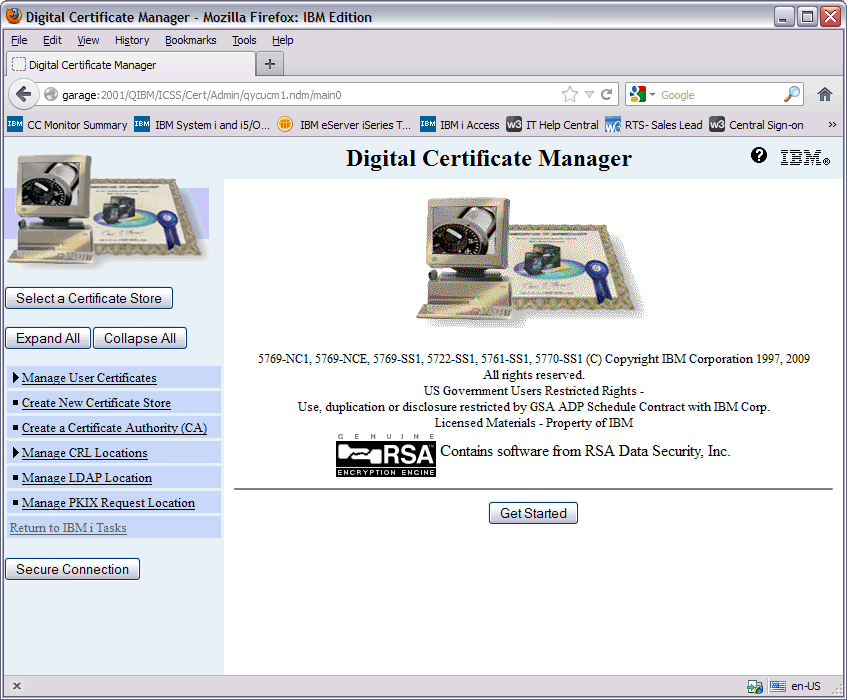
Step 1: To create the system certificate, open a Web browser and connect to: <your system name or ip address>:2001/QIBM/ICSS/Cert/Admin/qycucm1.ndm/main0
where <your system name or ip address> in this URL address is replaced with your IBM i OS IP address or system host name
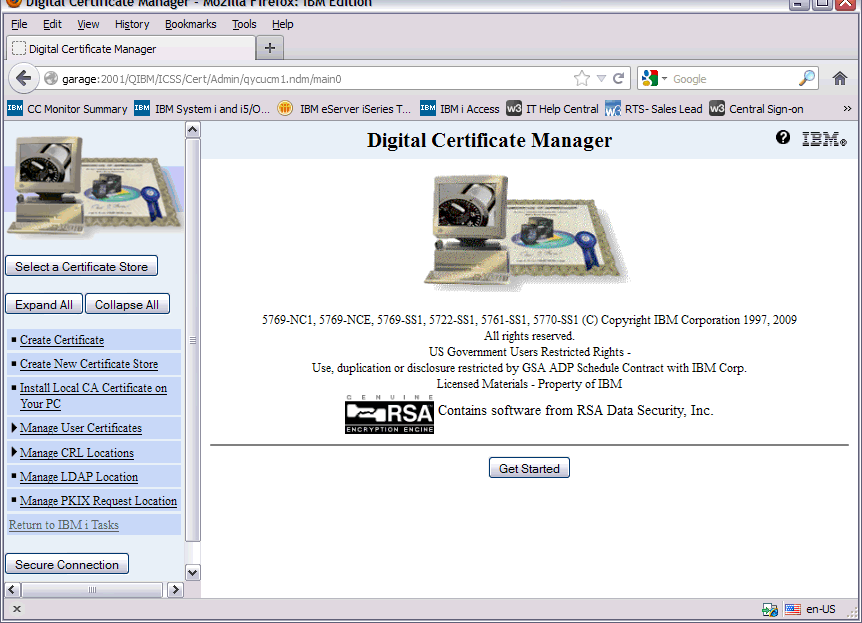
This following screen is displayed:
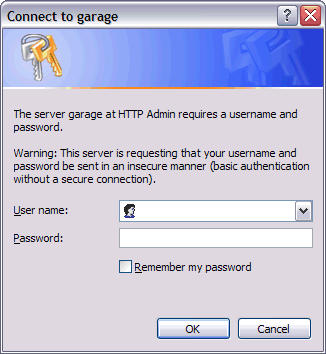
Step 2: Type a valid user profile and password that exist on the BM i OS and click OK:
Step 3: Click on Create a Certificate Authority (CA):
Note: If a Certificate Authority is already created, you will not see the Create a Certificate Authority link.
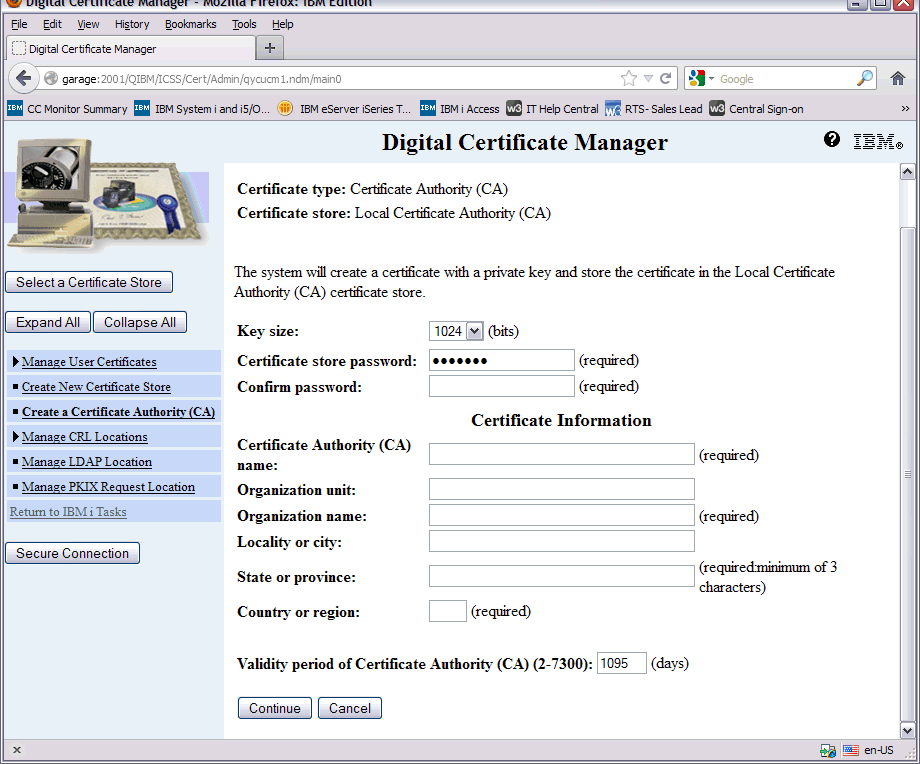
Step 4: Fill out the required fields, and click Continue. The default validity period is 1095 days. The maximum value of 7300 days is recommended, or whatever your security administrator allows.
Step 5: Click Continue:
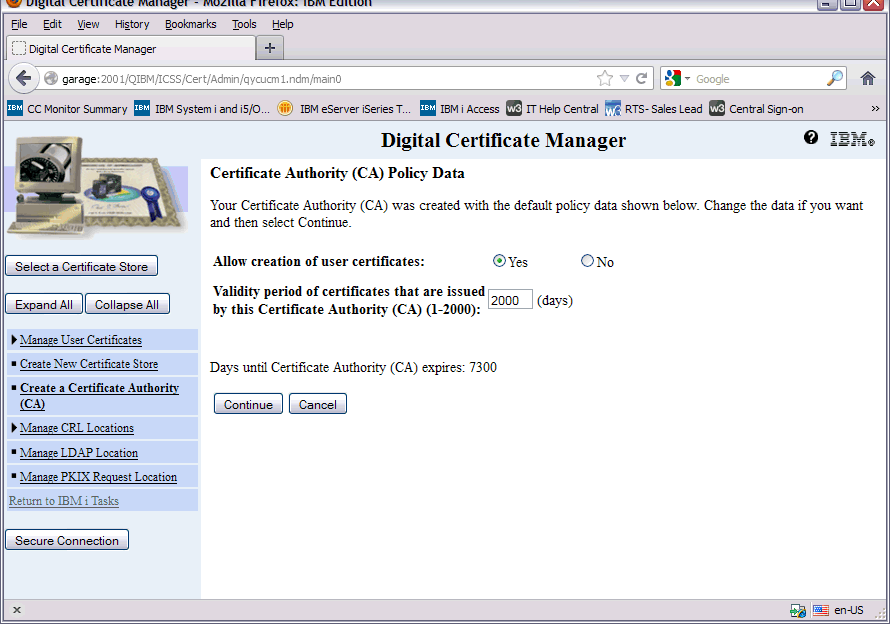
Step 6: Depending on whether or not you want to create user certificate, select Yes or No. Then set the validity period, and click Continue. The default validity period is 365 days. It is recommended that you set it for 2000 days, or whatever maximum your security administrator allows:
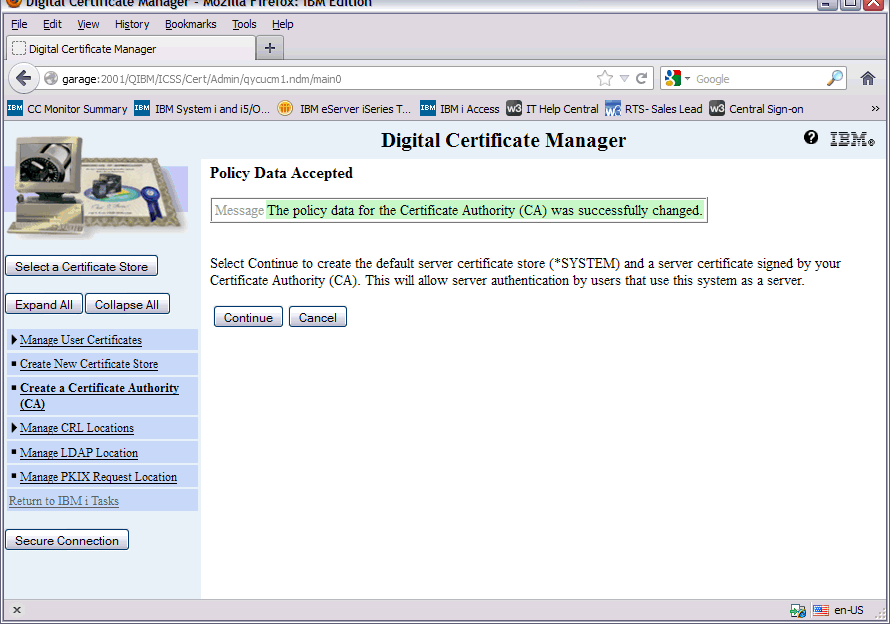
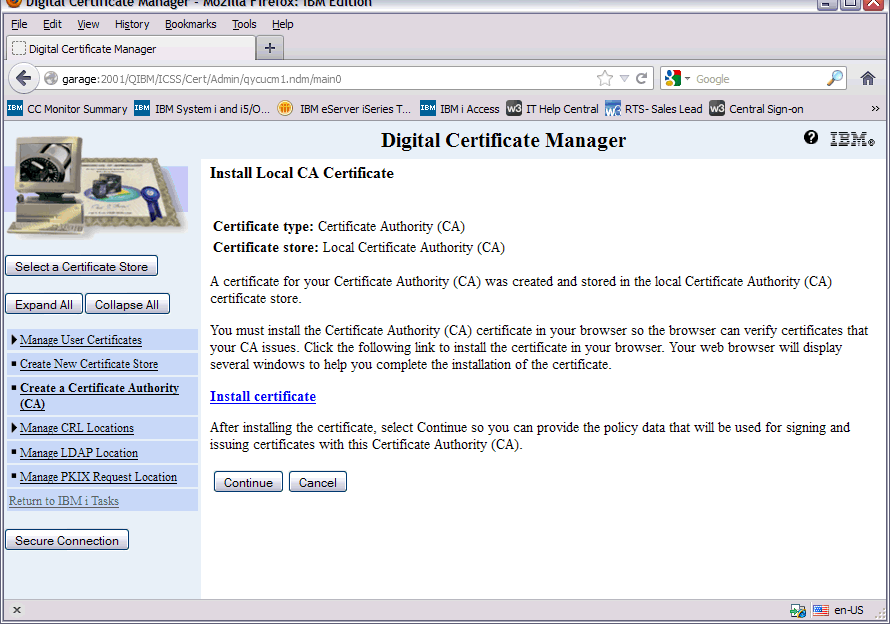
Step 7: Click Continue:
Note: Not all information is displayed on the next screen.
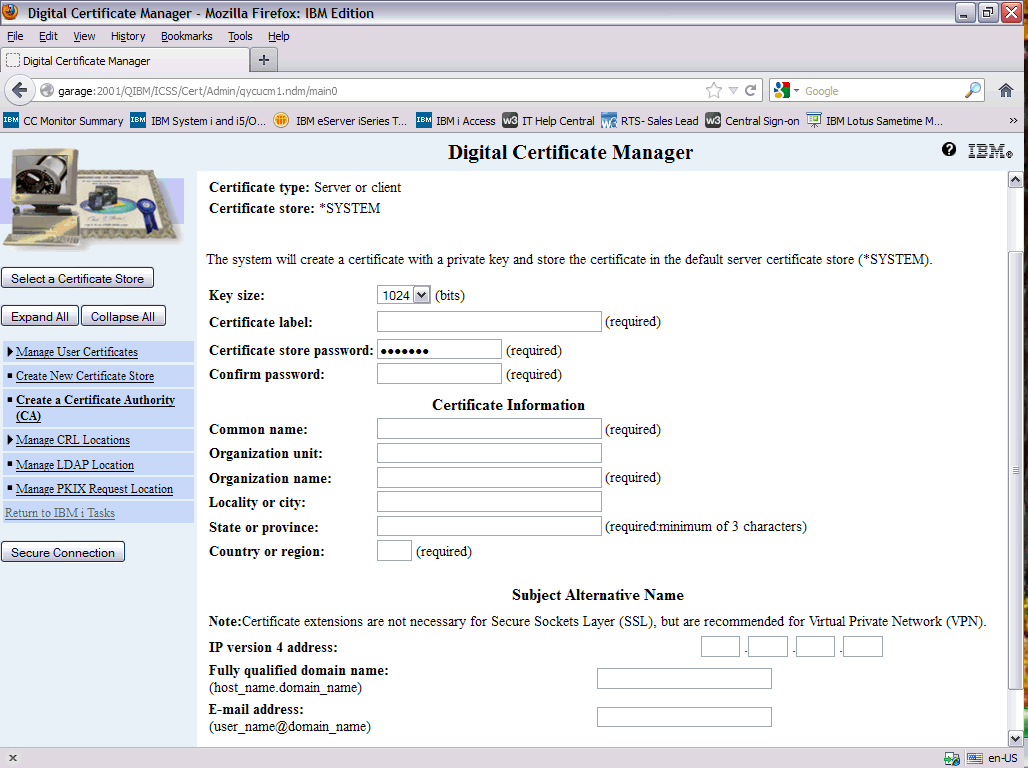
Step 8: Fill out the required fields, and click Continue:
Note: Not all information is displayed on the next screen. You will see the message at the top...
Step 1: To create the system certificate, open a Web browser and connect to: <your system name or ip address>:2001/QIBM/ICSS/Cert/Admin/qycucm1.ndm/main0
where <your system name or ip address> in this URL address is replaced with your IBM i OS IP address or system host name
This following screen is displayed:
Step 2: Type a valid user profile and password that exist on the BM i OS and click OK:
Step 3: Click on Create a Certificate Authority (CA):
Note: If a Certificate Authority is already created, you will not see the Create a Certificate Authority link.
Step 4: Fill out the required fields, and click Continue. The default validity period is 1095 days. The maximum value of 7300 days is recommended, or whatever your security administrator allows.
Step 5: Click Continue:
Step 6: Depending on whether or not you want to create user certificate, select Yes or No. Then set the validity period, and click Continue. The default validity period is 365 days. It is recommended that you set it for 2000 days, or whatever maximum your security administrator allows:
Step 7: Click Continue:
Note: Not all information is displayed on the next screen.
Step 8: Fill out the required fields, and click Continue:
Note: Not all information is displayed on the next screen. You will see the message at the top...
| Message | Your certificate was created and placed in the *SYSTEM certificate store. |
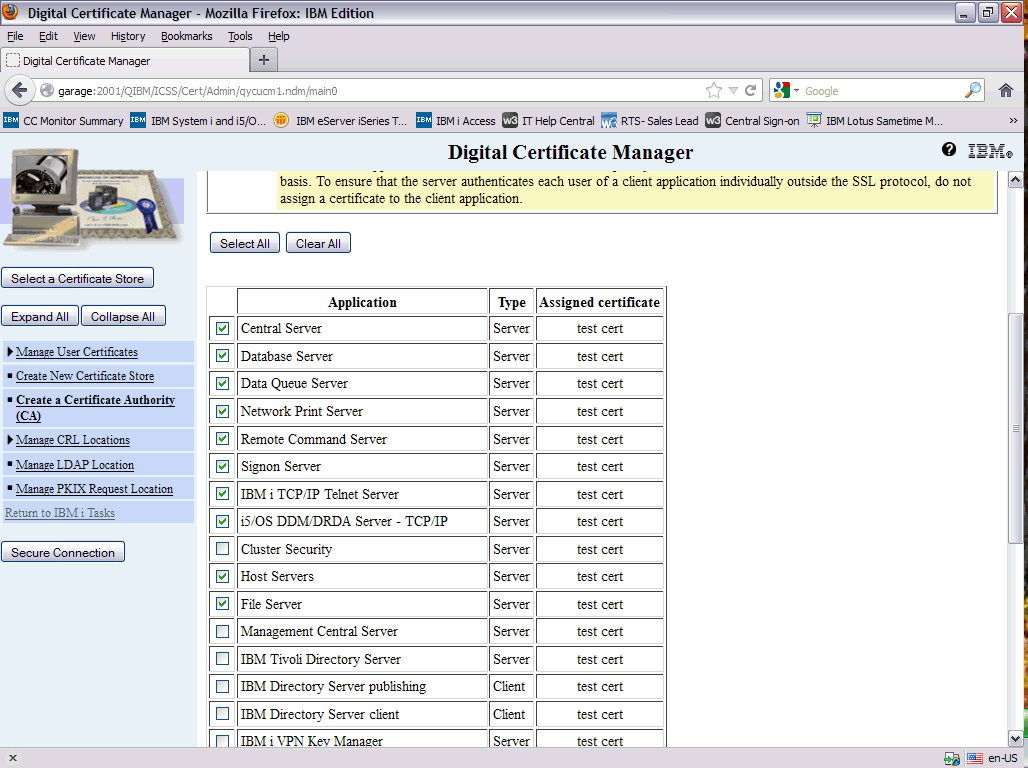
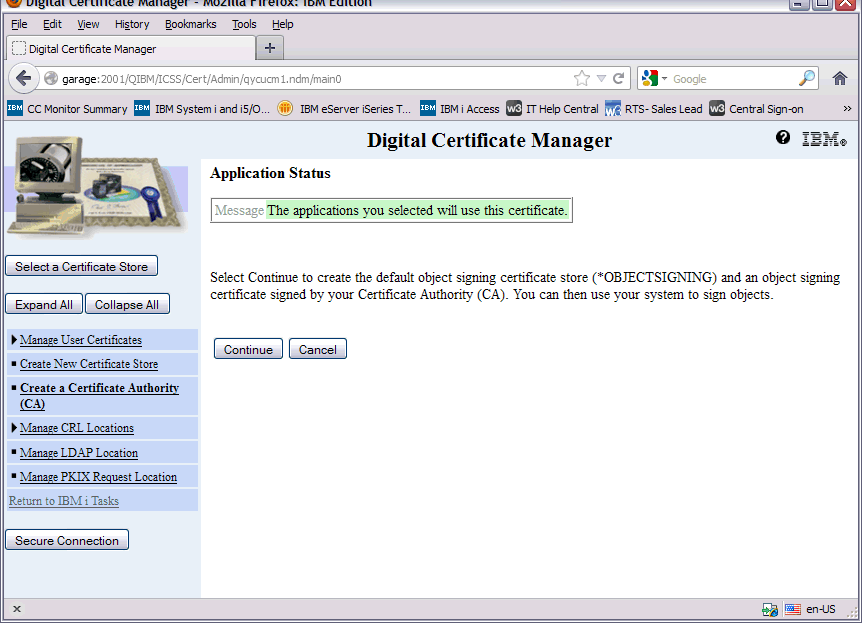
Step 9: Select the appropriate applications that you want to assign to the certificate. The specified functions of Access for Windows will determine which applications you will assign. When using Access for Windows and PC5250, the Telnet Server, Central Server, Signon Server, and Remote Command Server must be assigned. For all Access for Windows functions to be secured, also assign the Database Server, Data Queue Server, File Server, Network Print Server, File Server, Host Server and DDM/DRDA. When done selecting the applications, click Continue:
Step10: Click Continue:
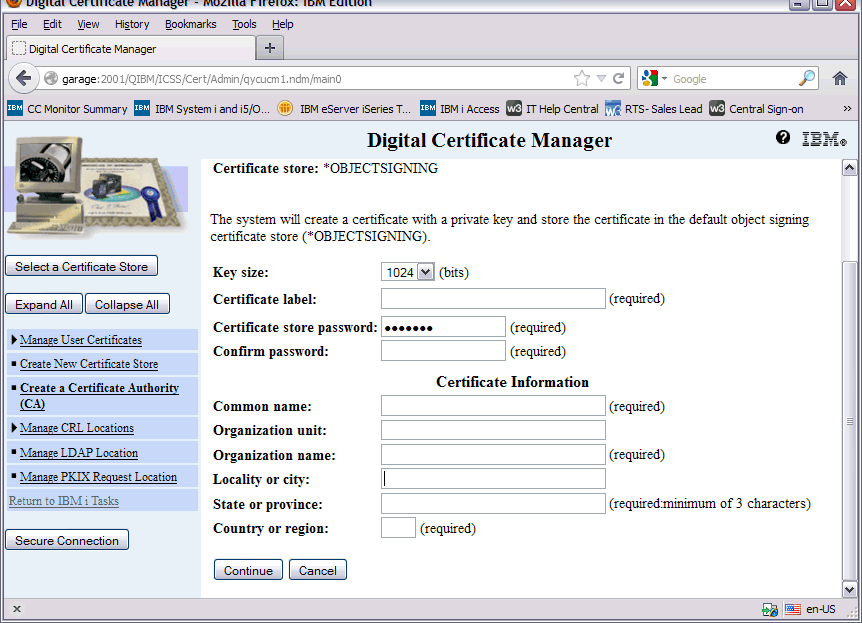
Step 11: Click Cancel. You do not want object signing. At this point, the Stores are created and you can move to assigning certificates:
Step 12: To ensure everything is configured properly, click Select a Certificate Store:
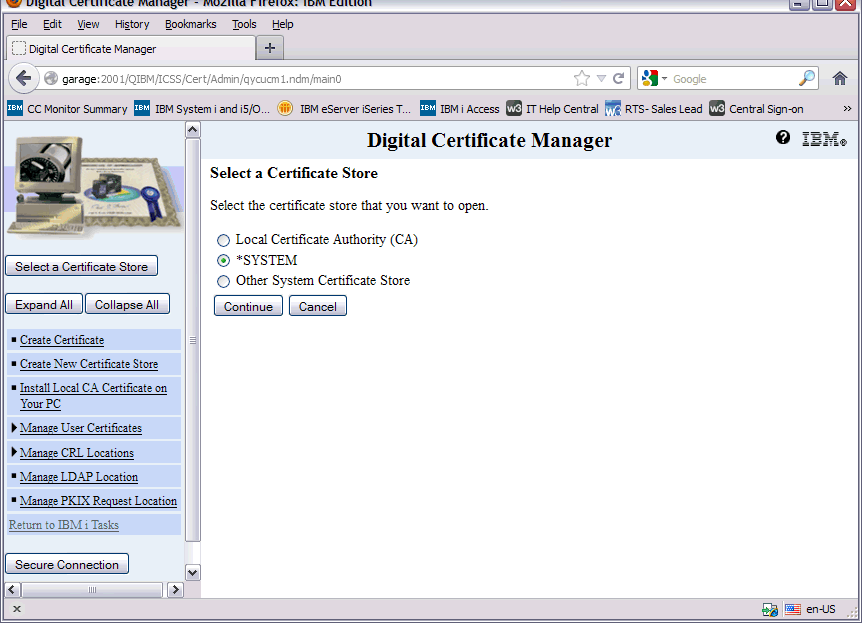
Step 13: Select *SYSTEM, and click Continue:
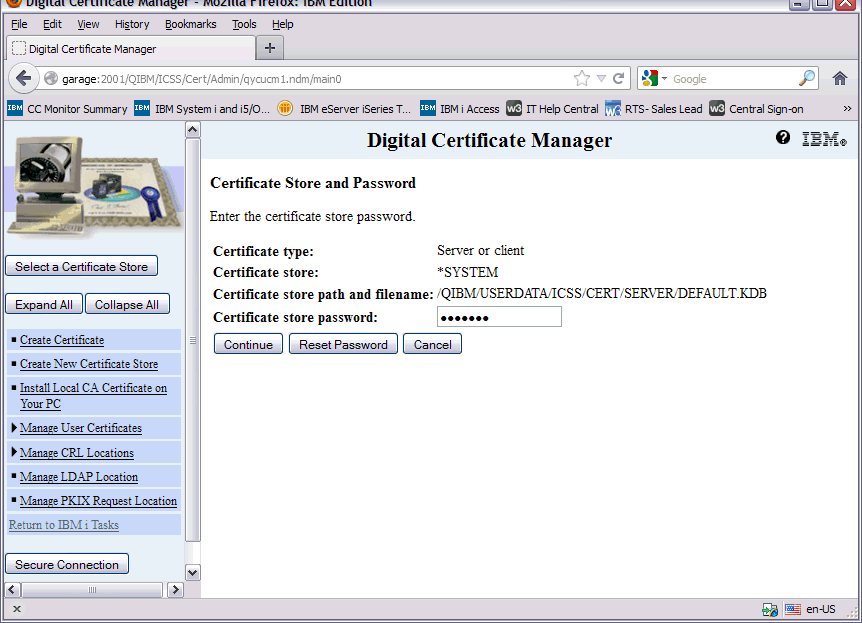
Step 14: Type the password, and click Continue:
Note: Do not press the Enter key after typing the password. Rather, click Continue.
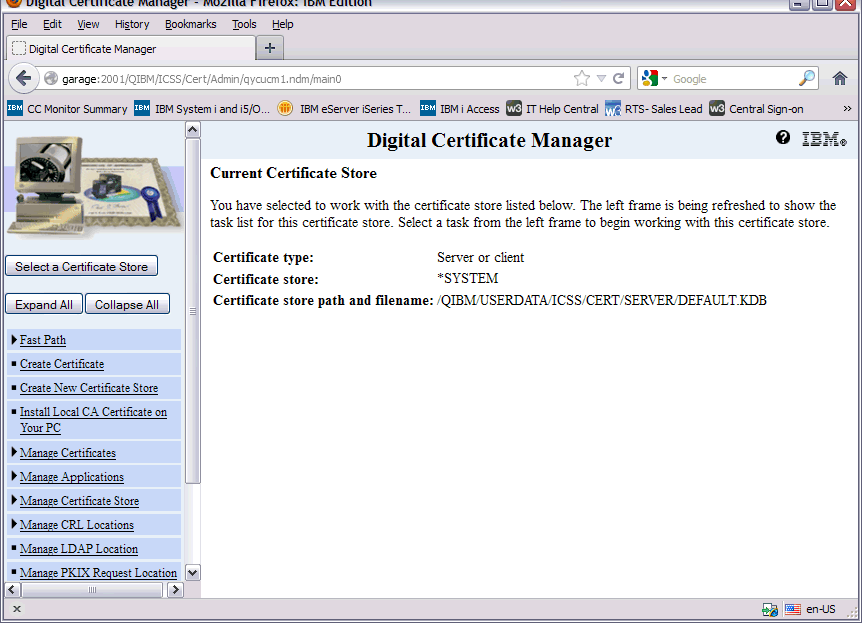
Step 15: Click Fast Path:
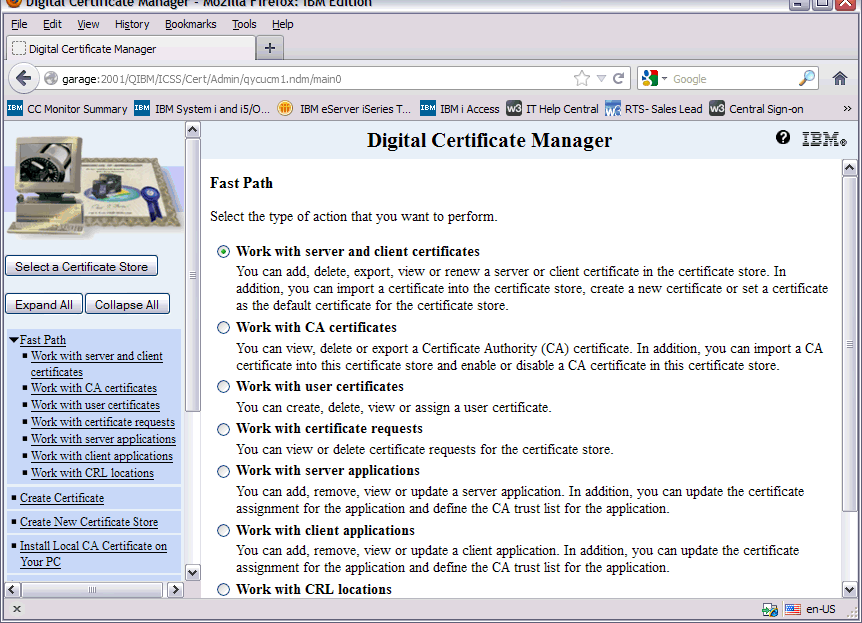
Step 16: Click Work with server applications:
Note: Not all information is displayed.
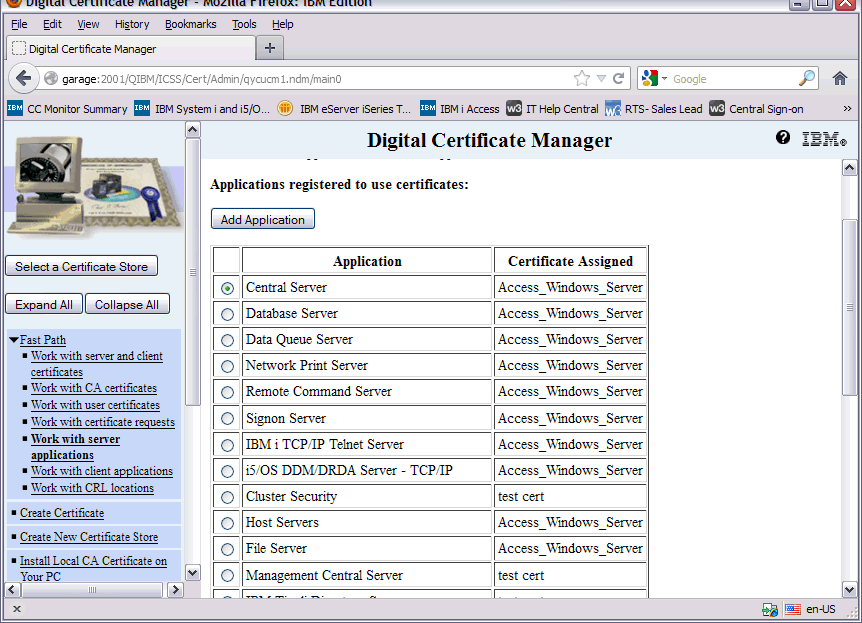
Step 17: If everything is configured properly, the applications assigned should have the certificate listed on the certificate assigned field. Select Telnet Server, and click Work with application:
Note: Not all information is displayed.
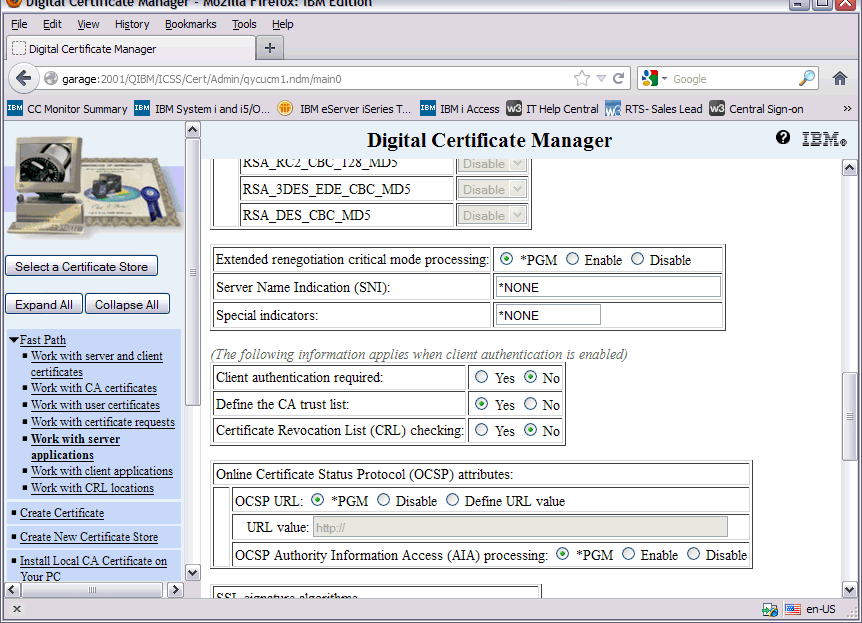
Step 18: Ensure Client Authentication required is No and Define the CA trust list is Yes. Page Down to Define CA Trust List:
Note: Not all information is displayed.
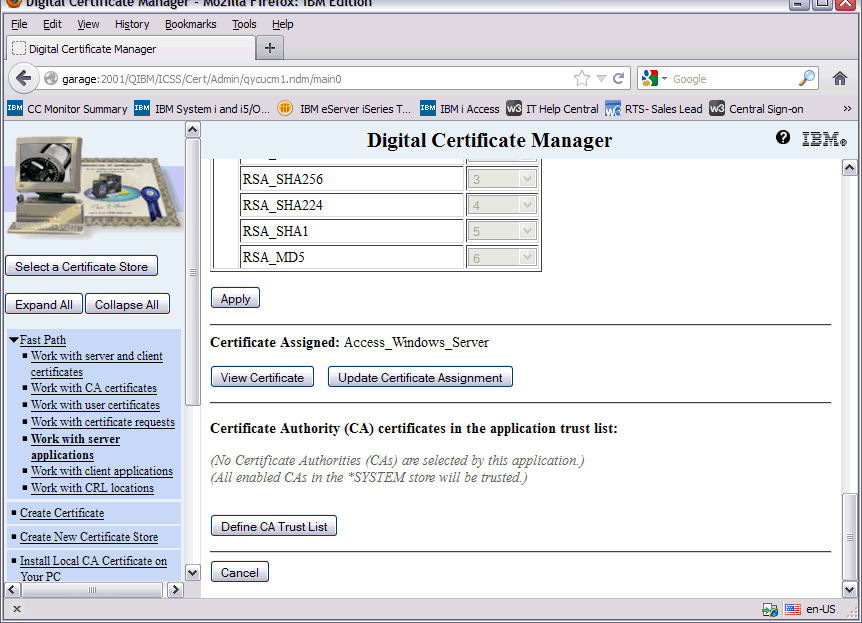
Step 19: Click Define the CA Trust list:
Note: Not all information is displayed.
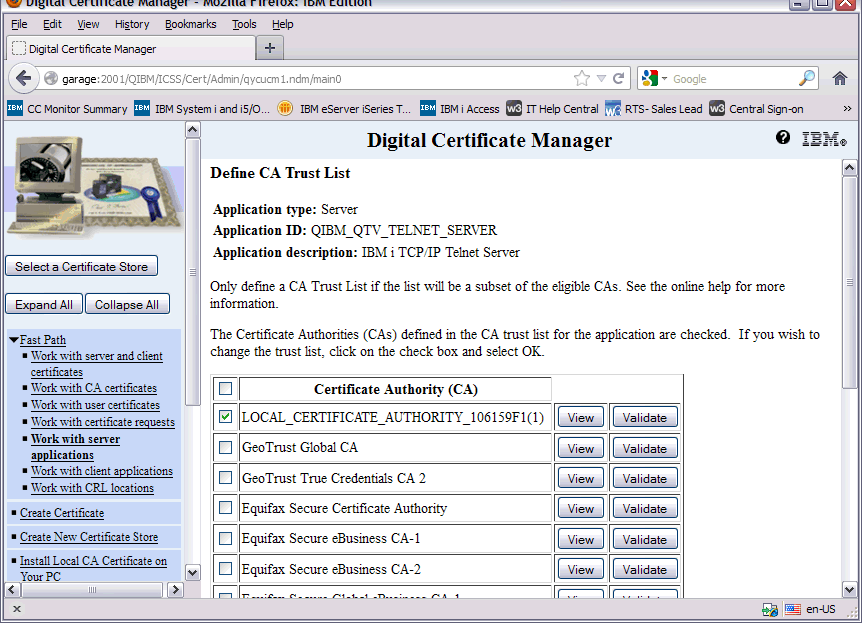
Step 20: Ensure the Local_Certificate_Authority box is selected. If not, select it, and click OK. Click Cancel, click Cancel again, and click Done.
Steps using Digital Certificate Manager for i
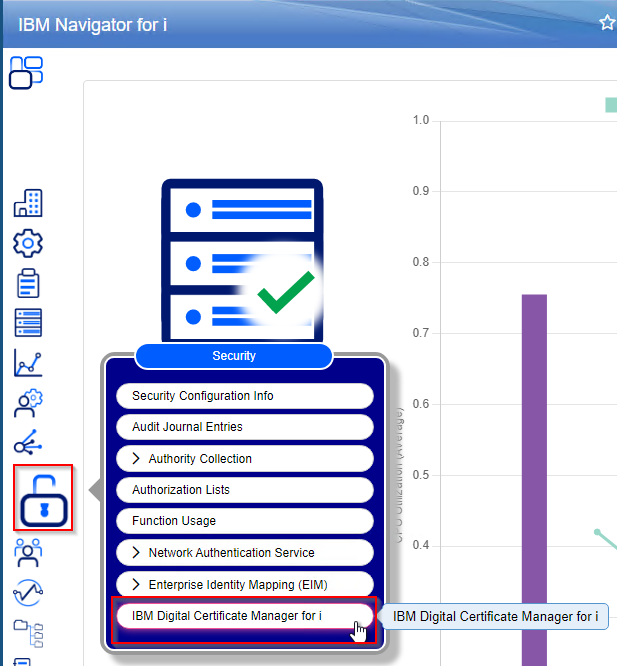
Connect to the IBM Digital Certificate Manager for i using the url 'http://systemNAMEorIP:2001/dcm' or by selecting the 'IBM Digital Certificate Manager for i' link from the Navigator for i page. (NOTE: If your systems HTTP PTF group is not at that latest level, your system may not have the ability to use the newly designed DCM.)
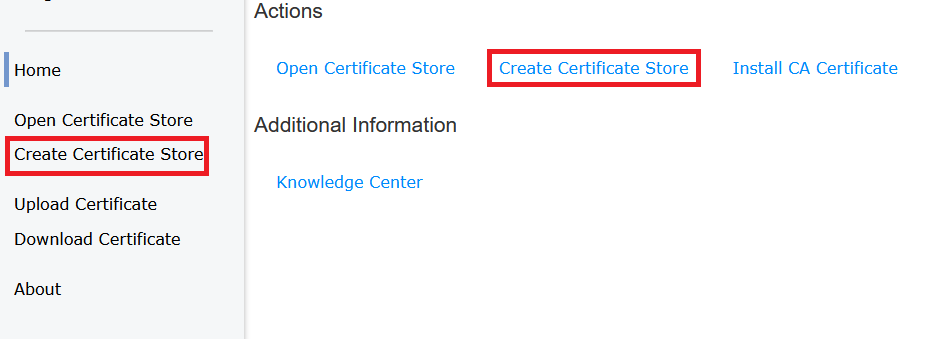
1. Create a Local Certificate Authority Store. Click on the "Create Certificate Store" link from the middle of the page or from the left hand navigation panel.
2. Click on Local CA and give the store a password of your choosing. Then click "Create". (The store password can easily be changed later)
3. Click the "Create" link to create a Local CA certificate.

4. Fill out the required fields to your liking and click the "Create" link when finished.
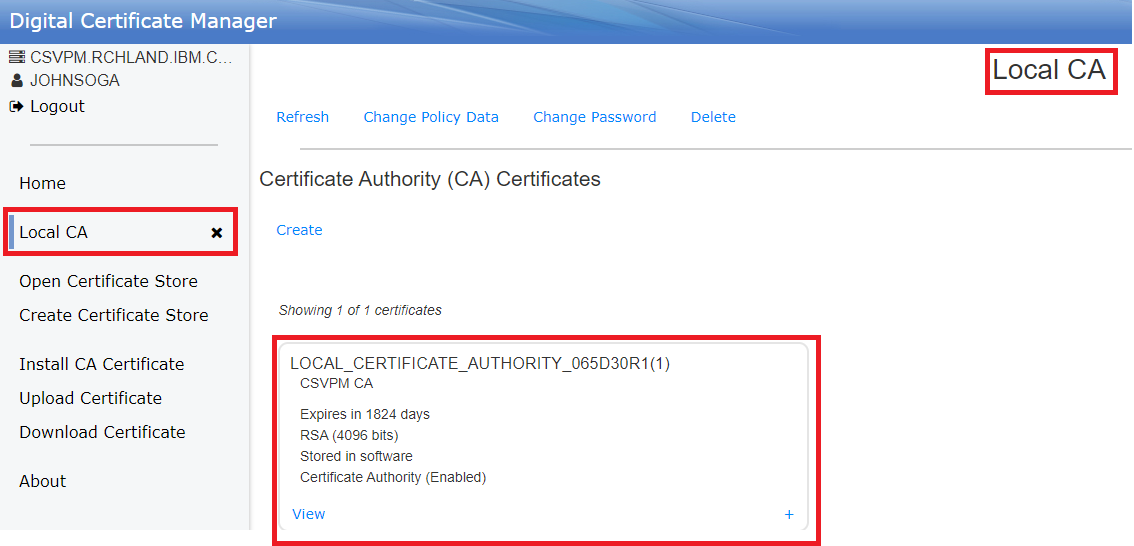
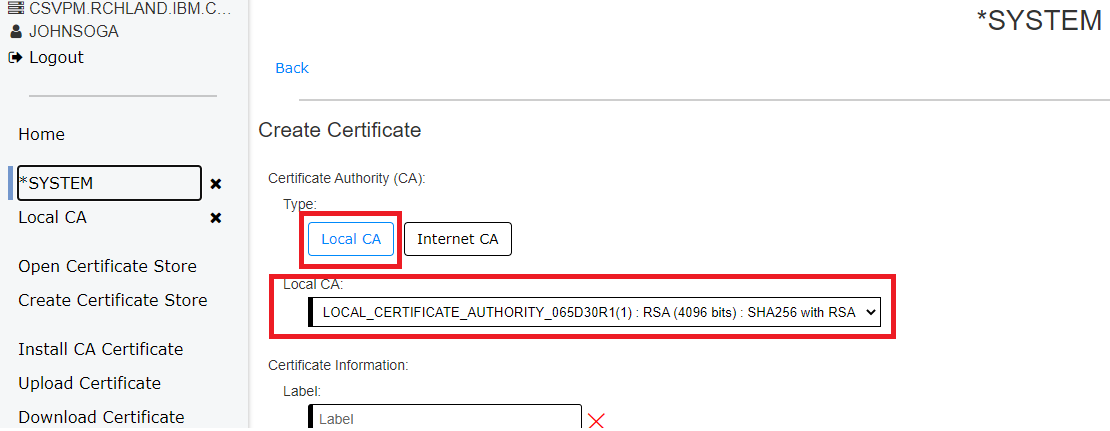
5. The next page will show the Local CA store and you should now see the new Local Certificate Authority cert you just created. Notice the Certificate Label the system automatically assigns. In this example the Certificate Label is LOCAL_CERTIFICATE_AUTHORITY_065D30R1(1). You will need the Certificate Label for Step 12 below.
6. Select the "Change Policy Data" link at the top of the page. This will allow you to change the validity period of issued certificates.

7. Set the "Validity Period of Issued Certificates" field (Max is 2000 days) to your liking. This is setting the policy for all Local CA certificates if you are using more than one. Select "Change" link to set your settings.
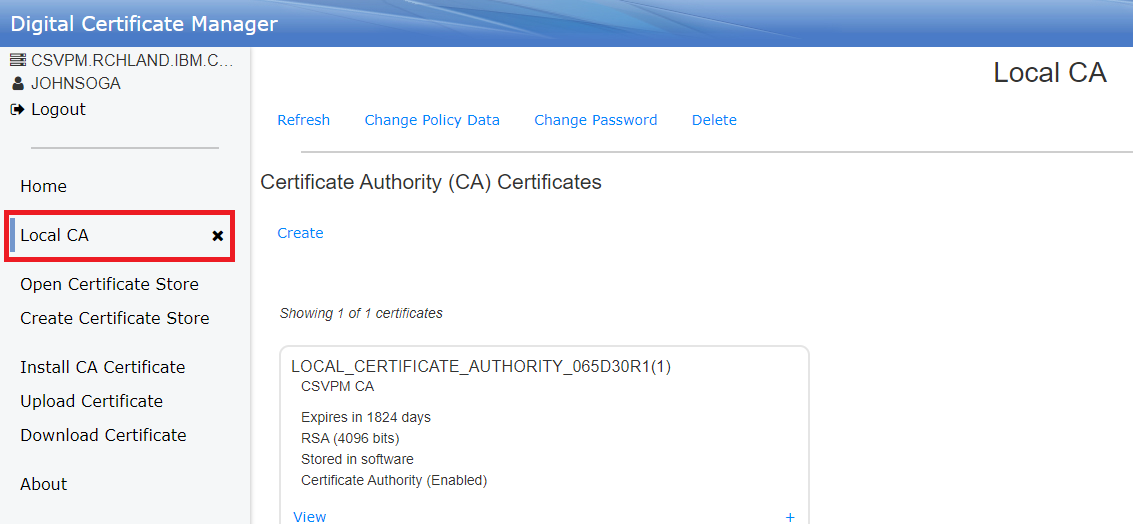
8. Click the black "X" next to the Local CA store name on the left hand panel to close the Local CA store.
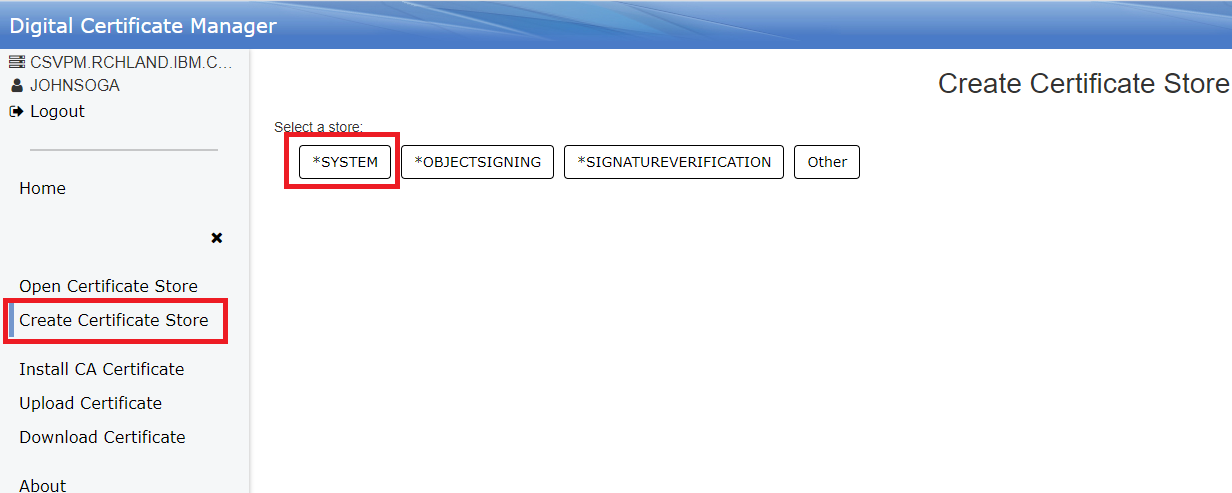
9. You have now created a Local CA store and created a Local Certificate Authority for your system. The next step is to create the *SYSTEM store and create a Server Certificate to assign to the Telnet and Host server application servers. Select "Create Certificate Store" link from the left hand panel. Then select "*SYSTEM" button to create the *SYSTEM store.
10. Give the *SYSTEM store a password and select "Create" link when finished.
11. Select "Create" from the *SYSTEM store page to create a new Server Certificate.
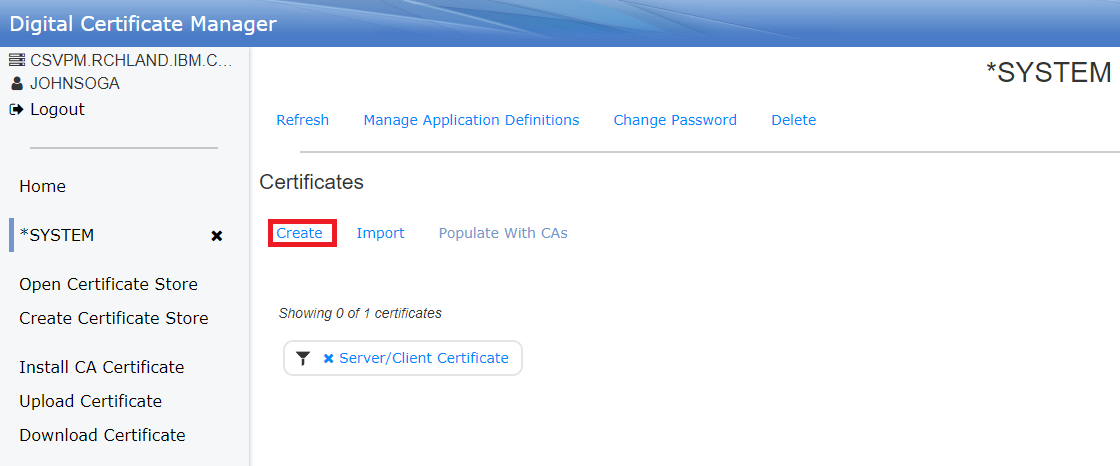
12. Select the Local CA button and select the Certificate Label for your Local CA certificate in the drop down.
13. Fill in the rest of the certificate info fields and hit "Create" when finished.
14. You should now see your newly created Server Certificate in the *SYSTEM Store.
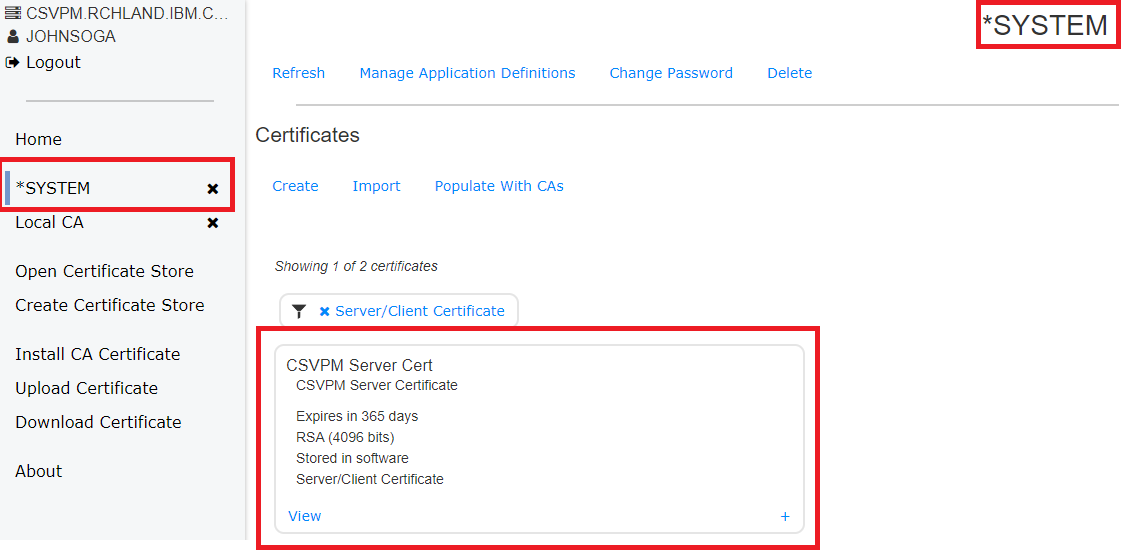
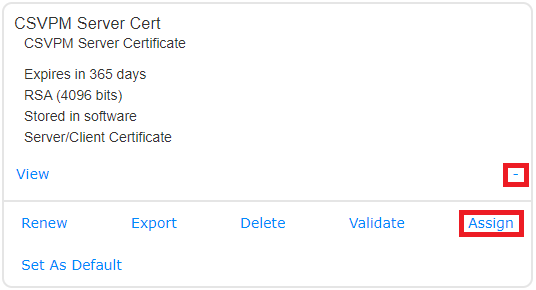
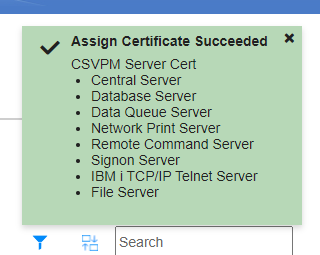
15. The next step is to assign this Server Cert to the Telnet and Host server applications. Expand the "+" sign on the bottom right of your certificate and choose "Assign".
16. Check the box to assign your certificate to the following Server Applications:
- QIBM_OS400_QZBS_SVR_CENTRAL
- QIBM_OS400_QZBS_SVR_DATABASE
- QIBM_OS400_QZBS_SVR_DTAQ
- QIBM_OS400_QZBS_SVR_NETPRT
- QIBM_OS400_QZBS_SVR_RMTCMD
- QIBM_OS400_QZBS_SVR_SIGNON
- QIBM_QTV_TELNET_SERVER
- QIBM_OS400_QZBS_SVR_FILE
Scroll all the way down to the bottom and select "Add" when finished.
17. You will see the status popup in the upper right hand of the browser confirming its completed.
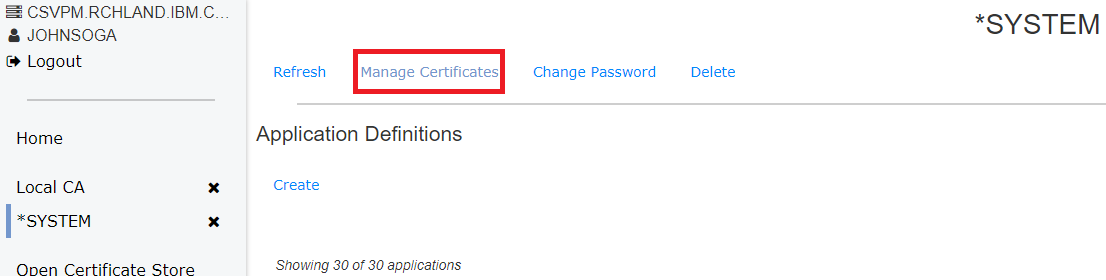
18. At this point, all needed steps are complete. If you would like to confirm your work you can toggle between "Manage Application Definitions" and "Manage Certificates" at the top of the *SYSTEM store to review further details.

You are now finished configuring Telnet and IBM i Access Host servers to use TLS. For the Telnet and IBM i Access Host Server to be listening on the secure ports, recycle the Telnet server and restart the IBM i Access Host Servers. Verify they are listening on the secure ports by typing NETSTAT *CNN, and press PF14 to display the ports. You will see port 992 for Telnet and ports 9470 - 9476 (depending upon which IBM i Access Host Server applications you assigned to use secure sockets).
To configure the ACS 5250 session to use TLS, you should refer to IBM Rochester Support Center Knowledgebase document:
To configure the ACS 5250 session to use TLS, you should refer to IBM Rochester Support Center Knowledgebase document:
[{"Type":"MASTER","Line of Business":{"code":"LOB57","label":"Power"},"Business Unit":{"code":"BU058","label":"IBM Infrastructure w\/TPS"},"Product":{"code":"SWG60","label":"IBM i"},"ARM Category":[{"code":"a8m0z0000001f0AAAQ","label":"Communications-\u003ETelnet"},{"code":"a8m0z0000000CISAA2","label":"Digital Certificate Manager"}],"ARM Case Number":"","Platform":[{"code":"PF012","label":"IBM i"}],"Version":"All Versions"}]
Historical Number
665196666
Was this topic helpful?
Document Information
Modified date:
05 January 2023
UID
nas8N1010449